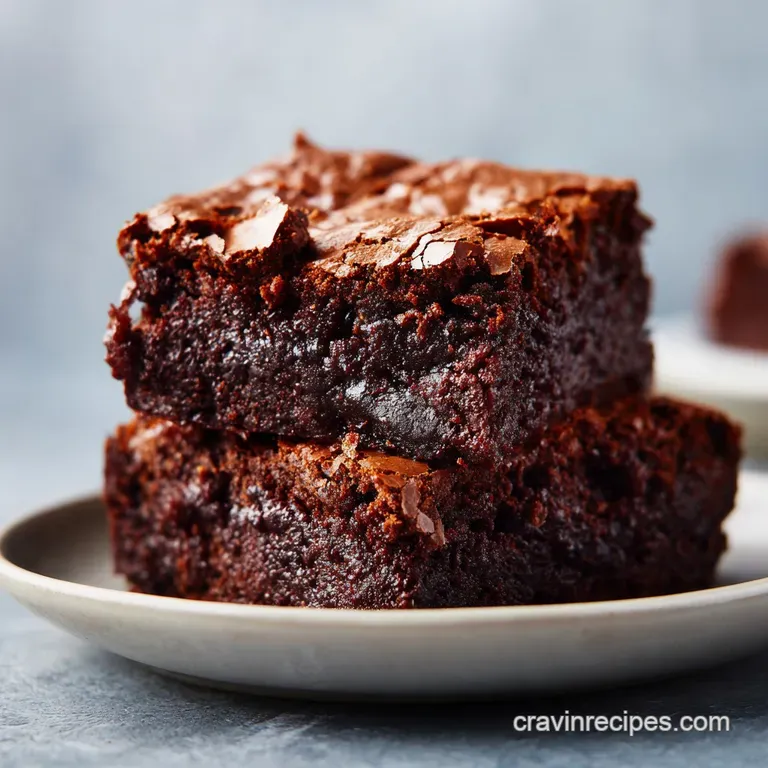
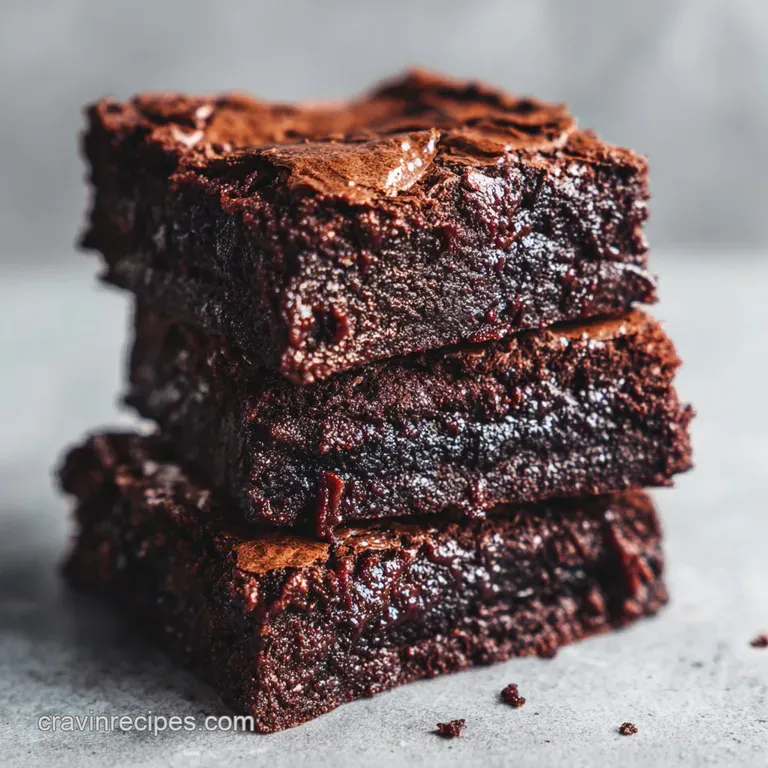
Best Fudgy Chewy Brownies: Dense and Velvety
- Time: Active 15 minutes, Passive 25 minutes, Total 40 minutes
- Flavor/Texture Hook: Deeply chocolatey with a shattering crinkle top and gooey, fudgy heart.
- Perfect for: Weekend indulgence, late night cravings, or impressing friends who take chocolate seriously.
- How to Make the Best Brownie Recipe Fudgy Chewy
- Why This Specific Method Creates Such Deep Flavor
- Setting the Stage with Accurate Time and Temperature
- Component Analysis for the Deepest Chocolate Flavor
- Selecting the Right Elements for Decadent Results
- Essential Kitchen Tools for Success
- Step by Step Guide to Baking Excellence
- Solving Common Baking Hurdles for Better Results
- Flavor Variations and Smart Ingredient Adjustments
- Keeping Your Treats Fresh and Delicious
- Decadent Pairings to Complete the Experience
- Recipe FAQs
- 📝 Recipe Card
How to Make the Best Brownie Recipe Fudgy Chewy
Imagine the smell of melting butter hitting dark, dusty cocoa powder. It’s that deep, earthy aroma that fills your kitchen before you’ve even turned on the mixer. When you pull these out of the oven, you’ll see it immediately: that thin, glossy, sugar crust top that crackles under your thumb like a frozen puddle.
It’s the kind of dessert that makes the whole house feel warm and indulgent, inviting everyone to hover around the cooling rack with forks in hand.
I remember the first time I realized that brownies didn't have to be like chocolate bread. I was hovering over a bowl, frustrated by a "cakey" batch, when I started whisking the eggs and sugar much longer than the recipe said. Suddenly, the mixture turned pale and thick, like a cloud of sweet meringue.
That was the moment everything changed. Combining that airy base with the richness of hot, melted butter created the exact texture I had been chasing since I was a kid.
We aren't just mixing ingredients here; we are building layers of richness. From the way the espresso powder wakes up the chocolate to the specific way we sift the flour to keep things light but dense, every step is about maximizing that gooey factor. You don't need a box mix when the real deal is this rewarding.
Let's get into what makes this the only recipe you'll ever need for that perfect, sink your teeth in experience.
Why This Specific Method Creates Such Deep Flavor
To get that iconic texture, we have to look at how the ingredients interact. It isn't just about what we put in the bowl, but the temperature and the air we incorporate.
- Blooming the Cocoa: Whisking cocoa powder into hot, melted butter "blooms" the powder, releasing volatile flavor compounds that stay trapped when using cold ingredients.
- The Meringue Effect: Beating eggs and sugar for a full 5 minutes creates a stable foam that rises to the surface during baking, forming that coveted shattering crinkle top.
- Fat Saturation: Using both butter and neutral oil ensures a velvety mouthfeel that stays soft even after the brownies have completely cooled.
- Starch Control: Keeping the flour ratio low prevents the development of a strong gluten network, ensuring the crumb remains fudgy rather than bready.
Comparison of Preparation Styles
| Feature | Stovetop Melting | Oven Baking (This Recipe) |
|---|---|---|
| Heat Source | Direct flame for butter/cocoa | Ambient heat for consistent rise |
| Texture Result | More dense, almost fudge like | Balanced chew with a crisp top |
| Risk Factor | Potential to scorch the chocolate | Low risk with parchment protection |
Getting the temperature right is half the battle when you want a specific outcome. While stovetop methods are great for making quick ganache, the oven's steady 350°F (180°C) environment is what allows the edges to caramelize while the center stays gooey.
Setting the Stage with Accurate Time and Temperature
Precision is your best friend when you’re chasing a specific texture. If you pull these out too late, you’ve got chocolate cake; too early, and they’re basically soup. Following these specific numeric checkpoints will ensure you hit the sweet spot every single time.
| Servings | Ingredient Adjustments | Pan Size | Cook Time |
|---|---|---|---|
| 16 squares | Standard recipe (3/4 cup flour) | 8x8 inch | 25 minutes |
| 32 squares | Double all ingredients | 9x13 inch | 35-40 minutes |
| 8 squares | Halve all ingredients | 9x5 inch (loaf) | 20-22 minutes |
Chef Tip: Always use a light colored metal pan if you have one. Dark pans absorb more heat and can make the bottom and edges of your brownies tough or even burnt before the middle is set.
Component Analysis for the Deepest Chocolate Flavor
We use a mix of cocoa powder and real chocolate chips to get the best of both worlds: the intense, concentrated chocolate hit from the Dutch process cocoa and the creamy, melting pockets from the chips.
| Ingredient | Science Role | Pro Secret |
|---|---|---|
| Unsalted Butter | Fat and flavor carrier | Melt it until it's steaming hot to bloom the cocoa properly. |
| Large Eggs | Structure and aeration | Use room temperature eggs so they whip up into a thick ribbon stage. |
| Dutch Processed Cocoa | Intense chocolate base | This has lower acidity, leading to a darker color and smoother taste. |
| Granulated Sugar | Sweetness and crust | This is what creates that crinkle top through aeration with the eggs. |
Every ingredient plays a part in the final chew. If you're looking for another decadent treat with a similar flavor profile, you might love my chocolate mousse cake which uses a very similar aeration technique to achieve that velvety texture.
Selecting the Right Elements for Decadent Results
- 3/4 cup (170g) unsalted butter: Melted and kept hot. Why this? Essential for blooming the cocoa and creating richness.
- 2 tbsp (30ml) neutral oil: Like canola or grapeseed. Why this? Keeps the brownies moist and chewy at room temp.
- 3/4 cup (75g) Dutch processed cocoa powder: Sifted. Why this? Provides a deep, dark chocolate flavor and color.
| Original Ingredient | Substitute | Why It Works |
|---|---|---|
| Dutch Processed Cocoa | Natural Cocoa Powder | Works, but will be lighter and more acidic in flavor. |
- 1/2 cup (90g) semi sweet chocolate chips: Or chunks. Why this? Adds pockets of melted chocolate texture.
| Original Ingredient | Substitute | Why It Works | | Semi Sweet Chips | Dark Chocolate (70%) | Adds a more sophisticated, bitter sweet edge. |
- 1 cup (200g) granulated white sugar: For the crust. Why this? Necessary for the "meringue" top formation.
- 1/2 cup (110g) light brown sugar: Packed. Why this? Adds moisture and a hint of molasses chew.
| Original Ingredient | Substitute | Why It Works | | Light Brown Sugar | Dark Brown Sugar | Adds deeper caramel notes and extra moisture. |
- 2 large eggs: Room temperature. Why this? Provides the lift and structure for the batter.
- 1 tbsp pure vanilla extract: For depth. Why this? Enhances the chocolate notes significantly.
- 3/4 cup (95g) all purpose flour: Sifted. Why this? The minimal structure needed for a fudgy result.
| Original Ingredient | Substitute | Why It Works | | All Purpose Flour | 1:1 gluten-free Flour | Works well; texture may be slightly more grainy. |
- 1 tsp espresso powder: Not instant coffee. Why this? Acts as a flavor booster for the chocolate.
- 1/2 tsp sea salt: Fine grain. Why this? Balances the sugar and makes flavors pop.
Essential Kitchen Tools for Success
You don't need a lot of fancy gear, but a few specific items make the process much smoother. An 8x8 inch square baking pan is non negotiable for the right thickness. If you use a larger pan, they will be thin and likely overbake.
Parchment paper is another "must have." I always leave an overhang on two sides, which I call the "brownie handles." This allows you to lift the entire block of brownies out of the pan once they’ve cooled, making those clean, sharp cuts so much easier to achieve.
Finally, an electric hand mixer is vital for that 5 minute egg beating step. Doing it by hand is a serious workout, and most people give up before the eggs reach the necessary pale, thick "ribbon stage." If you are a fan of using brown butter for an even nuttier flavor, you can check out my brown butter chocolate chip cookies for inspiration on how that toasted fat changes the game.
step-by-step Guide to Baking Excellence
- Preheat your oven to 350°F (175°C). Line an 8x8 inch square baking pan with parchment paper, leaving an overhang on two sides for easy removal.
- In a heat proof glass mixing bowl, whisk the hot melted butter and cocoa powder together until smooth to bloom the cocoa. Note: This heat releases the hidden oils in the cocoa.
- Stir in the neutral oil and chocolate chips until the chips are partially melted and the mixture looks glossy and dark.
- In a separate large bowl, combine the granulated white sugar, light brown sugar, eggs, and vanilla extract.
- Use an electric hand mixer on medium high speed to beat the mixture for 3 to 5 minutes until it is pale, thick, and reaches a ribbon stage. Note: This is the secret to the crinkle top.
- Gently fold the chocolate butter mixture into the aerated egg and sugar mixture until just combined.
- Using a fine mesh sieve, sift the all purpose flour, espresso powder, and sea salt into the wet ingredients.
- Fold gently with a spatula until no streaks of flour remain; do not overmix.
- Pour the batter into the prepared pan and smooth the top.
- Bake for 25 minutes. The center should be set but still slightly soft to ensure a fudgy texture.
Solving Common Baking Hurdles for Better Results
Sometimes things go sideways in the kitchen, even with the best intentions. If your brownies didn't turn out quite right, it's usually a small tweak in the process that's needed.
Why Your Brownies Turned Out Cakey
If your brownies feel more like a chocolate sponge than a dense fudge, you likely added too much flour or overbeat the batter after adding the dry ingredients. Flour provides structure, and too much of it creates a bread like crumb.
Always measure your flour by weight or use the "spoon and level" method rather than packing it into the cup.
Why the Top Is Dull and Matte
The shiny, paper thin top is a result of the sugar dissolving properly into the eggs. If you skip the 5 minute whisking step, or if your eggs were too cold, the sugar won't form that meringue like layer on top. It’s all about that aeration.
| Problem | Root Cause | Solution |
|---|---|---|
| Greasy Bottom | Butter was too hot or separated | Whisk butter and cocoa thoroughly until emulsified. |
| Dry/Crumbly | Overbaked or too much flour | Reduce bake time by 2 mins; use a kitchen scale. |
| No Crinkle Top | Eggs and sugar under beaten | Beat for a full 5 minutes until pale and thick. |
Common Mistakes Checklist
- ✓ Don't skip sifting the cocoa and flour; it prevents dry lumps in the fudgy batter.
- ✓ Ensure eggs are at room temperature to allow for maximum air volume.
- ✓ Never overmix once the flour is added, as this develops gluten and makes them tough.
- ✓ Check your oven temperature with a thermometer; 350°F is the sweet spot.
- ✓ Let them cool for at least 30 minutes before slicing to let the fudge set.
Flavor Variations and Smart Ingredient Adjustments
Once you've mastered the base, you can start getting creative. I love adding a handful of toasted walnuts for a classic crunch, but the possibilities are endless.
To Make It a Salted Caramel Variant
Drizzle 1/4 cup of thick salted caramel over the batter once it's in the pan. Use a knife to gently swirl it through, but don't over mix or it will just disappear into the chocolate. Sprinkle a little extra flaky sea salt on top right after baking for a professional touch.
For a Nutty Crunch
Add 1/2 cup of chopped, toasted pecans or walnuts during the final folding step. Toasting the nuts in a dry pan for 3-5 minutes before adding them makes a massive difference in the depth of flavor they bring to the dish.
Decision Shortcut
- If you want a darker, less sweet flavor: Use dark chocolate chunks (70% cocoa) instead of semi sweet chips.
- If you want a chewier edge: Use a metal baking pan and bake for 27 minutes instead of 25.
- If you want an extra fudgy center: Chill the brownies in the fridge for 2 hours after they reach room temperature.
| Premium Ingredient | Budget Alternative | Flavor Impact | Savings |
|---|---|---|---|
| Vanilla Bean Paste | Pure Vanilla Extract | Slightly less visual "speckle" | Save $15 |
| High End Couverture | Standard Baking Chips | Less velvety melt | Save $5 |
| French Sea Salt | Regular Table Salt | Less "pop" of flavor | Save $2 |
Keeping Your Treats Fresh and Delicious
Brownies are one of the few desserts that actually taste better the next day. As the fats stabilize and the sugars settle, the flavors deepen and the texture becomes even more fudgy.
Storage: Keep your brownies in an airtight container at room temperature for up to 4 days. If you like them extra chewy, you can store them in the fridge for up to a week. Just make sure the container is truly airtight, or they will pick up "fridge smells" and the edges will dry out.
Freezing: These freeze beautifully. Wrap individual squares in plastic wrap and then place them in a freezer safe bag. They will stay fresh for up to 3 months. You can even eat them straight from the freezer for a dense, truffle like snack!
Zero Waste: If you find yourself with edges that are a bit too hard or crumbs at the bottom of the pan, don't throw them away. Crumble them over vanilla bean ice cream or fold them into a batch of whipped cream for a quick chocolate parfait.
You can also pulse them in a food processor and use them as a "dirt" topping for chocolate pudding.
Decadent Pairings to Complete the Experience
While a cold glass of milk is the classic choice, there are so many ways to turn a simple brownie square into a full blown dessert course.
For a Restaurant Quality Plating
Serve a warm brownie with a large scoop of high-quality vanilla bean ice cream. The contrast between the hot chocolate and the freezing cream is a sensory delight. For extra indulgence, add a drizzle of warm ganache or a sprinkle of crushed raspberries to provide a bright, tart contrast to the heavy chocolate.
For the Ultimate Coffee Break
These brownies were practically made to be eaten with coffee. The espresso powder inside the batter mirrors the roasted notes of a good latte or a sharp double espresso. If you're feeling adventurous, a glass of dark red wine, like a Cabernet Sauvignon, pairs surprisingly well with the high cocoa content in this recipe.
Perfect Side Pairings
- Fresh Berries: Raspberries or strawberries cut through the richness with acidity.
- Whipped Cream: A dollop of unsweetened whipped cream balances the intense sugar.
- Caramel Sauce: For those who want maximum decadence and a buttery finish.
- Toasted Coconut: Sprinkling a little toasted coconut on top adds a tropical, nutty layer.
Whether you're making these for a party or just because it's Tuesday and you deserve a treat, this method is foolproof if you stick to the steps. The combination of the hot butter bloom and the long egg whisking is what separates the "okay" brownies from the "best ever" ones. Grab your whisk and let's get baking!

Recipe FAQs
How to make brownies more fudgy and chewy?
Beat the eggs and sugars together for 3 to 5 minutes until thick and pale. This ribbon stage creates a stable base that keeps the texture dense and moist while preventing the crumb from becoming cakey.
What is the secret of chewy brownies?
The secret is blooming the cocoa powder in hot melted butter. This process releases oils for deeper flavor and a smoother, chewier mouthfeel. If you enjoyed mastering the cocoa blooming technique here, see how the same principles of flavor intensity apply to our gluten-free chocolate dessert.
What makes brownies chewy vs fudgy?
Fudgy brownies rely on a higher fat-to-flour ratio and minimal mixing. Chewy brownies rely on the sugar egg structure formed during the whipping phase; overmixing after adding flour develops gluten, which ruins both textures.
What is the secret to making fudgy brownies?
Pull the pan from the oven at exactly 25 minutes. While the center may seem slightly soft, it will firm up into a perfect fudge texture as the brownies cool completely for 30 minutes.
How to ensure a crackly top on brownies?
Whisk your eggs, granulated sugar, and brown sugar until the mixture is pale and thick. Getting the sugar fully dissolved and aerated is the physical key to forming that signature shiny, paper thin crust.
How to tell when brownies are done?
Check that the edges are set and the center is no longer liquid. Because we use chocolate chips and oil, the center will remain dense and soft even when fully baked, so avoid over baking past the 25-minute mark.
Should I use cold eggs for the batter?
No, this is a common misconception. You must use room temperature eggs to achieve the maximum air volume needed for the ribbon stage, which ensures the proper structure of your brownie batter.
Best Fudgy Chewy Brownies

Ingredients:
Instructions:
Nutrition Facts:
| Calories | 237 kcal |
|---|---|
| Protein | 2.7 g |
| Fat | 13.2 g |
| Carbs | 30.3 g |
| Fiber | 1.6 g |
| Sugar | 23.1 g |
| Sodium | 78 mg |
