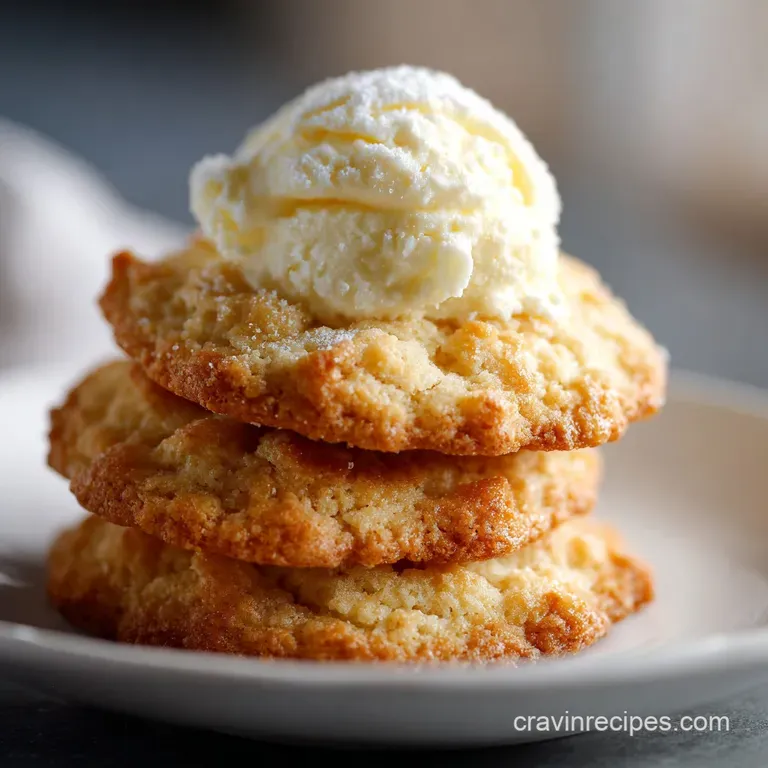
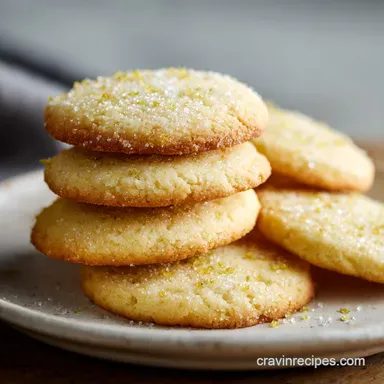
Danish Butter Cookie Recipe
- Time: Active 10 minutes, Passive 10 minutes, Total 20 minutes
- Flavor/Texture Hook: Rich, buttery shatter with a floral vanilla aroma
- Perfect for: Holiday gifting, afternoon tea, or beginner bakers wanting a win
- Master the Ultimate Butter Cookie Recipe for Holiday Perfection
- Understanding the Precise Timing and Batch Yield Details
- Selecting High Quality Ingredients for an Indulgent Cookie Crumb
- Essential Kitchen Tools for Achieving Bakery Style Results
- A Comprehensive Guide from Creaming Butter to Final Bake
- Fixing Common Issues Like Spreading or Tough Texture
- Simple Modifications for Gluten Free or Dairy Free Diets
- How to Store and Freeze for Long Lasting Freshness
- The Best Flavor Pairings for Your Homemade Butter Cookies
- Myths Regarding the Baking of Butter Cookies
- Recipe FAQs
- 📝 Recipe Card
Master the Ultimate Butter Cookie Recipe for Holiday Perfection
Imagine the kitchen on a Saturday afternoon, the sunlight hitting the counter just right, and the air thick with the scent of toasted sugar and high-quality cream. There's a specific sound I always listen for when I'm making this butter cookie recipe - it's that soft, rhythmic "thwack" of the paddle attachment hitting the side of the bowl as the butter and sugar transform into a pale, cloud like fluff.
I remember the first time I got this right; I had been rushing and used butter that was too melty, resulting in puddles of grease on the pan. But when I finally waited for that perfect 18°C (65°F) softened state, the cookies came out with sharp, defined edges and a snap that sounded like a tiny twig breaking.
We've all been there, staring at a tray of "meh" cookies that are either too hard or too greasy. This isn't just another sweet treat; it's the foundation of everything I love about baking. It's indulgent, it's honest, and it's surprisingly simple once you stop overcomplicating the process.
We're going for that classic Danish inspired richness but with a modern home cook twist that ensures you won't be struggling with a stiff dough or a bland bite. Trust me, once you see those golden brown edges emerging from the oven, you'll never go back to the store-bought tins again.
This recipe is all about the contrast between the initial crispness and the way the center just dissolves on your tongue. It's the kind of cookie that demands a cup of coffee or a cold glass of milk. We are looking for a specific crumb here - tight but tender, rich but not heavy.
I’ve spent years tweaking the flour to fat ratio because I wanted a cookie that could stand up to being dipped in chocolate but still feel light enough to eat three in one sitting. Let’s get into why this method actually works and how you can nail it every single time.
Understanding the Precise Timing and Batch Yield Details
Starch Interference: The addition of cornstarch prevents long gluten strands from forming, which ensures the cookie has a tender, melt in-your mouth shatter rather than a bready chew.
Fat Emulsification: Using a room temperature egg (exactly 50g) allows the fat and water to bond seamlessly, creating a stable dough that won't "leak" butter in the oven.
Thermal Shock: Baking at a slightly higher temperature (180°C) sets the edges quickly, trapping the air bubbles created during creaming before the cookie has a chance to spread too thin.
Aromatic Depth: The combination of vanilla and a tiny hint of almond extract creates a complex, "professional" flavor profile that mimics high end European bakeries.
| Feature | Fresh Homemade Recipe | store-bought Shortcut | Outcome Impact |
|---|---|---|---|
| Fat Source | 100% Grass fed butter | Vegetable oil/margarine | Homemade has a superior, lingering creamy finish |
| Texture | Delicate shatter crisp | Soft and chewy/bendy | Homemade provides that classic "snap" |
| Preservatives | None (pure ingredients) | High (extended shelf life) | Homemade tastes cleaner and less metallic |
It's tempting to grab a tube of pre made dough when you're in a rush, but the difference in flavor is honestly staggering. Homemade dough relies on the quality of the butter, which provides the primary flavor, while shortcuts often use artificial flavorings to mask cheaper fats.
If you want that indulgent, melt away experience, the twenty minutes it takes to whip these up from scratch is a trade off you'll never regret making.
Selecting high-quality Ingredients for an Indulgent Cookie Crumb
Choosing your elements carefully is the secret to a cookie that tastes like it came from a boutique patisserie. I always reach for unsalted butter because it gives me total control over the seasoning, and I make sure it's high fat (look for European style if you can) to ensure that velvety mouthfeel we're after.
| Ingredient | Science Role | Pro Secret |
|---|---|---|
| Unsalted Butter | Provides structure and flavor | Use at 18°C (65°F) for maximum aeration |
| Cornstarch | Lowers protein content | Sift it with the flour to prevent lumps |
| Almond Extract | Flavor enhancer | Just a drop makes the vanilla taste "expensive" |
| Fine Sea Salt | Contrast and balance | Salt grains should be tiny to dissolve instantly |
- - 226g Unsalted Butter
- Softened but still cool to the touch. Why this? It holds air bubbles better than warm, greasy butter.
- - 150g Granulated Sugar
- For sweetness and that essential "snap." Why this? Provides the best structure for crisp edges.
- - 1 Large Egg (50g)
- Must be at room temperature. Why this? Prevents the butter from curdling during mixing.
- - 10ml Pure Vanilla Extract
- Use the good stuff, not the imitation.
- - 1.25ml Almond Extract
- The "secret" ingredient for that bakery aroma.
- - 250g All purpose Flour
- Provides the bulk and structure.
- - 16g Cornstarch
- For that signature delicate crumble.
- - 3g Fine Sea Salt
- To keep the sweetness from being cloying.
For a different vibe, you can swap the almond extract for lemon zest, though it will change the flavor profile from "classic" to "bright." If you're out of cornstarch, you can use arrowroot powder in the same quantity; it works similarly to keep the crumb tender.
For the sugar, don't try to use brown sugar here - it adds too much moisture and will make the cookies chewy instead of crispy.
Essential Kitchen Tools for Achieving Bakery Style Results
You don't need a professional kitchen, but a few specific tools make this butter cookie recipe much easier to handle. A stand mixer is my preferred choice because it has the power to cream the butter and sugar for a full 3 to 5 minutes without breaking a sweat.
If you're using a hand mixer, just be prepared to put in a little more time to get that "pale and fluffy" look.
A digital scale is non negotiable for me. I used to use cups, but I realized my "cup" of flour was sometimes 20g heavier than the recipe intended, leading to dry, sandy cookies. Measuring by weight ensures that every batch is as indulgent as the last.
Also, grab a sturdy piping bag with a large star tip (like an Ateco 826) if you want those beautiful ridged circles, or a cookie press for more intricate shapes.
Finally,, heavy duty baking sheets are worth their weight in gold. Thin, cheap pans warp in the heat and cause uneven browning. If your cookies are burning on the bottom before the tops are done, your pans are likely the culprit.
Lining them with parchment paper or a silicone mat is also essential for a clean release - there's nothing heartbreaking like a perfect cookie shattering because it's stuck to the tray.
A Comprehensive Guide from Creaming Butter to Final Bake

The Impact of Creaming Temperature on Snap
The temperature of your butter is the single most important factor. If it's too cold, it won't trap air; if it's too warm, the air bubbles will collapse. You want it to be 18°C (65°F), where it feels like firm clay.
When you beat it with the sugar, you're literally carving tiny air pockets into the fat. These pockets expand in the oven, creating that light, airy texture.
How Cornstarch Softens the Final Crumb
By replacing a small portion of the flour with cornstarch, we are effectively lowering the protein percentage of the mix. This mimics "cake flour" but gives us more control. It's the secret to that "short" texture where the cookie snaps cleanly but then seems to dissolve the moment it hits your palate.
Benefits of Higher Baking Temperatures
While many cookies bake at 175°C, I prefer 180°C for this butter cookie recipe. This higher heat causes the exterior to "set" almost instantly. This prevents the butter from melting and spreading outward, which is why these cookies keep their beautiful piped shapes so well.
Phase 1: Achieving the Perfect Creamy Base
- Place 226g of softened butter and 150g of granulated sugar in the bowl of your mixer.
- Cream on medium high speed for 4 minutes until the mixture is pale ivory and doubled in volume. Note: This creates the aeration needed for a light cookie.
- Add the 50g egg, 10ml vanilla, and 1.25ml almond extract.
- Beat for another minute until the mixture looks velvety and completely smooth.
Phase 2: Incorporating Dry Ingredients Without Overmixing
- In a separate bowl, whisk together 250g all purpose flour, 16g cornstarch, and 3g salt.
- Turn the mixer to the lowest setting and gradually add the flour mixture.
- Mix for only 30 seconds until no white streaks of flour remain. Note: Overmixing at this stage will make the cookies tough.
Phase 3: Shaping Techniques for Maximum Crispness
- Transfer the dough to a piping bag fitted with a star tip or a cookie press.
- Pipe 2 inch rosettes onto a parchment lined baking sheet, spacing them 2 inches apart.
- Optional: Place the tray in the fridge for 15 minutes until the dough feels firm to the touch. Note: Chilling helps retain the sharp definition of the ridges.
Phase 4: Judging the Ideal Mahogany Gold Color
- Preheat your oven to 180°C (350°F).
- Bake for 10 minutes until the edges are a deep golden brown but the centers remain pale.
- Let them cool on the pan for 5 minutes until they are firm enough to move.
- Transfer to a wire rack to cool completely until they achieve their final crispy snap.
Fixing Common Issues Like Spreading or Tough Texture
Even with the best intentions, baking can be fickle. If your cookies turned into one giant sheet, your butter was likely too warm before it went into the oven. Next time, make sure you don't skip the 15 minute chill in the fridge after piping.
This solidifies the fat so it takes longer to melt in the oven, giving the flour time to set.
Reasons Why Cookies Spread Too Much
This usually happens because the oven wasn't fully preheated or the butter was over creamed into a greasy soup. If you see "bleeding" fat around the edges of the cookies, your butter reached its melting point before the structure of the cookie could form.
Troubleshooting Stiff Dough in Cookie Presses
If you're using a cookie press and the dough won't come out, it might be too cold. If you chilled the dough, let it sit at room temperature for 10 minutes to soften slightly. Conversely, if it's too soft and sticking to the press, pop it back in the fridge for a bit.
| Problem | Root Cause | Solution |
|---|---|---|
| Cookies are hard/tough | Overworking the flour | Mix dry ingredients only until just combined |
| No "snap" (soft texture) | Underbaking or high humidity | Bake until edges are dark gold; store with silica gel |
| Burnt bottoms | Dark or thin baking sheets | Use light colored, heavy gauge pans or double stack trays |
A mistake I once made was trying to use "spreadable" butter from a tub honestly, don't even bother. That stuff has added oils and water that will absolutely ruin the chemistry of this butter cookie recipe. Stick to the sticks!
Common Mistakes Checklist: - ✓ Always weigh your flour; a "packed" cup can ruin the texture. - ✓ Ensure your egg is truly room temperature to avoid breaking the emulsion. - ✓ Don't grease the baking sheet; use parchment or a silicone mat.
- ✓ Let the baking sheet cool completely between batches never pipe dough onto a hot pan. - ✓ Sift your cornstarch to avoid tiny white clumps in the finished cookies.
Simple Modifications for gluten-free or dairy-free Diets
If you're looking for a different flavor profile, you can easily turn these into chocolate dipped delights. Once cooled, melt some high-quality dark chocolate and dip half of each cookie, then sprinkle with crushed pistachios or sea salt. This adds a sophisticated bitterness that cuts through the rich butter.
For a festive twist, similar to the method used in my Smores Cookies with recipe, you can create a thumbprint version. Just press your thumb into the center before baking and fill with a dollop of raspberry jam. The jam concentrates in the oven, becoming a chewy, jewel like center.
If you want a more intense cocoa hit, you might enjoy my Cookies Double Choc recipe, but you can also adapt this one by replacing 30g of the flour with Dutch processed cocoa powder. Just be sure to add an extra tablespoon of sugar to balance the bitterness of the chocolate.
Creating a dairy-free Alternative
You can substitute the butter with a high-quality plant based butter stick (like Miyoko's). Note: Ensure the substitute has a similar fat content to real butter (around 80%), or the cookies will spread significantly more and lack that signature snap.
Traditional Christmas Butter Cookie Variations
To make these "Christmas ready," add 1 tsp of orange zest and a pinch of cardamom to the dough. You can also use a cookie press with the "tree" or "snowflake" discs. After baking, a simple glaze made from powdered sugar and a bit of milk can be drizzled over the top for extra sweetness.
How to Store and Freeze for Long Lasting Freshness
Storage is where many people go wrong. These cookies are high in fat, which means they can absorb odors from the fridge very easily. Always keep them in an airtight container at room temperature. They will stay perfectly crisp for up to 7 days.
If they start to soften due to humidity, you can "refresh" them in a 150°C oven for 3 minutes to drive out the moisture.
For long term storage, these cookies freeze beautifully. You can freeze the baked cookies for up to 3 months. Just make sure they are completely cool before placing them in a freezer bag. To eat, let them thaw at room temperature for 20 minutes.
If you want to freeze the dough, pipe the shapes onto a tray, freeze until solid, then transfer the "frozen rosettes" to a bag. You can bake them straight from the freezer just add 2 minutes to the total bake time.
Don't throw away those broken cookie bits at the bottom of the jar! I love to pulse them in a food blender to create a buttery "cookie dust." This makes an incredible crust for a cheesecake or a topping for vanilla bean ice cream. Zero waste and 100% flavor it’s a win win.
The Best Flavor Pairings for Your Homemade Butter Cookies
These cookies are the ultimate "blank canvas." While they are indulgent on their own, pairing them with the right beverage or accompaniment can take the experience to another level. A sharp, acidic coffee or a tannic Earl Grey tea works perfectly to cut through the richness of the butter.
If you're feeling particularly decadent, try using these cookies to make "sandwiches." Spread a thin layer of my Peanut Butter Frosting recipe between two cookies. The salty sweet frosting against the buttery snap of the cookie is a combination that's hard to beat.
For a holiday dessert platter, I like to serve these alongside my Peanut Butter Balls recipe. The contrast between the crunchy, baked butter cookie and the smooth, no bake truffle creates a wonderful textural variety for your guests.
- - If you want a softer, melty texture
- Replace the granulated sugar with powdered sugar (150g).
- - If you want maximum crispness
- Increase the bake time by 2 minutes and use a slightly lower rack in the oven.
- - If you want a savory twist
- Add 1/2 tsp of chopped fresh rosemary and a crack of black pepper to the flour mix.
Myths Regarding the Baking of Butter Cookies
"Using cold butter will make the cookies fluffier." This is a misconception. While cold butter is great for flaky pie crusts, it won't cream properly with sugar. Without the air pockets formed during creaming, your butter cookies will be dense and hard rather than light and crispy.
"You must use cake flour for a tender cookie." Not necessarily. While cake flour works, the combination of all purpose flour and cornstarch used in this recipe achieves the same tender result with more structural integrity.
It allows the cookie to be delicate without being so fragile that it falls apart when you pick it up.
"Searing the bottom of the cookie adds flavor." While a little browning is good (the Maillard reaction), "searing" or over browning the bottom usually just results in a bitter, burnt taste. The goal is a uniform golden hue that signals the sugars have caramelized without scorching the delicate fats in the butter.

Recipe FAQs
What is the difference between a butter cookie and a shortbread cookie?
Butter cookies typically include eggs; shortbread does not. The egg in a butter cookie adds richness and slight lift, resulting in a more tender texture, whereas shortbread relies solely on fat, sugar, and flour for its dense, crumbly structure.
What are the common butter cookie mistakes?
The biggest mistake is using butter that is too warm or too cold. If the butter is too warm, the cookies will spread excessively in the oven; if it is too cold, they will not cream properly to trap the necessary air pockets for lightness.
How to make butter cookies with 3 ingredients?
Mix 1 cup softened butter, 1/2 cup powdered sugar, and 2 cups flour. Cream the butter and sugar until fluffy, then gently mix in the flour until just combined; chill thoroughly before baking for best texture.
What is a butter cookie?
It is a rich, delicate biscuit characterized by a high butter content and a crumbly, melt-in-your mouth texture. These cookies often rely on creaming butter and sugar to incorporate air, giving them a lighter structure than traditional shortbreads.
Is it true I must chill the dough before piping or pressing?
Yes, chilling the dough is highly recommended for shaped cookies. Firming the dough prevents the butter from melting too quickly upon hitting the hot pan, which is crucial for maintaining sharp details on piped designs.
Why do my piped butter cookies bake flat?
Your cookies are flattening because the butter was too soft during the creaming stage or the oven was not hot enough. The higher heat sets the edges fast, trapping the air you whipped in; this principle of quick setting is also key when mastering cake recipes like our Chocolate Cupcakes with Chocolate recipe.
Can I substitute the granulated sugar with brown sugar?
No, stick to granulated sugar for classic butter cookies. Brown sugar contains molasses, which adds moisture and acidity, resulting in a softer, chewier cookie rather than the desired crisp, buttery snap.
Butter Cookie Recipe Essentials
Ingredients:
Instructions:
Nutrition Facts:
| Calories | 136 kcal |
|---|---|
| Protein | 1.4 g |
| Fat | 7.9 g |
| Carbs | 14.8 g |
| Fiber | 0.3 g |
| Sugar | 6.3 g |
| Sodium | 48 mg |
