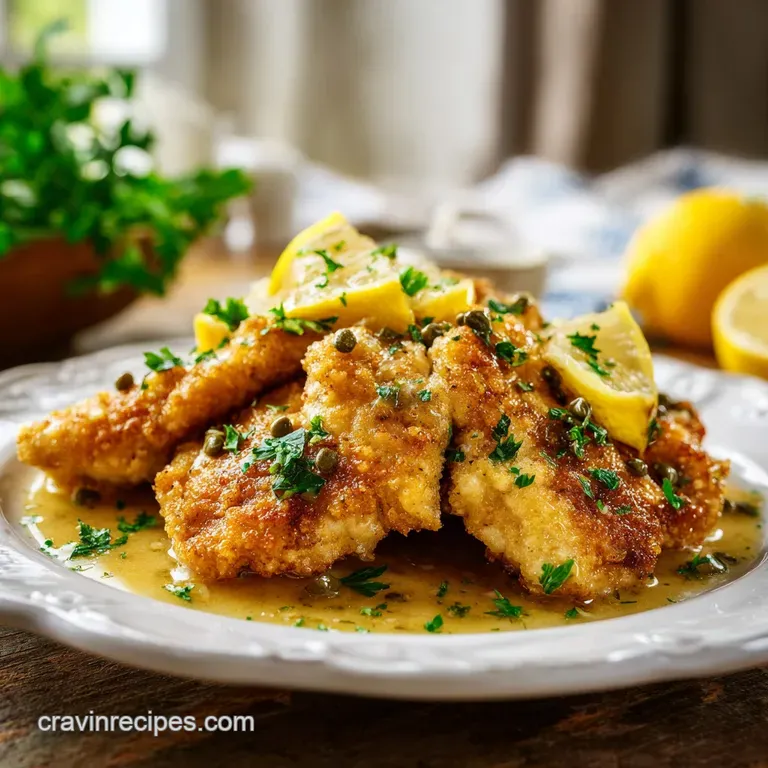
Golden Crispy Chicken Piccata: Italian Dinner
- Time: Active 10 minutes, Passive 10 minutes, Total 20 minutes
- Flavor/Texture Hook: Shatter crisp golden chicken edges bathed in a velvety, citrus forward glaze.
- Perfect for: Busy weeknight dinners where you want to impress without the fuss.
- Perfecting the Classic Chicken Piccata at Home
- Why This Zesty Method Works
- Component Analysis for Better Flavor
- Selecting Your Pantry Essentials
- Necessary Kitchen Tools and Gear
- Stepping Through the Cooking Process
- Fixes for Common Sauciness Hurdles
- Flavor Tweaks for Your Family
- Keeping Your Leftovers Fresh
- Serving Ideas for Hearty Meals
- High in Sodium
- Recipe FAQs
- 📝 Recipe Card
Perfecting the Classic Chicken Piccata at Home
You might think that a dish with a name as fancy as this requires a white chef’s hat and a bank account that can handle high end Italian imports. I used to believe that too, honestly.
I thought if I didn't have the "right" expensive bottle of wine or some artisanal capers hand picked from a cliffside in Sicily, it just wouldn't be right. But here is the truth: you don't need any of that.
This is a hearty, no fuss meal that relies on basic pantry staples and a few smart techniques to get that restaurant quality finish right in your own kitchen.
The first time I made this for my family, I was terrified I’d burn the lemon or end up with a soggy mess. I remember the kitchen smelling like a mix of hot butter and sharp citrus, a scent that still makes my mouth water just thinking about it. What I discovered is that this dish is remarkably forgiving.
It’s all about the sizzle of the chicken hitting the pan and the way the sauce comes together in those final seconds. We aren't aiming for a gourmet museum piece here; we want a comforting, family friendly dinner that people will scrape the pan for.
Forget everything you’ve heard about this being a complex or delicate recipe. It’s a workhorse. It’s fast, it’s punchy, and it uses ingredients you probably already have in your fridge.
Once you see how those browned bits at the bottom of the pan transform into a glossy sauce, you’ll never look at a plain chicken breast the same way again. Let’s get into what actually makes this dish sing without overcomplicating the process.
Why This Zesty Method Works
Understanding the "why" behind the sizzle makes you a better cook, and luckily, the logic here is straightforward.
- The Flour Veil: Dreading a heavy breading? We only use a light coating of flour to create a thin, crispy barrier that grabs onto the sauce without becoming a doughy blanket.
- Fond Development: Those brown bits left in the skillet after frying are pure flavor gold that dissolves into the wine to build the sauce’s foundation.
- Temperature Contrast: Adding cold butter to a hot reduction creates a stable, creamy emulsion that won't separate into a greasy mess on your plate.
- The Pounding Principle: Flattening the meat ensures every inch cooks at the exact same rate, preventing that "dry on the outside, raw in the middle" disaster.
| Choice | Budget Option | Premium Impact | Best For |
|---|---|---|---|
| Wine Type | Dry Vermouth | Sauvignon Blanc | budget friendly pantry staple |
| Capers | Non pareil (Jarred) | Salt cured | Classic tartness and ease |
| Fat Base | Salted Butter | European style Butter | Richer, creamier sauce texture |
Finding a balance between cost and quality is part of being a smart home cook. If you're out of white wine, a little extra chicken stock with a splash of vinegar works in a pinch, though the flavor profile will shift slightly. The goal is always a hearty result that fits your lifestyle.
Component Analysis for Better Flavor
Every ingredient in this recipe serves a specific structural or flavor based purpose. We aren't just tossing things into a pan; we are building layers of taste that work together to create that signature zing.
| Component | Role in Dish | Pro Secret |
|---|---|---|
| Chicken Breasts | Lean protein base | Pat them bone dry before dredging for the best sear. |
| Dry White Wine | Acidity and depth | Use something you’d actually drink; if it tastes bad in a glass, it’ll taste bad in the sauce. |
| Fresh Lemon Juice | Brightness and lift | Always squeeze fresh; bottled juice has a metallic aftertaste that ruins the silkiness. |
| Non pareil Capers | Briny salt bursts | Rinse them first to control the salt level of the final sauce. |
When you are looking for a base for your cooking, you might find yourself needing a reliable stock. Using a high-quality Chicken and Broth base can really change the depth of your pan sauce compared to just using water or a bouillon cube. It provides that foundational savory note that balances the sharp lemon.
Selecting Your Pantry Essentials
For this recipe, we stick to the basics. No need to go hunting for obscure items.
- 2 large boneless, skinless chicken breasts (approx. 500g / 1.1 lbs): Why this? They cook fast and provide a neutral canvas for the vibrant sauce.
- Substitute: Chicken thighs (boneless) for a juicier, though less traditional, texture.
- 1/2 cup (65g) All purpose flour: Why this? Creates the perfect light crust and slightly thickens the sauce later.
- Substitute: Cornstarch or a GF flour blend for those with dietary restrictions.
- 1 tsp (5g) Kosher salt: Why this? Enhances all other flavors without being overly "salty."
- Substitute: Sea salt, but use slightly less as the grains are finer.
- 1/2 tsp (2g) Cracked black pepper: Why this? Provides a subtle back of-the throat heat.
- Substitute: White pepper if you want a cleaner look without the black specks.
- 2 tbsp (30ml) Extra virgin olive oil: Why this? High smoke point and adds a fruity undertone to the sear.
- Substitute: Avocado oil or any neutral vegetable oil.
- 2 tbsp (30g) Unsalted butter for frying: Why this? Adds flavor and helps achieve that golden brown color.
- Substitute: Ghee (clarified butter) for a higher smoke point.
- 1/2 cup (120ml) Dry white wine: Why this? Cuts through the fat and adds a sophisticated fruity acidity.
- Substitute: Extra chicken stock with a tablespoon of white wine vinegar.
- 1/4 cup (60ml) Freshly squeezed lemon juice: Why this? The star of the show; provides the essential "piccata" tang.
- Substitute: Lime juice (will be more tropical) or white grapefruit juice.
- 1/2 cup (120ml) Low sodium chicken stock: Why this? Adds body and savoriness without making the dish a salt bomb.
- Substitute: Vegetable stock or even water if you’re desperate.
- 1/4 cup (40g) Non pareil capers, drained and rinsed: Why this? Little explosions of salty, vinegary flavor.
- Substitute: Chopped green olives or even finely diced pickles for a similar brine.
- 3 tbsp (45g) Cold unsalted butter, cubed for emulsification: Why this? This is what makes the sauce velvety and glossy.
- Substitute: Heavy cream, though it changes the sauce to a "creamy" style.
- 1/4 cup (10g) Fresh Italian parsley, chopped: Why this? Adds a necessary grassy freshness and a pop of color.
- Substitute: Fresh chives or a small amount of dried parsley.
- 1 lemon, sliced for garnish: Why this? Makes the plate look beautiful and provides extra zing for those who want it.
Necessary Kitchen Tools and Gear
You don't need a kitchen full of gadgets for this one. A few basics will get the job done efficiently.
Chef's Tip: If you don't have a meat mallet, use the bottom of a heavy skillet or even a rolling pin to pound your chicken. Just be gentle!
First and foremost, a large stainless steel or cast iron skillet is your best friend here. Non stick pans are great for eggs, but they don't develop that beautiful "fond" (the brown bits) that we need for a deep, flavorful sauce.
You also want a shallow bowl or pie plate for dredging the chicken anything with a wide, flat bottom makes it easier to coat the meat evenly without making a massive mess on your counter.
I also highly recommend a wire rack set over a baking sheet. Once the chicken is fried, putting it on a rack instead of a flat plate prevents the bottom from getting soggy while you make the sauce. It keeps that "shatter crisp" texture we worked so hard for.
Finally,, a sturdy whisk is essential for that final step where we stir in the cold butter. You want to move quickly to get that perfect, silky emulsion.
Stepping Through the Cooking Process
This is a fast moving recipe, so I always suggest having all your ingredients measured and ready before you turn on the stove.
- Butterfly the chicken breasts horizontally and place them between sheets of plastic wrap. Using a mallet, pound them to a uniform 1/4 inch thickness. Note: This ensures they cook in minutes without drying out.
- In a shallow bowl, whisk together the flour, salt, and pepper. Dredge the chicken pieces in the flour mixture, shaking off every bit of excess until only a translucent veil remains. Note: Too much flour will lead to a gummy sauce.
- Heat the olive oil and 2 tablespoons of butter in a large skillet over medium high heat until the foam subsides. Fry the chicken in batches for 2-3 minutes per side until golden brown and cooked through. Remove to a wire rack.
- Deglaze the skillet with white wine, scraping up the browned bits (fond) from the bottom. Simmer until reduced by half. Note: This concentrates the flavors and removes the harsh alcohol bite.
- Add lemon juice, chicken stock, and capers. Simmer for 3-5 minutes until slightly thickened.
- Remove the pan from heat and whisk in the cold cubed butter one piece at a time until the sauce is creamy and emulsified.
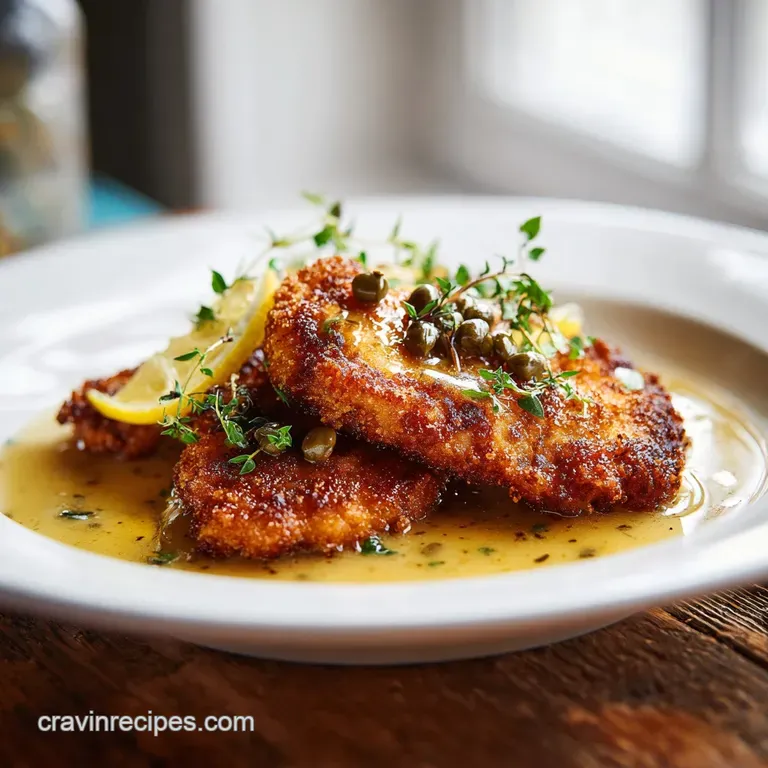
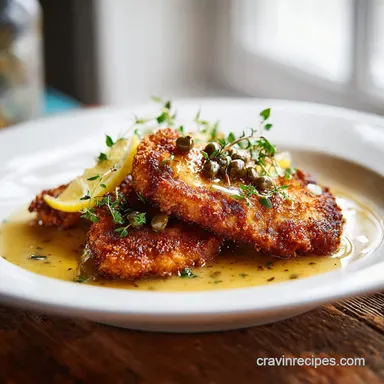
- Stir in fresh parsley, pour the velvety sauce over the chicken, and garnish with lemon slices.
- Serve immediately while the chicken is still crisp and the sauce is perfectly glossy.
Fixes for Common Sauciness Hurdles
Even the best of us have days where things don't go perfectly in the kitchen. If your sauce looks a bit wonky, don't panic!
Why Your Sauce Separated
If your sauce looks oily or broken rather than creamy, it usually means the pan was too hot when you added the finishing butter. The butter "broke" instead of emulsifying. To fix this, try adding a tiny splash of water or stock and whisking vigorously off the heat.
The goal is to bring the temperature down slowly so the fats and liquids can play nice again.
Why the Coating Peels
There is nothing more frustrating than your beautiful golden crust sliding right off the chicken. This usually happens if the chicken was damp when you put it in the flour, or if the pan wasn't hot enough. Make sure you use a paper towel to dry the meat completely before dredging.
You want that flour to stick to the meat, not a layer of moisture.
| Problem | Root Cause | Solution |
|---|---|---|
| Sauce is too thin | Not enough reduction | Simmer for another 2 minutes before adding butter. |
| Chicken is tough | Overcooked or not pounded | Stick to the 1/4 inch thickness and 2-3 minute cook time. |
| Too salty | Capers weren't rinsed | Add a pinch of sugar or extra lemon juice to balance. |
If you ever find yourself with leftover chicken that isn't quite right for a reheat, you can always shred it and use it as a base for something else. For instance, a Favorite Chicken Potpie is a great way to repurpose chicken in a completely different, comforting way.
Common Mistakes Checklist:
- ✓ Pat chicken completely dry before dredging to ensure the flour sticks properly.
- ✓ Don't overcrowd the pan; fry in batches so the chicken sears rather than steams.
- ✓ Whisk in the butter off the heat to prevent the sauce from breaking.
- ✓ Use cold butter for the sauce; room temperature butter will melt too fast and won't emulsify.
- ✓ Ensure the wine has reduced by half before adding the stock for maximum flavor depth.
Flavor Tweaks for Your Family
Sometimes you want to change things up based on what you have in the cupboard or what your kids will actually eat.
If you are cooking for someone who needs to watch their salt intake, the "Low Sodium Adjustment" is easy: just double the lemon juice and omit the extra salt in the flour dredge. The capers provide plenty of salty punch on their own!
For a "Mediterranean Variation", try adding a few sun dried tomatoes or some sliced kalamata olives along with the capers. It adds a lovely sweetness and depth that pairs beautifully with the lemon.
For those who want a bit more indulgence, the "Creamy Twist" is a winner. Instead of whisking in butter at the end, stir in a splash of heavy cream and let it bubble for a minute until it coats the back of a spoon. It’s less traditional, but incredibly comforting on a cold night.
If you're looking for a "gluten-free Swap", use a 1:1 gluten-free flour blend or even almond flour for the dredge. Almond flour won't get quite as crispy, but it adds a nice nutty flavor that works surprisingly well with the lemon.
- For more crunch
- Use panko breadcrumbs instead of flour for the dredge (add 5 minutes to cook time).
- For a deeper flavor
- Add a clove of smashed garlic to the butter while frying the chicken.
- For a kid friendly version
- Reduce the capers by half and add a teaspoon of honey to the sauce.
Keeping Your Leftovers Fresh
Chicken Piccata is definitely best served fresh because that crispy coating softens over time, but that doesn't mean leftovers aren't a treat!
- Storage
- You can keep leftover chicken and sauce in an airtight container in the fridge for up to 3 days. I recommend storing the sauce and chicken together so the meat stays moist.
- Freezing
- I wouldn't recommend freezing the finished dish. The butter based sauce will almost certainly separate when thawed, and the texture of the chicken coating will become mushy. It’s a 20 minute meal, so it’s usually better to make it fresh!
- Reheating
- To get some of that crispness back, reheat the chicken in a skillet over medium low heat with a tiny bit of butter. Avoid the microwave if you can, as it tends to make the chicken rubbery.
Zero Waste Tip: Don't throw away those lemon rinds! Toss them into a jar of white vinegar for a week to make a natural, fresh smelling kitchen cleaner. Also, if you have extra parsley stems, save them in a freezer bag for the next time you make a homemade chicken stock.
Serving Ideas for Hearty Meals
This dish is so vibrant that it needs a side that can soak up all that extra lemon butter sauce.
A classic choice is a pile of buttered noodles or angel hair pasta. The thin strands catch the capers and sauce perfectly. If you want something a bit heartier, a side of roasted potatoes or even a creamy mash works wonders.
The earthiness of the potatoes balances the sharp acidity of the lemon in a really satisfying way.
For a lighter option, try serving it over a bed of sautéed spinach or alongside some charred asparagus. The green veg adds a nice crunch and keeps the meal feeling fresh. My family loves it with a simple piece of crusty bread on the side perfect for mopping up every last drop of that velvety sauce.
Honestly, as long as you have something to catch that sauce, you're going to have a very happy table!
Searing meat does not "seal in juices." This is a common myth. Moisture loss happens regardless of the sear; however, the crust we create through frying is essential because it adds layers of flavor through browning.
The real secret to juicy chicken is simply not overcooking it, which is why we pound it thin to ensure a lightning fast cook time. Another myth is that you must use expensive wine. In reality, a budget friendly dry white works perfectly because the lemon and capers are the dominant flavors anyway.
Don't stress the "fancy" labels; focus on the technique and the fresh citrus!

High in Sodium
842 mg of sodium per serving (37% of daily value)
The American Heart Association recommends limiting sodium intake to no more than 2,300mg per day, with an ideal limit of under 1,500mg for most adults.
Tips to Reduce Sodium
-
Swap Chicken Stock-30%
Use low-sodium or no-salt added chicken stock instead of regular chicken stock. This is a significant source of hidden sodium.
-
Halve the Added Salt-25%
Reduce the 1 tsp of kosher salt in the flour mixture to 1/2 tsp. You can always add more salt at the table if needed.
-
Rinse Capers Thoroughly-20%
Ensure the capers are well rinsed under cold water to remove excess salt. Draining and rinsing significantly reduces their sodium contribution.
-
Boost Fresh Herbs
Increase the amount of fresh Italian parsley and consider adding other fresh herbs like dill or chives. They add flavor without sodium.
-
Enhance Lemon Flavor-5%
Incorporate more fresh lemon juice and zest. This brightens the dish and can help compensate for reduced saltiness.
Recipe FAQs
What is chicken piccata sauce made of?
The sauce is a reduction of dry white wine, lemon juice, chicken stock, and briny capers. It is finished by whisking in cold, cubed butter off the heat to create a glossy, emulsified texture.
What's the secret to a great piccata sauce?
The secret is the cold butter emulsification at the very end. Whisking in cold butter while the pan is off the heat prevents the sauce from breaking, ensuring a velvety mouthfeel. If you enjoyed nailing this stable emulsion technique here, see how we use a similar process for a creamy pasta sauce.
What's the difference between chicken piccata and chicken limone?
No, they are distinct preparations. Chicken piccata specifically relies on the addition of salty, piquant capers to balance the lemon and wine, whereas chicken limone focuses strictly on a lemon butter sauce without the capers.
What is chicken piccata normally served with?
Serve it alongside simple starches like angel hair pasta, mashed potatoes, or crusty bread. These sides effectively soak up the bright, acidic sauce without overpowering the delicate flavor of the chicken.
How to ensure the chicken doesn't dry out?
Pound the breasts to a uniform 1/4 inch thickness before cooking. This ensures the chicken cooks through in the allotted 2-3 minutes per side, keeping the interior tender while the exterior browns.
How to get the flour coating right?
Shake off every bit of excess flour until only a translucent veil remains. A heavy coating will turn gummy and soak up too much sauce, preventing that desired golden brown crust.
How to manage the pan fond?
Deglaze the skillet with your white wine while scraping the bottom with a wooden spoon. Incorporating these browned bits is essential for building a deep, complex flavor profile in your final sauce.
Classic Chicken Piccata
Ingredients:
Instructions:
Nutrition Facts:
| Calories | 448 kcal |
|---|---|
| Protein | 39.4 g |
| Fat | 26.8 g |
| Carbs | 6.2 g |
| Fiber | 0.6 g |
| Sugar | 0.8 g |
| Sodium | 842 mg |
