Classic Apple Pie: Easy and Homemade

- Time: Active 30 minutes, Passive 50 minutes, Total 80 minutes
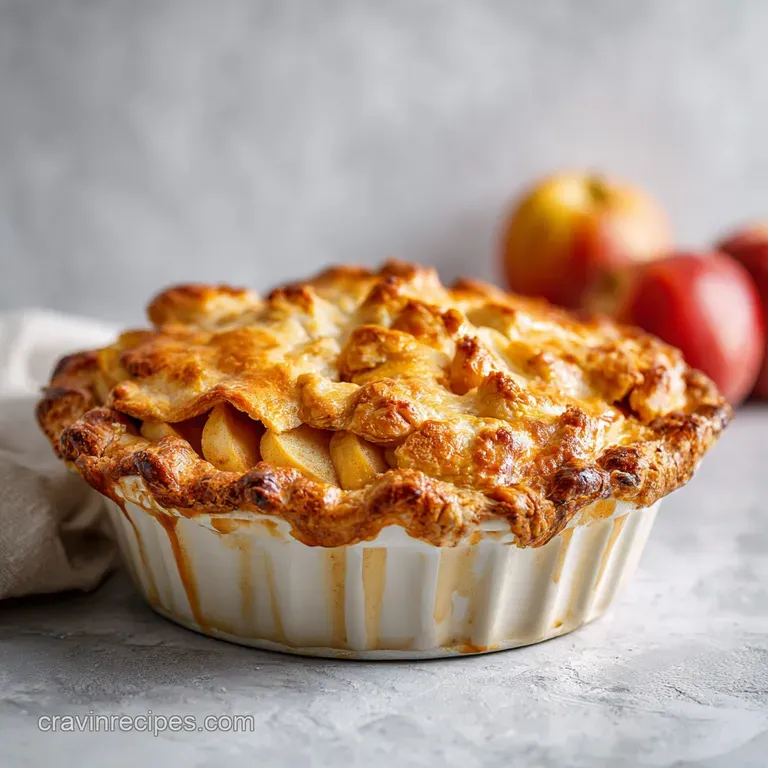
- Flavor/Texture Hook: Flaky, buttery crust paired with tart, cinnamon spiced apples.
- Perfect for: Holiday gatherings, Sunday dinners, or a comforting weekend project.
- Mastering This Apple Pie Recipe Easy and Homemade
- Understanding the Science of the Flaky Texture
- Ingredient Analysis for a Rich Flavor Profile
- Essential Elements and Substitutes for Baking
- Crucial Tools for a Successful Bake
- Executing the Method with Absolute Precision
- Solving Potential Obstacles During the Process
- Creative Variations for Your Individual Style
- Maintaining Freshness and Reducing Kitchen Waste
- Beautiful Ways to Serve Your Golden Creation
- Myths About Apple Pie
- Recipe FAQs
- 📝 Recipe Card
Mastering This Apple Pie Recipe Easy and Homemade
Imagine the scent of warm cinnamon and bubbling brown sugar swirling through your kitchen as the oven timer ticks down. There is nothing quite like the moment you pull a golden, vented crust from the heat and hear that slight hiss of escaping steam.
The real hero here isn't just the sugar; it’s the Granny Smith apple. I chose this specific variety because its high acidity and firm structure prevent the filling from turning into a sad, watery mash.
While some might reach for a softer Gala or Red Delicious, those apples often collapse under the heat, leaving you with a texture that feels more like baby food than a proper dessert. The Granny Smith holds its shape, providing a tart bite that cuts right through the richness of the butter.
We are aiming for a specific contrast today: a crust that shatters like glass when your fork hits it, and a filling that is tender but still has a discernible "snap." Using a mix of Granny Smith and Honeycrisp apples creates a complex flavor profile where the sweetness of one balances the sharp tang of the other.
You’ll notice that this version doesn't rely on pre cooking the fruit on the stovetop. While the stovetop method is great for preventing the "gap" under the top crust, it often sacrifices that fresh, bright apple flavor that only happens when the fruit roasts in its own juices inside the pastry.
You've probably seen recipes that call for shortening, but we are sticking with pure, unsalted butter. It provides a depth of flavor that a neutral fat simply cannot match. The trick is keeping everything cold and I mean really cold.
If that butter melts into the flour before it hits the oven, you lose those beautiful layers. We want those little pockets of fat to stay solid until they hit the high heat, where they’ll explode into steam and lift the flour into flaky ribbons.
Trust me, once you see those layers, you'll never go back to store-bought.
Understanding the Science of the Flaky Texture
The success of this dish hinges on a few simple physical reactions that happen behind the scenes. When we talk about a "flaky" crust, we’re actually talking about steam.
- Fat Vaporization: As the cold butter cubes hit the 200°C environment, the water trapped within the fat expands rapidly. This pushes the layers of dough apart before the flour sets, creating that coveted shatter.
- Pectin Retention: The 15ml of lemon juice isn't just for flavor; the acid helps the pectin in the 1.2kg of apples stay firm. This prevents the wedges from disintegrating into a sauce during the 50 minutes bake.
- Gluten Inhibition: By using 90ml of ice water and minimal handling, we prevent long gluten strands from forming. This ensures the crust remains tender rather than tough and bready.
- Sugar Syneresis: The 100g of brown sugar and 50g of granulated sugar draw moisture out of the apples. This liquid then mixes with the 25g of flour to create a thick, glossy syrup that coats every slice.
| Servings | Ingredient Adjustments | Pan Size | Cook Time |
|---|---|---|---|
| 4 People | 160g flour, 115g butter, 600g apples | 15cm Pie Dish | 35 minutes |
| 8 People | 320g flour, 225g butter, 1.2kg apples | 23cm Pie Dish | 50 minutes |
| 12 People | 480g flour, 340g butter, 1.8kg apples | 25cm Deep Dish | 65 minutes |
Choosing the right pan size is essential for ensuring the heat penetrates the center of the apple pile without burning the edges. If you scale up to a larger dish, you'll need to watch the rim of the crust carefully, as it will be exposed to the oven's heat for a longer duration.
For a standard 23cm dish, the 50 minutes mark is usually the "sweet spot" where the juices begin to bubble through the vents.
Ingredient Analysis for a Rich Flavor Profile
Every component in this bake has a job to do. We aren't just adding ingredients for the sake of it; we are building a structural and flavor foundation.
| Component | Role in Recipe | Pro Secret |
|---|---|---|
| 225g Unsalted Butter | Provides fat for flakiness and rich mouthfeel. | Freeze the cubes for 10 minutes before adding to the flour to ensure they stay solid. |
| 1.2kg Fresh Apples | The structural bulk and primary flavor source. | Slice them to a uniform 6mm thickness so they soften at the same rate. |
| 25g All purpose Flour | Acts as a thickener for the internal juices. | Toss with the sugar first to prevent clumping when it hits the fruit moisture. |
The choice of sea salt over standard table salt is a small but vital detail. Sea salt has a cleaner finish that brightens the sugars without leaving a chemical aftertaste. This recipe is an excellent foundation, but if you're looking for something even more approachable for a crowd, you might want to try this Caramel Apple Dump Cake which offers a similar flavor profile with much less manual labor.
Essential Elements and Substitutes for Baking
When you're gathering your supplies, the quality of your fruit and fat will dictate the final outcome. Use the best butter you can find something with a high fat content will yield a more indulgent result.
- 320g All purpose flour: The skeleton of our crust.
- Substitute: Pastry flour (adds a more delicate crumb but is harder to handle). Why this? AP flour provides the perfect balance of strength and tenderness.
- 225g Unsalted butter: Chilled and cubed.
- Substitute: Refined coconut oil (frozen and cubed). Why this? Butter provides the essential flavor and water content for steam.
- 1.2kg Fresh apples: Specifically Granny Smith and Honeycrisp.
- Substitute: Braeburn or Jonagold. Why this? These varieties hold their shape under intense heat.
- 100g Brown sugar: For deep, molasses like sweetness.
- Substitute: Coconut sugar (adds a toasted, nutty flavor). Why this? The moisture in brown sugar creates a better syrup.
- 8g Ground cinnamon: The classic aromatic.
- Substitute: Apple pie spice blend. Why this? Cinnamon provides that iconic, warming scent we all love.
- 15ml Lemon juice: To balance sweetness and preserve texture.
- Substitute: Apple cider vinegar. Why this? Acid prevents the fruit from oxidizing and turning brown.
Getting the ratio of these items right is the difference between a soggy mess and a masterpiece. If you find yourself with extra apples, you can always prep a batch of Apple Pie Filling to freeze for later use, ensuring you're always ready for a spontaneous bake.
Crucial Tools for a Successful Bake
You don't need a high end laboratory to make a great pie, but a few specific tools will make your life significantly easier and the results more consistent.
- Pastry Cutter: This is far superior to using your hands, as the heat from your palms can melt the butter. If you don't have one, two knives or a sturdy fork will work.
- 9 inch (23cm) Pie Dish: Glass or ceramic is preferred for even heat distribution. Metal pans can sometimes heat up too quickly, leading to a burnt bottom.
- Rolling Pin: A classic French tapered pin gives you more control over the dough's thickness, but a standard heavy pin is fine for beginners.
- Baking Sheet: Always place your pie on a sheet. This catches any bubbling juices that might overflow, saving your oven floor from a smoky, burnt sugar mess.
- Large Mixing Bowls: You'll need one for the dough and one for the fruit. Make sure the fruit bowl is big enough to toss the apples vigorously without losing any slices.
Executing the Method with Absolute Precision
- In a large bowl, whisk 320g flour, 15g sugar, and 5g salt until fully combined. Note: This ensures the salt is evenly distributed for a consistent flavor.
- Add 225g of chilled, cubed butter to the bowl. Use a pastry cutter to press the fat into the flour until the mixture looks like coarse sand with some pea sized butter chunks remaining.
- Drizzle 90ml of ice water into the mix, one tablespoon at a time. Stir with a fork after each addition until the dough just starts to clump together.
- Gently press the dough into two flat discs, wrap them tightly in plastic, and chill in the fridge for at least 30 minutes. Note: This allows the gluten to relax and the fat to re harden.
- Peel, core, and slice your 1.2kg of apples into 6mm wedges. Toss them in a separate bowl with 100g brown sugar, 50g granulated sugar, 25g flour, 8g cinnamon, 1g nutmeg, and 15ml lemon juice.
- Roll out the first dough disc on a floured surface to about 3mm thickness and drape it into your pie dish, leaving an inch of overhang.
- Pour the apple mixture into the crust, piling them slightly higher in the center to account for shrinkage during the bake.
- Roll out the second disc, place it over the apples, and crimp the edges firmly to seal the two layers together. Cut four large slits in the top to let steam escape.
- Beat one egg with 15ml of water and brush this egg wash over the entire top crust for a glossy finish.
- Bake on the middle rack of a preheated 200°C oven for 50 minutes until the crust is golden brown and the juices are thick and bubbling.
Solving Potential Obstacles During the Process
Even experienced bakers run into trouble occasionally. The key is knowing how to spot a problem before it ruins your dessert.
Why Your Bottom Crust Is Soggy
A "soggy bottom" is usually caused by the fruit juices soaking into the raw dough before it has a chance to set. If your apples are particularly juicy, they can overwhelm the bottom layer.
Ensure your oven is fully preheated to 200°C before the pie goes in; that initial blast of heat is what sears the crust and makes it liquid proof.
Dealing with a Shrinking Crust
If your dough pulls away from the edges of the pan, it’s likely because the gluten was overworked or the dough wasn't chilled long enough. When you roll out the dough, avoid pulling or stretching it. Instead, lift and lay it gently into the dish.
If it feels springy or resists rolling, stop and let it rest in the fridge for another 10 minutes.
| Problem | Root Cause | Solution |
|---|---|---|
| Floury Taste | Undercooked flour in the filling. | Ensure juices are bubbling vigorously before removing from oven. |
| Tough Crust | Over handling the dough. | Use a light touch; stop mixing as soon as the dough clumps. |
| Gap Under Top Crust | Apples shrank more than the pastry. | Slice apples thin and pack them tightly into the dish. |
Common Mistakes Checklist
- ✓ Always use ice cold water; room temperature water will melt the butter instantly.
- ✓ Don't skip the chilling step; 30 minutes is the absolute minimum for a flaky result.
- ✓ Check the pie at 30 minutes; if the edges are browning too fast, cover them with foil.
- ✓ Let the pie cool for at least 2 hours before slicing; the filling needs time to set.
- ✓ Avoid using "mealy" apples like Red Delicious; they will turn to mush.
Creative Variations for Your Individual Style
Once you've mastered the classic, you can start playing with the flavors. A little bit of experimentation can lead to a signature version that your friends will beg for.
- Scaling Down: If you're baking for two, cut the recipe in half. Use a smaller 15cm dish and reduce the bake time by about 15 minutes. Use half a beaten egg for the wash.
- Scaling Up: For a crowd, double the ingredients and use a large rectangular baking dish for a "slab pie." This increases the crust to filling ratio, which many people prefer.
- The Boozy Twist: Add 15ml of spiced rum or bourbon to the apple mixture. The alcohol burns off, leaving behind a deep, smoky sweetness that pairs beautifully with the cinnamon.
- Cheese Crust: Grate 50g of sharp cheddar into the flour before adding the butter. The savory, salty kick of the cheese is a traditional pairing with apples in many parts of the world.
| Method | Time | Texture | Best For |
|---|---|---|---|
| Standard Oven | 50 minutes | Crisp and Flaky | The classic, foolproof result. |
| Stovetop (Filling Only) | 15 minutes | Soft and Jammy | Pre cooking fruit for tarts or hand pies. |
| Convection Oven | 40 minutes | Extra Shatter | Faster bake, requires temp reduction of 20°C. |
If you love the flavor of apples but want something even more decadent and cake like, consider trying an Apple Dapple Cake for your next gathering. It’s a great way to use the same fruit in a completely different format.
Maintaining Freshness and Reducing Kitchen Waste
Apple pie is best served the day it's made, but with proper care, it can last for several days.
Storage: Keep the pie at room temperature, covered loosely with foil or a clean kitchen towel, for up to 2 days. For longer storage, move it to the fridge for up to 5 days.
To reheat, put it in a 150°C oven for 10-15 minutes to crisp up the crust avoid the microwave, as it will make the pastry rubbery.
Freezing: You can freeze the unbaked pie! Assemble it completely, wrap it tightly in several layers of plastic wrap and foil, and freeze for up to 3 months. Bake it directly from frozen, adding about 15-20 minutes to the total bake time.
Zero Waste: Don't throw away those apple peels and cores! Simmer them in a small pot with a bit of water, a cinnamon stick, and a spoonful of sugar. Strain the liquid to create a homemade apple syrup that is fantastic over pancakes or stirred into hot tea.
The leftover dough scraps can be rolled out, sprinkled with cinnamon sugar, and baked for 10 minutes to make "pie fries" for the baker to snack on.
Beautiful Ways to Serve Your Golden Creation
Presentation is the final step in the baking process. While a plain slice is wonderful, a few small touches can make it feel truly special.
The classic pairing is a scoop of high-quality vanilla bean ice cream. The heat from the pie melts the cream into a velvety sauce that seeps into the flaky layers of the crust. If you prefer something less sweet, a dollop of unsweetened whipped cream or a wedge of sharp cheddar cheese provides a sophisticated contrast to the sugary filling.
For a decorative touch, sprinkle a tablespoon of coarse sanding sugar over the egg wash before the pie goes into the oven. This creates a glittering, crunchy lid that looks professional and adds a nice texture.
When slicing, use a sharp serrated knife and a gentle sawing motion to cut through the top crust without crushing the delicate layers beneath. Remember, the first slice is always the hardest to get out cleanly don't sweat it if it looks a bit messy; the flavor will be just as rich!
Myths About Apple Pie
The crust must be handled as little as possible. While you don't want to knead it like bread, you do need to ensure the water is fully incorporated. Under mixing can lead to a crumbly dough that falls apart when you try to roll it out. The goal is to mix just until it holds together when squeezed.
Searing the apples isn't necessary. Some believe you should sauté the apples before baking to prevent the gap under the crust. While this works, it changes the texture of the fruit.
Instead, simply slice your apples thin and pile them high; they will settle naturally as they bake, and the flour in the filling will bridge the gap.
High protein flour makes a better crust. Actually, the opposite is true. We want a lower protein content (like all purpose or pastry flour) to minimize gluten development. High protein bread flour would result in a tough, chewy crust rather than a light, flaky one.
Apple pie is better the next day. While the flavors do meld over time, the crust is at its absolute peak of flakiness within a few hours of leaving the oven. Once it sits in the fridge, the moisture from the filling inevitably starts to soften the pastry. For the best experience, eat it fresh!

Recipe FAQs
How to ensure my pie crust turns out perfectly flaky?
Keep your butter and water ice-cold. If you enjoyed mastering the temperature sensitive butter technique here, see how that same logic creates the perfect ginger crust in our other dessert recipes.
Is it true I should precook the apple filling to stop it from collapsing?
No, this is a common misconception. You can achieve a dense, stable filling simply by tossing your apples with the flour and sugar mixture right before assembling.
How to prevent the bottom crust from getting soggy?
Place your pie on a preheated baking sheet. This conductive heat hits the bottom of the pie dish immediately, helping the pastry set before the apple juices have a chance to soak through.
How to tell when the pie is fully baked?
Look for a deep golden brown color on the crust and visible bubbling filling. The bubbling indicates that the starch from the flour has successfully thickened the apple juices into a syrupy consistency.
How to properly store leftovers?
Cover the cooled pie tightly with plastic wrap or foil. Store it at room temperature for two days, or in the refrigerator for up to four, to keep the crust from losing its texture.
How to get a deep, professional looking shine on the crust?
Brush the top of the pie with an egg wash before baking. Combining the egg with water ensures the crust browns evenly and develops that signature glossy finish.
Is it possible to use only one type of apple?
Yes, you can use either Granny Smith or Honeycrisp exclusively. While the mix provides the best balance of structure and sweetness, using a single variety will still yield a delicious, consistent result.
Classic Homemade Apple Pie

Ingredients:
Instructions:
Nutrition Facts:
| Calories | 505 kcal |
|---|---|
| Protein | 5.1g |
| Fat | 23.4g |
| Carbs | 69.2g |
| Fiber | 3.9g |
| Sugar | 31.9g |
| Sodium | 242mg |
