Cookies Double Choc: Fudgy & Intense
- Time: Active 45 mins, Passive 10 mins, Total 55 mins
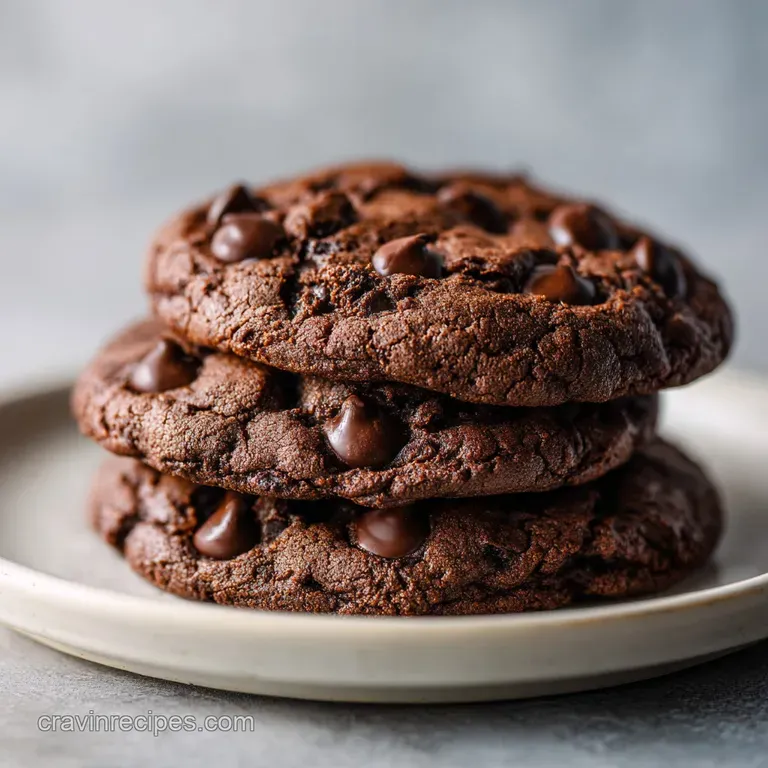
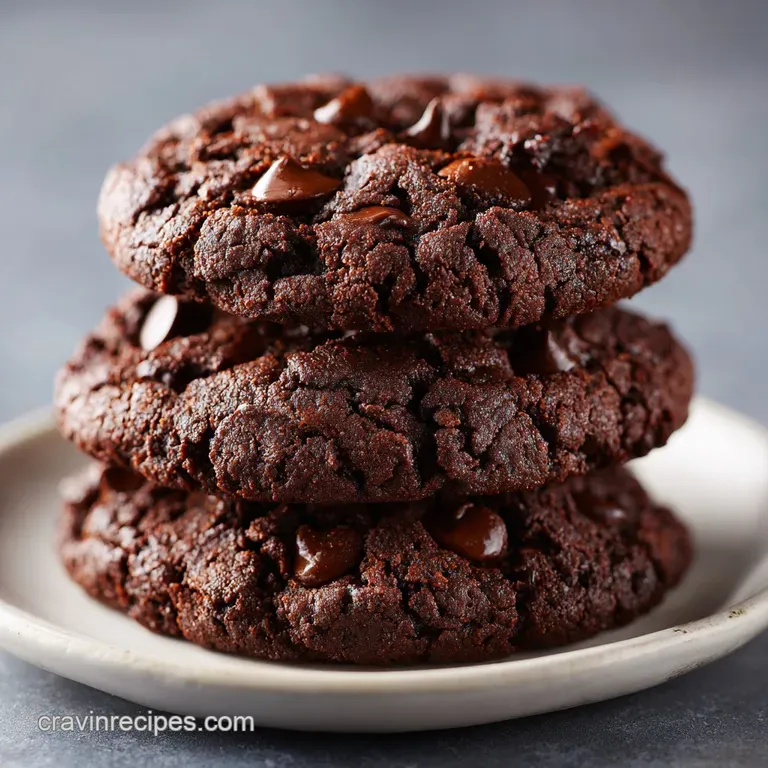
- Flavor/Texture Hook: Fudgy, velvet centered, and intensely dark
- Perfect for: Late night cravings, holiday cookie swaps, or impressing true chocoholics
- Master the Most Indulgent Cookies Double Choc
- The Chemistry of the Perfect Fudgy Center
- Analyzing the Essential Component Roles
- The Full Ingredient Breakdown
- Essential Tools for Baking Success
- Transforming Ingredients into Decadent Treats
- Solving Common Baking Hurdles
- Adjusting for Different Batch Sizes
- Debunking Common Cookie Legends
- Storage and Zero Waste Strategies
- Professional Presentation Techniques
- Recipe FAQs
- 📝 Recipe Card
Master the Most Indulgent Cookies Double Choc
I still remember the first time I pulled a tray of these out of the oven and realized I’d finally cracked the code. The kitchen was thick with the scent of toasted butter and rich cocoa, a smell so heavy you could almost chew it.
I’d spent months chasing that specific "bakery style" texture you know the one, where the edge has a slight shatter crisp snap but the middle stays almost like truffle ganache. My earlier attempts were either too cakey or, frankly, just boring.
But when I broke one of these open and saw that molten dark chocolate pool staring back at me, I knew this was the one.
Honestly, the trick isn't just about adding more chocolate; it’s about the contrast. We’re playing with the deep, earthy bitterness of Dutch process cocoa against the sweet, caramel notes of light brown sugar. It’s that hit of fine sea salt at the end that really makes the whole thing sing.
If you've ever felt like a standard chocolate chip cookie was missing "something," it was probably this level of intensity. We aren't just making cookies; we're making a statement.
We’ve all been there staring at a recipe wondering if it’s actually going to turn out like the picture. I’ve made every mistake possible so you don’t have to.
I've used cold eggs (big mistake, the dough broke), I've forgotten the salt (it tasted flat), and I've overbaked them until they were hockey pucks. This guide is everything I’ve learned about getting that velvety, rich finish every single time.
Grab your favorite mixing bowl, and let's get into the details of why these work so well.
The Chemistry of the Perfect Fudgy Center
Alkaline Reaction: Dutch process cocoa is treated with alkali, which neutralizes its natural acidity and creates a smoother, darker flavor that reacts perfectly with baking soda for a controlled rise.
Fat to Flour Ratio: By using 115g of softened butter against a relatively low 160g of flour, we ensure the dough remains heavy and moist rather than airy or bread like.
Sugar Hygroscopy: The high ratio of light brown sugar (150g) compared to granulated sugar (50g) pulls moisture from the air, keeping the cookies soft and chewy for days.
| Thickness | Internal Temp | Rest Time | Visual Cue |
|---|---|---|---|
| 1/2 inch | 175°F | 10 mins | Edges set, center looks slightly underdone |
| 3/4 inch | 180°F | 15 mins | Surface shows small cracks, center is soft |
| 1 inch | 185°F | 20 mins | Cookies look matte on top, no longer shiny |
Choosing the right thickness matters because these cookies continue to "set" while resting on the hot pan. If you pull them out when they look fully cooked, they will end up being far too dry once they cool down.
I always aim for that 1/2 inch thickness for the ultimate fudgy experience, which usually happens naturally if you don't press the dough balls down too much before baking.
Analyzing the Essential Component Roles
| Ingredient | Science Role | Pro Secret |
|---|---|---|
| Dutch process Cocoa | Provides deep color and mild acidity | Sift this with the flour to avoid tiny "cocoa bombs" of dry powder in your dough |
| Espresso Powder | Enhances chocolate perception | It doesn't make the cookies taste like coffee; it just makes the chocolate taste "louder" |
| Light Brown Sugar | Adds moisture and caramel notes | Pack it tight in the measuring cup to ensure you get the full 150g for that chewy bite |
| Large Egg | Emulsifier and structure | Ensure it's room temperature so the fat and liquid bond into a silky, cohesive emulsion |
When we talk about the "double" in these cookies, we're really looking at the layers of flavor. The cocoa powder provides the base "darkness," while the 170g of semi sweet chips and the 100g of chopped dark chocolate bar provide the texture and "goo factor." Using a chopped bar is a trick I learned from a pastry chef friend; the uneven chunks create different sized pockets of melted chocolate, which is way more interesting than uniform chips alone.
It’s the difference between a flat flavor and one that has peaks and valleys of sweetness.
If you find yourself running low on the specific sugars called for, don't panic. While the balance here is designed for that specific fudgy on-the inside, crisp on-the outside vibe, you can make some adjustments. For instance, if you're looking for something with a bit more of a "snap" or if you want to experiment with different bases, similar to how we adjust moisture in our Soft and Chewy recipe, the sugar ratio is your primary lever for texture control.
The Full Ingredient Breakdown
- 115g unsalted butter, softened: Why this? Provides the rich, creamy foundation and fat needed for a tender, melt away crumb. (Substitute: Salted butter just omit the extra sea salt later).
- 150g light brown sugar, packed: Why this? The molasses content is what gives us that quintessential chewy, moist interior. (Substitute: Dark brown sugar for a deeper, toffee like flavor).
- 50g granulated sugar: Why this? Creates those beautiful, slightly crisp edges that contrast with the soft middle. (Substitute: Caster sugar for an even finer texture).
- 1 large egg, room temperature: Why this? Acts as the "glue" while adding fat and protein for structure. (Substitute: 1/4 cup unsweetened applesauce for a denser, vegan friendly binder).
- 1 tbsp vanilla extract: Why this? Rounds out the bitterness of the cocoa and adds a floral sweetness. (Substitute: Vanilla bean paste for those gorgeous little black flecks).
- 160g all purpose flour: Why this? Provides the "bones" of the cookie without making it heavy or tough. (Substitute: 1:1 gluten-free baking flour ensure it contains xanthan gum).
- 45g Dutch process cocoa powder: Why this? Gives that signature dark color and smooth, intense chocolate flavor profile. (Substitute: Natural cocoa powder note that the cookies will be lighter and tangier).
- 1 tsp espresso powder: Why this? A secret weapon that amplifies the cocoa notes without adding coffee flavor. (Substitute: 1 tsp very finely ground instant coffee).
- 1 tsp baking soda: Why this? The leavening agent that helps the cookies spread and puff just enough. (Substitute: 3 tsp baking powder, but expect a puffier, more cake like result).
- 1/2 tsp fine sea salt: Why this? Essential for balancing the sugars and making the chocolate pop. (Substitute: Kosher salt use a full teaspoon if using Diamond Crystal).
- 170g semi sweet chocolate chips: Why this? Classic pockets of sweetness that hold their shape reasonably well. (Substitute: Milk chocolate chips for a sweeter, creamier profile).
- 100g dark chocolate bar, chopped into large chunks: Why this? These create those "pools" of molten chocolate that make the cookies look professional. (Substitute: Dark chocolate chunks or additional chips).
Essential Tools for Baking Success
You don't need a professional kitchen to make these, but a few specific tools will make your life a whole lot easier. First off, a digital kitchen scale is non negotiable for me. Baking by volume (cups) is notoriously inaccurate one person’s "cup" of flour can be 20% heavier than someone else’s depending on how they scoop it.
When we're dealing with 160g of flour, even a 20g difference can turn these from fudgy masterpieces into dry biscuits.
I also highly recommend using a sturdy stand mixer or a reliable hand mixer. Creaming the butter and sugars together requires a bit of speed to incorporate air, which is what gives the cookies their lift. If you're doing it by hand, you'll need a lot of elbow grease and a very sturdy whisk.
Finally,, invest in some parchment paper or silicone baking mats. These cookies are rich and full of chocolate chunks that can stick to a bare pan, and there is nothing more heartbreaking than a beautiful cookie breaking apart because it's glued to the baking sheet.
Chef's Tip: Grate your dark chocolate bar directly into the dough for the final 10 grams. Those tiny shavings will melt into the dough itself, turning the entire cookie into a deep chocolate experience rather than just "vanilla dough with chips."
Transforming Ingredients into Decadent Treats
- Cream the butter and sugars. Combine the 115g softened butter, 150g light brown sugar, and 50g granulated sugar in your mixer. Beat for about 3 minutes until the mixture looks pale and fluffy. Note: This aeration is vital for the cookie's structure.
- Add the wet components. Mix in the large egg and 1 tbsp vanilla extract. Continue beating for another minute until the emulsion is silky and smooth.
- Whisk the dry essentials. In a separate bowl, sift together the 160g flour, 45g Dutch cocoa, 1 tsp espresso powder, 1 tsp baking soda, and 1/2 tsp sea salt. Note: Sifting prevents bitter cocoa clumps.
- Combine the mixtures. Slowly add the dry ingredients to the wet mixture on low speed. Mix until just a few streaks of flour remain. Do not overmix here, or you'll develop too much gluten.
- Fold in the chocolate. Use a spatula to fold in the 170g semi sweet chips and the 100g of chopped dark chocolate bar. Note: Hand folding prevents breaking the delicate chocolate chunks.
- Chill the dough. Cover the bowl and refrigerate for at least 30 minutes. This allows the flour to hydrate and the butter to firm up, preventing the cookies from spreading into flat puddles.
- Preheat and prepare. Set your oven to 350°F (180°C) and line two large baking sheets with parchment paper.
- Scoop the dough. Use a large cookie scoop to form balls (about 2 tablespoons each). Space them 2 inches apart on the sheets to allow for natural spreading.
- Bake with precision. Slide the trays into the oven for 10 minutes. Bake until the edges are set and the tops have developed a crackly, matte appearance.
- The "Pan Bang" and rest. Remove from the oven and firmly tap the sheet on the counter once. Let them sit on the hot pan for 10 minutes until they are firm enough to move.
| Feature | Fresh Homemade | store-bought Dough |
|---|---|---|
| Flavor | Complex, dark, and buttery | Often overly sweet and artificial |
| Texture | Fudgy center with crisp edges | Usually uniform and soft baked |
| Quality | Real dark chocolate chunks | Mostly wax filled chips |
Solving Common Baking Hurdles
One of the biggest heartbreaks is watching your hard work turn into a single giant pancake in the oven. If your cookies are spreading too much, the culprit is usually the temperature of the butter or the lack of chilling time. When the butter is too warm, it melts before the structure of the cookie has a chance to set.
This is why that 30 minute chill is the most important step in the entire process. It's the difference between a thick, bakery style treat and a thin, greasy mess.
On the flip side, if your cookies aren't spreading at all and look like little chocolate balls, you might have packed your flour too tightly or over measured it. This is where the scale comes in handy.
If you’ve already baked a test batch and they’re too thick, try pressing the remaining dough balls down slightly with the palm of your hand before they go into the oven.
Why Your Cookies Turned Out Dry
If the texture is more like a muffin than a brownie, you've likely overbaked them or used too much flour. Remember, these cookies look "underdone" when they first come out. They should still be very soft in the center; the residual heat from the baking sheet finishes the job.
Fixing a Dull Flavor Profile
If the cookies taste "flat" or just like sugar, you might have skimped on the salt or the espresso powder. Chocolate needs acidity and salt to wake up its flavor receptors. Don't be afraid to sprinkle a tiny bit of flaky sea salt on top right after they come out of the oven it changes everything.
| Problem | Root Cause | Solution |
|---|---|---|
| Excessive Spreading | Butter was too warm or dough wasn't chilled | Chill dough for at least 30-60 mins before baking |
| Hard/Tough Texture | Overmixing the dough after adding flour | Fold in flour by hand until just combined |
| Burnt Bottoms | Dark baking sheets or oven rack too low | Use light colored pans and bake on the middle rack |
Common Mistakes Checklist
- ✓ Always use room temperature eggs to prevent the butter from curdling.
- ✓ Never skip sifting the cocoa powder; it's prone to lumps that won't disappear during baking.
- ✓ Ensure your baking soda is fresh (less than 6 months old) for a proper lift.
- ✓ Don't overcrowd the tray; 6-8 cookies per sheet is usually the sweet spot.
- ✓ Avoid using "low-fat" butter spreads; the water content will ruin the texture.
Adjusting for Different Batch Sizes
If you’re baking for a crowd or just for yourself, scaling this recipe is pretty straightforward. When cutting the recipe in half, the trickiest part is the egg. Since the recipe calls for one large egg, simply crack it into a small bowl, whisk it well, and use exactly half of the weight (usually about 25-27g).
For the other ingredients, a simple 50% reduction works perfectly. You might find they bake a minute faster in a smaller batch, so keep a close eye on the oven.
Scaling up is even easier. You can double every ingredient exactly as listed. I do recommend mixing in two separate batches if you have a smaller stand mixer, as the dough for 36 cookies gets very heavy and can strain the motor.
Also, if you’re doing a double batch, keep the second half of the dough in the fridge while the first batch bakes. Cold dough is the secret to consistent results every single time.
If you want X, do Y: If you want extra crispy edges, leave them in the oven for an additional 2 minutes and use only granulated sugar. If you want molten lava centers, underbake by 1 minute and eat them while they are still warm to the touch.
If you want a more sophisticated flavor, use a high percentage cacao bar (70% or higher) for the chopped chunks.
Debunking Common Cookie Legends
One of the biggest myths in baking is that you can't over cream your butter and sugar. In reality, if you whip it for 10 minutes, you’re incorporating too much air, which will cause the cookies to puff up and then collapse, creating a weird, wrinkled texture.
Three to four minutes is plenty to get that light, fluffy base without turning it into a sponge cake.
Another myth is that "Dutch process" and "Natural" cocoa are interchangeable. They are absolutely not. Natural cocoa is acidic, while Dutch process is neutral. If you use natural cocoa in this recipe without adjusting the leavening agent (you'd need to add some baking powder), the cookies will be flat, metallic tasting, and won't have that iconic dark mahogany color.
Stick to the Dutch process for that "Oreo dark" richness.
Finally, some people swear that you don't need to chill the dough. While you can bake them immediately, the flavor won't be as deep. Chilling allows the sugars to break down and the flour to fully hydrate, which creates a more complex, almost toffee like undertone.
It’s worth the 30 minute wait, trust me.
Storage and Zero Waste Strategies
To keep your cookies double choc at peak fudginess, store them in an airtight container at room temperature. They’ll stay soft for about 3 to 4 days. If they do start to get a little firm, pop one in the microwave for 10 seconds it revives the chocolate pools and softens the crumb instantly.
For long term storage, these cookies freeze beautifully. You can freeze the baked cookies for up to 3 months, or better yet, freeze the raw dough balls. When a craving hits, you can bake a single cookie directly from the freezer; just add 2 minutes to the baking time.
For a zero waste approach, don't toss those tiny crumbs at the bottom of the container! They are incredible when sprinkled over vanilla bean ice cream or folded into a morning bowl of yogurt. If you have leftover chocolate bar scraps that were too small to chunk, melt them down with a splash of cream to make a quick ganache dip. You can also look into other chocolate heavy treats if you have leftover cocoa, such as a gluten-free Dessert recipe that uses similar flavor profiles.
Professional Presentation Techniques
If you want these to look like they came from a high end boutique bakery, there are two simple tricks. First, the "Scoot." As soon as the cookies come out of the oven, take a large circular glass or a round cookie cutter and place it over a cookie.
Gently move the glass in a circular motion to "scoot" the edges of the cookie into a perfect circle. It smooths out any wonky edges and gives them that uniform, professional look.
Second, save a few of those 100g dark chocolate chunks to press into the tops of the dough balls right before they go into the oven. This ensures that the most prominent thing people see is a big, glistening pool of melted chocolate.
A final dusting of flaky sea salt (like Maldon) not only adds a beautiful sparkle but also provides a sophisticated contrast to the dark, sweet dough. They’ll look so good you won’t even want to share but you probably should.

Recipe FAQs
Should I use all Dutch process cocoa for the deepest color?
Yes, for the darkest, smoothest flavor. Dutch process cocoa is alkalized, which neutralizes acidity and yields a darker, more uniform color than natural cocoa.
How to stop these cookies from spreading too thin during baking?
Chill the dough for at least 30 minutes before scooping. Cold butter melts slower, allowing the flour and structure to set before the cookie spreads out completely.
Is it true I must use a chopped chocolate bar instead of just chips?
No, using both provides the best texture. Chips maintain shape, while the chopped bar melts into those highly desired, uneven pools of molten chocolate throughout the cookie.
How do I know when these fudgy cookies are perfectly done?
Bake until the edges are set and the tops look matte, usually around 10 minutes. The centers must look slightly underdone when you remove them, as they continue cooking on the hot pan.
Can I substitute the espresso powder if I don't have any?
No, avoid skipping it, but you can substitute the form. Espresso powder enhances chocolate perception without adding coffee flavor; use finely ground instant coffee if necessary.
How to achieve that perfectly round, professional cookie shape after baking?
Immediately after removing them, place a large round cutter over the cookie and gently scoot it in a circle. This "scooting" technique reforms the edges into a perfect circle before they fully cool.
What is the best way to store leftover double choc cookies to keep them soft?
Store airtight at room temperature for up to 4 days. If they firm up, a quick 10-second zap in the microwave revives the chewiness and melts the interior chocolate again.
Cookies Double Choc Fudgy Recipe
Ingredients:
Instructions:
Nutrition Facts:
| Calories | 210 kcal |
|---|---|
| Protein | 2.7 g |
| Fat | 10.7 g |
| Carbs | 27.7 g |
| Fiber | 1.4 g |
| Sugar | 15.9 g |
| Sodium | 130 mg |
