Creamy Peanut Butter Fudge Recipe
- Time: Active 5 minutes, Passive 65 minutes, Total 70 minutes
- Flavor/Texture Hook: Toasty, buttery, and incredibly velvety
- Perfect for: Holiday gifting, late night cravings, or beginner friendly hosting
- Creating the Most Velvety Peanut Butter Fudge
- Specifying the Ideal Texture for This Treat
- Selecting Elements for a Glossy Finish
- Gathering Your Essential Confectionery Tools
- Executing the Traditional Stove Top Method
- Solving Common Issues with Your Batch
- Customizing Your Squares with Creative Additions
- Keeping Your Fudge Fresh and Luscious
- Finding the Best Accompaniments for Sweets
- Debunking Common Kitchen Myths
- Recipe FAQs
- 📝 Recipe Card
Creating the Most Velvety Peanut Butter Fudge
Right then, let's talk about that specific kitchen aroma. You know the one the scent of butter and brown sugar melding into something that smells like a warm, sugary hug? Last Christmas, I tried to get all fancy with a temperamental chocolate soufflé that collapsed into a sad, gooey puddle.
Honestly, I should have just stuck to what I knew worked. I pulled out the peanut butter, started the timer, and within minutes, the kitchen smelled like the best kind of trouble.
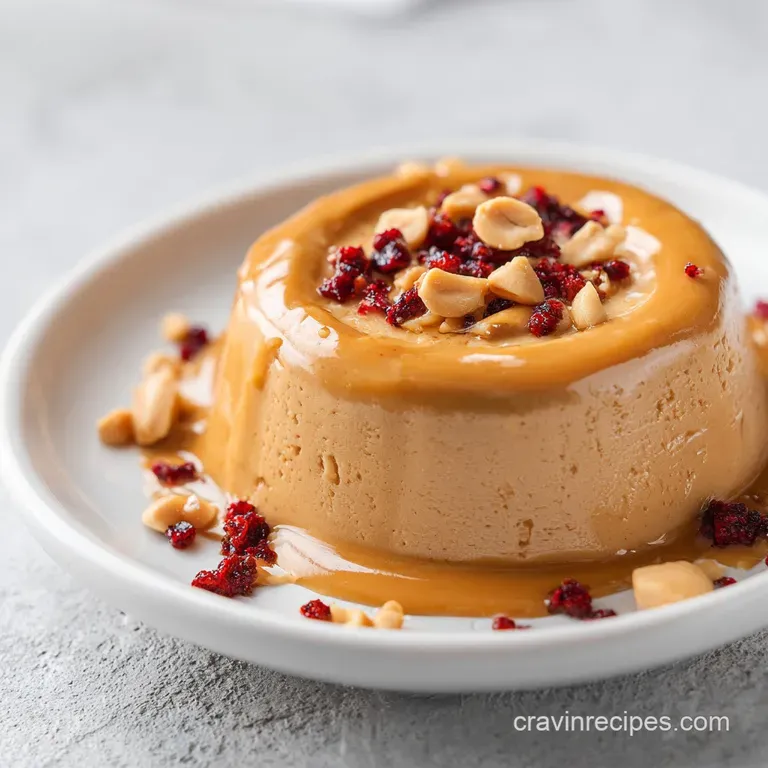
There is something sublime about the contrast between the deep, toasty notes of the sugar and that sharp hit of flaky salt on top. This isn't just a sweet square; it is a full on sensory experience that makes you want to hide the container from everyone else in the house.
We have all been there, hovering over a bubbling pot, praying it sets. Trust me, follow these steps and we'll nail that decadent texture every single time.
This recipe for Peanut Butter Fudge is my absolute go to because it skips the fussy marshmallow fluff and corn syrup. Instead, we are leaning into the natural fats of the butter and the protein in the peanut butter to create a structure that is firm enough to slice but soft enough to dissolve on the tongue.
It is essentially the "little black dress" of the dessert world simple, elegant, and always a hit.
Specifying the Ideal Texture for This Treat
The Physics of the Rolling Boil: Boiling the sugar and milk for exactly two minutes ensures the sucrose crystals dissolve and then reform into a fine, microscopic lattice.
This specific timing creates a "soft ball" stage without the need for a candy thermometer, resulting in a square that holds its shape but yields to a fork.
- Thermal Stability: Using whole milk provides enough fat to coat the sugar crystals, preventing them from bonding too tightly and turning into a gritty rock.
- Emulsification: The residual heat from the sugar mixture melts the peanut butter, allowing the oils and solids to integrate into a singular, luscious suspension.
- Crystalline Structure: Light brown sugar adds a hint of moisture through molasses, keeping the crumb supple rather than brittle.
| Batch Size | Component Ratios | Pan Dimensions | Total Setting Time |
|---|---|---|---|
| 24 Servings | Half all ingredients | 20x10 cm loaf tin | 45 minutes |
| 48 Servings | Standard recipe | 20x20 cm square pan | 65 minutes |
| 96 Servings | Double all ingredients | Two 20x20 cm pans | 90 minutes |
Similar to the technique I use in my Peanut Butter Balls recipe, the key is managing how the fats interact with the sweeteners. If you rush the cooling process, you'll lose that signature silkiness.
Selecting Elements for a Glossy Finish
To get that professional grade sheen, we need to be picky about our components. Don't even think about using "natural" peanut butter where the oil separates at the top you'll end up with a greasy mess that refuses to set. We want the stabilized stuff that stays creamy at room temperature.
- 1/2 cup (115g) Unsalted Butter: Provides the silky mouthfeel and rich fat base. Why this? Salted butter varies too much in sodium; unsalted keeps you in control.
- 2 1/4 cups (450g) Light Brown Sugar: Adds sweetness and a subtle caramel undertone. Why this? The molasses content ensures the fudge remains moist and soft.
- 1/2 cup (120ml) Whole Milk: The liquid vehicle that dissolves the sugar. Why this? Lower fat milks can lead to a watery, weak set.
- 1 cup (250g) Creamy Peanut Butter: The star of the show for flavor and structure.
- 1 tsp (5ml) Pure Vanilla Extract: Rounds out the sugar notes.
- 1/4 tsp Flaky Sea Salt: The essential counterpoint to the sugar.
| Ingredient | Science Role | Pro Secret |
|---|---|---|
| Light Brown Sugar | Moisture/Bulking | Sift it first to avoid stubborn "sugar rocks" in the boil. |
| Creamy Peanut Butter | Structural Fat | Use a room temperature jar for faster emulsification. |
| Whole Milk | Solvent | Don't swap for skim; the fat prevents a grainy texture. |
While this is a classic approach, it shares some dna with a traditional Fudge Recipe, though the peanut butter adds a level of protein that makes the setting process much more forgiving.
Gathering Your Essential Confectionery Tools
You don't need a high tech laboratory, but a few specific tools will save you from a kitchen disaster. A heavy bottomed saucepan is non negotiable. Thin pans create hot spots that will scorch your milk and ruin the batch before it even boils.
I also swear by a wooden spoon. Metal spoons conduct heat too quickly and can actually cause the sugar to crystallize prematurely on the handle. And please, line your pan with parchment paper.
Leaving a little "overhang" or a sling on the sides allows you to lift the entire block out for clean, sharp slicing once it is firm.
Chef's Tip: Freeze your butter for 10 minutes before adding it to the pot. This slight delay in melting allows the milk and sugar to warm up more evenly, preventing the butter from separating early in the process.
Executing the Traditional Stove Top Method
1. Prepare the Foundation
Line a 20x20 cm square baking tin with parchment paper. Leave a 2 cm overhang on two sides so you can lift the fudge out later.
2. Combine the Liquids
Place the 115g unsalted butter, 450g light brown sugar, and 120ml whole milk in your saucepan. Heat over medium high until the butter is fully melted and the sugar looks wet.
3. Achieve the Rolling Boil
Bring the mixture to a vigorous, rolling boil. Note: A rolling boil is one that doesn't disappear when you stir it.
4. Time the Set
Set a timer for exactly 2 minutes. Boil the mixture without stirring until the surface is covered in large, glassy bubbles.
5. Remove from Heat
Take the pan off the burner immediately. Note: Overcooking at this stage will make the fudge crumbly rather than creamy.
6. The Creamy Integration
Stir in the 250g creamy peanut butter and 5ml vanilla extract. Vigorously whisk until the mixture looks glossy and smooth.
7. Add the Crunch
Immediately pour the molten mixture into your prepared pan. Sprinkle the 1/4 tsp flaky sea salt across the top until the surface is lightly speckled.
8. The Patience Phase
Let the pan sit at room temperature for at least 15 minutes. Then, transfer it to the fridge for 50 minutes until the center is firm to the touch.
9. Slice and Serve
Lift the fudge out using the parchment sling. Use a sharp, warm knife to cut into 48 even squares until you see clean, sharp edges.
Solving Common Issues with Your Batch
Even with the best intentions, sugar can be a fickle beast. The most common heartbreak is "grainy" fudge, which usually happens if you stir the pot too much while it is boiling or if sugar crystals from the side of the pan fall back into the mix.
Why Your Fudge Is Grainy
This happens when large sugar crystals form and "seed" the rest of the batch. If you stir during the boil, you encourage these crystals to bond. To prevent this, let the boil happen undisturbed, and if you see crystals on the pan walls, use a wet pastry brush to wash them down into the liquid.
Why Your Fudge Didn't Set
If your squares are more like a thick glaze than a solid candy, you likely didn't reach a high enough temperature. This often happens if the "rolling boil" was just a few lazy bubbles. It needs to be a mountain of froth that stays active even if you poke it.
| Problem | Root Cause | Solution |
|---|---|---|
| Gritty Texture | Stirred during boil | Let it boil undisturbed for the full 2 minutes. |
| Greasy Surface | Used "Natural" PB | Stick to stabilized brands for the correct fat ratio. |
| Won't Harden | Under boiled | Boil for an extra 30 seconds if your stove runs cool. |
Common Mistakes Checklist ✓ Never use a lid on the saucepan; steam needs to escape for the sugar to concentrate. ✓ Ensure your measuring cups for sugar are packed tightly for accuracy. ✓ Don't skip the vanilla it acts as a flavor bridge between the salt and the sugar.
✓ Avoid making fudge on a very humid or rainy day, as sugar absorbs moisture from the air.
Customizing Your Squares with Creative Additions
Once you've mastered the base, you can start playing with the flavor profile. Personally, I love a bit of texture. Stirring in 50g of chopped honey roasted peanuts right before pouring adds a "shatter" effect that contrasts beautifully with the velvety base.
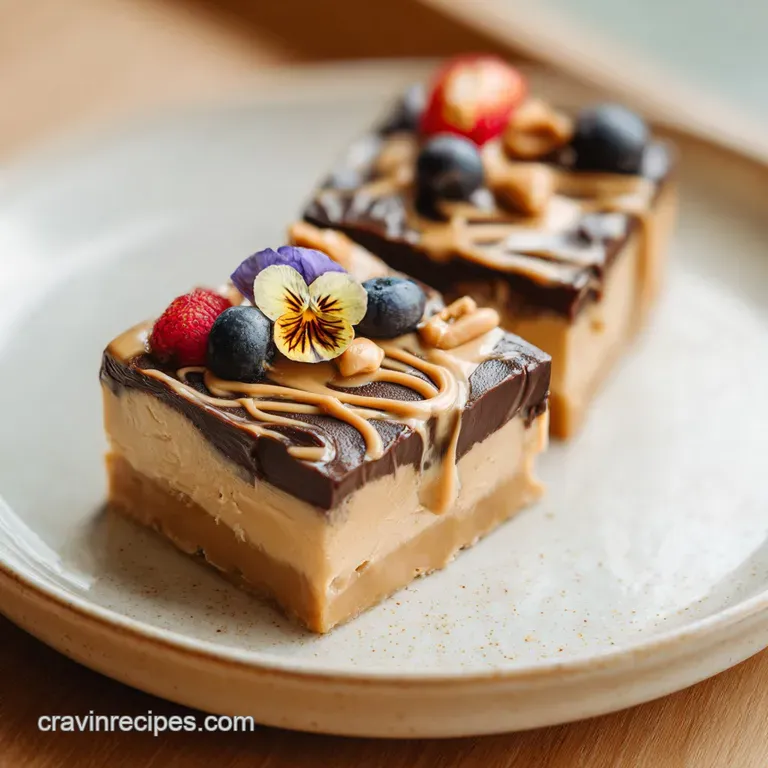
1. The Dark Chocolate Swirl
Melt 60g of dark chocolate and drizzle it over the fudge once it is in the pan. Use a toothpick to swirl it through the peanut butter base. The bitterness of the cocoa cuts through the sugar brilliantly.
2. The Honey Roasted Variation
Swap the creamy peanut butter for a crunchy variety and add a tablespoon of honey to the boil. It creates a deeper, floral sweetness that feels very high end.
3. The Salty Crunch Twist
Top the fudge with crushed pretzels or even a few potato chip crumbs. The saltiness amplifies the peanut flavor and provides a satisfying crunch that keeps the fudge from feeling one dimensional.
| Original Ingredient | Substitute | Why It Works |
|---|---|---|
| Whole Milk | Heavy Cream | Creates an even richer, more truffle like texture. |
| Light Brown Sugar | Dark Brown Sugar | Adds a deeper molasses flavor and darker color. |
| Creamy PB | SunButter | Great for nut free kitchens; has a slightly earthier taste. |
If you find yourself with leftover peanut butter, it's the perfect excuse to whip up a batch of my No Bake Peanut recipe for a slightly "healthier" snack during the week.
Keeping Your Fudge Fresh and Luscious
Storage is where many people go wrong. If you leave fudge out on the counter uncovered, it will lose its moisture and turn into a dry, chalky brick within 48 hours. Sugar is hygroscopic, meaning it draws in or loses moisture depending on the environment.
Fridge Storage: Keep your squares in an airtight container with sheets of parchment paper between layers. It will stay luscious for up to 2 weeks.
Freezing Guidelines: This easy peanut butter fudge freezes remarkably well. Wrap the entire block (or individual squares) in plastic wrap, then place in a freezer safe bag. It will last for 3 months. To eat, thaw in the fridge overnight.
Don't thaw at room temperature or you might get condensation "sweat" on the surface.
Zero Waste Tip: If you end up with scraps or crumbs from slicing, don't toss them! Toss those bits into a blender with vanilla ice cream for the most incredible peanut butter milkshake you've ever had. Or, melt the scraps down and drizzle them over popcorn for a sweet and salty movie night snack.
Finding the Best Accompaniments for Sweets
When you're serving something this rich, you need a drink that can stand up to it. A cold glass of milk is the classic choice, but a dark, bitter espresso is actually my favorite pairing. The acidity of the coffee cleanses the palate between bites of the dense, sweet fudge.
For a dessert platter, I like to serve these squares alongside something tart, like fresh raspberries or a sharp green apple slice. The fruit provides a much needed brightness that prevents "palate fatigue" from all that buttery goodness.
- - Drink
- Intense Espresso or Cold Brew.
- - Fruit
- Tart Green Apple or Fresh Raspberries.
- - Contrast
- Sharp Cheddar Cheese (Trust me on this one!).
Debunking Common Kitchen Myths
Myth: You must use a candy thermometer for fudge. Truth: While thermometers provide precision, the "two minute boil" method is a reliable shortcut for this specific fat heavy recipe.
The peanut butter acts as a stabilizer that a traditional chocolate fudge lacks, making it much more forgiving of slight temperature variations.
Myth: Natural peanut butter is better for baking. Truth: In the case of fudge, "natural" oils are the enemy. The separation that happens in organic jars will prevent the fudge from emulsifying, often leaving you with a layer of oil sitting on top of a gritty sugar base.
Stick to the processed, creamy brands for this one!
Myth: Fudge needs to be stirred constantly while it sets. Truth: Stirring while the fudge is cooling actually encourages the formation of large sugar crystals, which leads to graininess. Once you've mixed in your peanut butter and vanilla, pour it and leave it alone. Patience is your best friend here.
This homemade peanut butter fudge recipe is honestly the most rewarding 5 minutes of work you'll do all week. It's rich, it's reliable, and it makes the house smell like a professional confectionery. Just remember: watch that timer, use the good butter, and don't skimp on the salt!

Recipe FAQs
How to make really easy fudge?
Boil whole milk, butter, and light brown sugar for exactly two minutes. Vigorously stir in creamy peanut butter off the heat until glossy, then pour into a lined pan and let it set undisturbed for at least an hour.
What are the three ingredients for fudge?
Sugar, butter, and a liquid binding agent are the core components. For this recipe, the essential three are light brown sugar, unsalted butter, and whole milk, supplemented by the structural fat of peanut butter.
Do you have to have vanilla for peanut butter fudge?
No, vanilla is not strictly necessary for the structure to set correctly. It serves to round out the intense sweetness of the sugar and deepen the overall flavor profile, but the fudge will set without it.
What are the common mistakes when making fudge?
Stirring the mixture during the rolling boil is the primary mistake leading to graininess. Also, under boiling prevents the sugar from reaching the soft ball stage needed for a firm, creamy set.
Is it true I can substitute skim milk for whole milk?
False. Do not substitute skim milk for the whole milk in this recipe. Whole milk contains sufficient fat to coat the sugar crystals, preventing a grainy texture; skim milk will result in a watery or weak set.
How do I achieve a glossy, professional finish on my fudge squares?
Vigorously whisk the peanut butter into the hot sugar mixture until the texture becomes entirely glossy and smooth before pouring. For an even better contrast, add flaky sea salt immediately after pouring, while the surface is still molten.
How do I ensure the fudge doesn't turn out gritty?
Let the mixture boil undisturbed for the full two minutes without stirring. If you enjoyed mastering the control of heat transfer here, you can apply the same patience to baking our Moist Banana Bread recipe for perfect crumb structure.
Creamy Peanut Butter Fudge

Ingredients:
Instructions:
Nutrition Facts:
| Calories | 88 calories |
|---|---|
| Protein | 1.5 g |
| Fat | 4.8 g |
| Carbs | 10.6 g |
| Fiber | 0.3 g |
| Sugar | 10.1 g |
| Sodium | 42 mg |
