Easy Fudge Recipe: Silky and Dense
- Time: Active 5 minutes, Passive 5 minutes, Total 10 minutes
- Flavor/Texture Hook: Intensely chocolatey with a silky, dense bite
- Perfect for: Holiday gifting, late night cravings, or beginner bakers
- The Easiest Rich Chocolate Fudge Recipe Ever
- Layering Flavors for Maximum Decadence
- Fudge Texture and Timing Benchmarks
- Everything in Your Pantry Now
- Tools for a Silky Finish
- Step by Step Melting Magic
- Solving Common Fudge Fails Fast
- Fun Twists on the Classic
- Keeping Your Fudge Fresh Longer
- Perfect Slices for Gifting Success
- Myths About Fudge Making
- Recipe FAQs
- 📝 Recipe Card
The Easiest Rich Chocolate Fudge Recipe Ever
You know that specific, heavenly aroma that hits you when you walk into an old-fashioned candy shop? That deep, buttery scent of melting chocolate that makes your mouth water instantly? That is exactly what your kitchen is about to smell like.
I remember my first attempt at traditional fudge involved a heavy copper pot and a candy thermometer that I clearly didn't know how to read. I ended up with a grainy, crumbly mess that looked more like chocolate flavored sand than the silky confection I was dreaming of.
But then, I discovered the absolute magic of this easy fudge recipe. It is a total game changer for anyone who wants high end results without the risk of sugar crystallization. We are talking about a texture that is so smooth it practically slides off the knife, with a deep cocoa flavor that isn't masked by cloying sweetness.
Whether you are prepping for a bake sale or just need a decadent little treat to hide in the back of the fridge, this is the one you will come back to again and again.
We are going to layer in some secret ingredients, like a pinch of espresso powder and flaky sea salt, to make sure every bite feels sophisticated. Don't worry about complicated techniques or fancy equipment. We are keeping things simple, indulgent, and completely foolproof.
Let's get into the details so you can start snacking on these velvety squares as soon as possible.
Layering Flavors for Maximum Decadence
The Science of Smooth
The Emulsion Secret: Using sweetened condensed milk provides a stable, pre dissolved sugar base that prevents the gritty crystallization often found in boiled sugar recipes.
Fat Stabilization: The addition of room temperature butter introduces a different type of fat molecule that interferes with chocolate's tendency to set too hard, ensuring a fudgy rather than brittle snap.
Solubility Enhancement: Espresso powder contains compounds that physically unlock our taste buds' ability to perceive the darker, more complex notes of the cacao bean.
Osmotic Balance: A tiny amount of salt suppresses bitterness while heightening our perception of sweetness, creating a more rounded and satisfying flavor profile.
| Preparation Method | Total Time | Final Texture | Best For |
|---|---|---|---|
| Stovetop (Double Boiler) | 10 minutes | Maximum Gloss | Precision control and shine |
| Microwave (Burt style) | 4 minutes | Denser Set | Speed and minimal cleanup |
| Slow Cooker | 1 hours | Extra Soft | Large batches for parties |
Whether you choose the stovetop or the microwave, the key is keeping the heat gentle. High heat is the enemy of silkiness, as it can cause the cocoa butter in your chocolate chips to separate, leaving you with an oily puddle.
Fudge Texture and Timing Benchmarks
The Anatomy of Indulgence
| Ingredient | Science Role | Pro Secret |
|---|---|---|
| Dark Chocolate Chips | Structural Base | Use chips with 60% cacao for a sophisticated, less sugary bite. |
| Sweetened Condensed Milk | Moisture & Sugar | This acts as the binder that keeps the fudge pliable and prevents "graininess." |
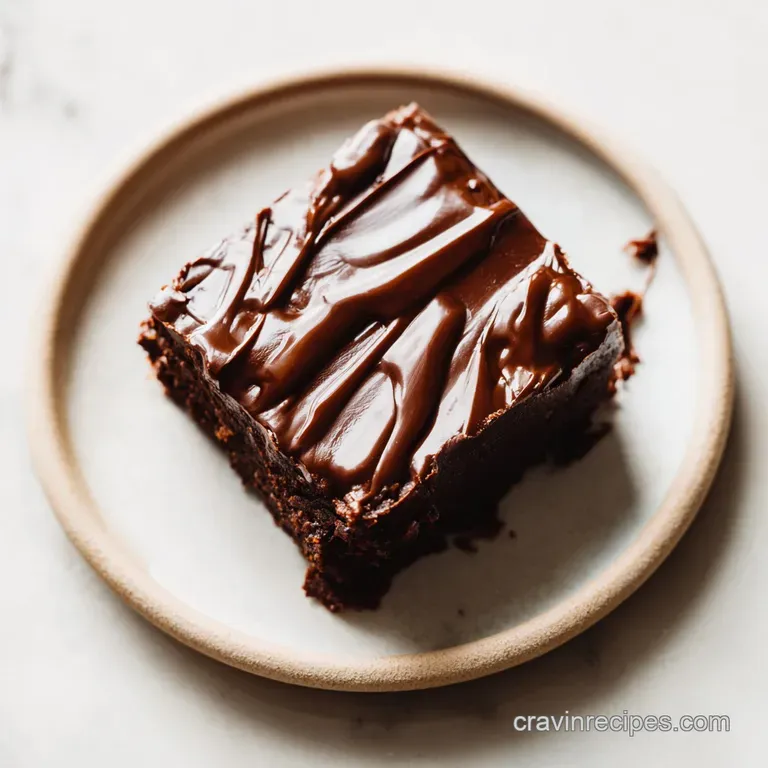
| Unsalted Butter | Mouthfeel | Adding butter at the very end creates a professional, high gloss sheen on the surface. |
When you select your chocolate, try to avoid the generic "milk chocolate" bags if you want that professional finish. The higher cacao content in dark chocolate chips provides the structural integrity needed for a clean slice. If you are a fan of deep chocolate notes, you might also enjoy the intensity of a Fudgy Brownies recipe which uses similar flavor principles to achieve that dense, rich crumb we all crave.
Everything in Your Pantry Now
To make this easy fudge recipe, you only need a handful of high-quality components. I’ve included some swaps just in case your cupboards are looking a little bare.
- 12 oz high-quality dark chocolate chips (at least 60% cacao)
- Substitute: Semisweet chocolate chips. Why this? Maintains structure while being slightly sweeter.
- 14 oz sweetened condensed milk
- Substitute: Coconut condensed milk. Why this? Works for dairy-free needs but adds a coconut hint.
- 1 tbsp unsalted butter, room temperature
- Substitute: Coconut oil (solid). Why this? Provides the necessary fat for a glossy finish.
- 1/2 tsp espresso powder
- Substitute: Double the vanilla extract. Why this? Vanilla rounds out the sweetness if coffee isn't your thing.
- 1 tsp pure vanilla extract
- Substitute: Almond extract (use only 1/4 tsp). Why this? Adds a cherry like floral note to the dark chocolate.
- 1/4 tsp flaky sea salt
- Substitute: Fine table salt (use 1/8 tsp). Why this? Essential for cutting through the richness of the milk.
Chef Tip: Freeze your chocolate chips for 10 minutes before starting. This slight temperature drop prevents them from melting instantly when they hit the warm milk, giving you more control over the emulsion process.
Tools for a Silky Finish
Having the right gear makes the process move smoothly. You don't need anything fancy, but a few specific items will make your life much easier. First, grab an 8x8 inch square baking pan. If you use a larger pan, your fudge will be thin; a smaller pan results in thick, chunky blocks.
You will also need parchment paper. This is non negotiable! Trying to dig fudge out of a greased pan is a nightmare. Leave an overhang of paper on two sides so you can lift the entire block out once it has set.
A heavy bottomed saucepan is best for the stovetop method to prevent scorching, and a silicone spatula is perfect for scraping every last drop of chocolatey goodness out of the pot.
step-by-step Melting Magic
- Line an 8x8 inch pan with parchment paper. Note: Leave "wings" of paper hanging over the edges for easy removal.
- Combine the 12 oz dark chocolate chips and 14 oz sweetened condensed milk in a saucepan.
- Add the 1 tbsp unsalted butter. Note: Room temperature butter incorporates much faster than cold butter.
- Set the heat to low. Cook 5 minutes while stirring constantly until the mixture is glossy and thick.
- Remove the pan from the heat immediately.
- Whisk in the 1/2 tsp espresso powder and 1 tsp vanilla extract. Stir until the aroma is fragrant and the powder disappears.
- Fold in the 1/4 tsp flaky sea salt gently.
- Pour the mixture into your prepared pan. Spread with a spatula until the surface is level and smooth.
- Tap the pan firmly on the counter three times. Note: This releases trapped air bubbles that cause "holes" in your fudge.
- Chill in the refrigerator for at least 2 hours. Wait until the center feels firm and cold to the touch.
For another no bake treat that pairs beautifully with this chocolate base, you should definitely check out this Peanut Butter Balls recipe. They share that same melt in-your mouth quality and make for a stunning dessert platter when served together.
Solving Common Fudge Fails Fast
Why Your Fudge Feels Gritty
Even with condensed milk, you can occasionally get a grainy texture if the heat was too high. This happens when the sugars in the milk begin to caramelize and clump together. Always keep your burner on the lowest setting. It might take an extra minute, but the velvety results are worth it.
Why Your Fudge Is Oily
If you see a layer of oil sitting on top of your fudge, the chocolate has "seized" or separated. This usually occurs if a drop of water gets into the pot or if the chocolate was overheated. You can sometimes save this by vigorously whisking in a teaspoon of warm milk until it re emulsifies.
| Problem | Root Cause | Solution |
|---|---|---|
| Sticky or Soft | Under chilled or too much liquid | Return to fridge for 4 hours; or use more chocolate chips next time. |
| Dull Surface | Added butter too early | Stir in the butter at the very end after removing from heat. |
| Cracking when cut | Chocolate was too cold | Let the fudge sit at room temperature for 10 minutes before slicing. |
Common Mistakes Checklist
- ✓ Use a dry spatula and pot (even a drop of water can ruin the chocolate).
- ✓ Don't boil the mixture; low heat is your best friend here.
- ✓ Always use parchment paper instead of just greasing the pan.
- ✓ Let the fudge set completely in the fridge before attempting to slice it.
- ✓ Wipe your knife with a warm, damp cloth between every single cut for clean edges.
Fun Twists on the Classic
The Nutty Crunch Variation
If you love a bit of texture, fold in 1/2 cup of toasted walnuts or pecans right before pouring the mixture into the pan. The bitterness of the toasted nuts contrasts perfectly with the sweet, dark chocolate. You can also try adding crushed pretzels for a salty sweet combo that is totally addictive.
The "Easy Fudge Recipe Without Condensed Milk" Swap
If you don't have condensed milk on hand, you can make a version using heavy cream and sugar. You will need to simmer 1 cup of heavy cream with 1 cup of sugar and a pinch of salt until it reduces by about a third, then proceed with adding your chocolate.
It takes longer but results in an even richer, truffle like consistency.
| Premium Add in | Budget Alternative | Flavor Impact | Savings |
|---|---|---|---|
| Madagascar Vanilla Bean | Pure Vanilla Extract | Subtle floral notes vs standard sweetness | Save $10-15 |
| Valrhona Chocolate | Store brand Dark Chips | Higher cocoa butter content vs more sugar | Save $8-12 |
| Maldon Sea Salt | Fine Kosher Salt | Dramatic crunch vs even seasoning | Save $5 |
Keeping Your Fudge Fresh Longer
One of the best things about this easy fudge recipe is how well it keeps. You can store these squares in an airtight container in the refrigerator for up to 2 weeks. Make sure to place a piece of parchment paper between layers so they don't stick together.
If you want to keep them longer, fudge actually freezes beautifully. Wrap the entire block (or individual squares) tightly in plastic wrap and then foil. It will stay fresh for up to 3 months. To serve, just let it thaw in the fridge overnight.
To avoid waste, save any "scraps" or crumbs from when you trimmed the edges. These can be melted down and drizzled over ice cream, or even stirred into your morning coffee for a DIY mocha. If you have extra sweetened condensed milk left over, it's the perfect base for a Pancake Mix Recipe topping or a quick caramel sauce.
Perfect Slices for Gifting Success
The secret to those sharp, professional looking squares you see in candy shops? It's all about temperature and the knife. I used to just hack away at the block with a cold knife, which leads to jagged edges and碎裂 (shattering) of the chocolate.
Now, I always let the fudge sit on the counter for about 10 minutes to take the chill off.
Fill a tall glass with hot water. Dip your sharpest chef's knife into the water, wipe it dry with a clean towel, and make one long, smooth slice. Repeat the dipping and wiping for every single cut. It sounds tedious, but the result is a perfectly smooth, glassy edge that looks like it came from a professional kitchen.
Myths About Fudge Making
Some people insist you need to "beat" the fudge until it loses its gloss to ensure it sets. This is true for old-fashioned sugar and water fudge, but for this easy fudge recipe, it's a myth. Beating this mixture will actually introduce air bubbles and make it look dull.
You want to stir just enough to combine the ingredients into a smooth emulsion.
Another common misconception is that you can't make fudge on a rainy day because of the humidity. While high humidity can wreak havoc on traditional boiled sugar recipes by preventing them from reaching the right temperature, this condensed milk method is much more stable.
The sugar is already dissolved, so the moisture in the air won't affect the final set. You can make this treat rain or shine without any worries.

Recipe FAQs
How to make really easy fudge?
Melt chocolate, condensed milk, and butter gently over low heat. Stir constantly until glossy, remove from heat, mix in flavorings, and chill until firm. This no-bake technique bypasses the need for a candy thermometer entirely.
What are the three essential ingredients for this easy fudge?
Chocolate chips, sweetened condensed milk, and butter. These three form the core structure and texture, with the milk providing the dissolved sugar base for smooth results.
What is the secret to making good, non-grainy fudge?
Avoid high heat and never let water splash into the melting mixture. Overheating causes the sugars to crystallize, resulting in a gritty texture instead of the desired silkiness.
Can you make fudge with just condensed milk and chocolate?
No, while you can combine them, adding butter is crucial for the best texture. The butter adds necessary fat content, which ensures the fudge is melt-in-your mouth tender rather than hard and brittle after chilling.
Is it true you must use a candy thermometer for easy fudge?
No, this is a common misconception when using sweetened condensed milk. This particular recipe relies on the stability of the pre-sweetened milk, which lets you rely on visual cues like glossiness instead of precise temperature readings.
How do I get perfectly clean, sharp cuts when slicing the fudge?
Dip a sharp knife into hot water, wipe it dry, and slice through the chilled fudge. Wipe and reheat the knife between every cut to ensure a smooth, non-stick experience, similar to how you would slice a very dense Chocolate Cupcakes with Chocolate recipe base for clean presentation.
What if my fudge mixture looks oily after stirring?
The chocolate has separated, usually because of too much heat or a drop of water entering the pan. Try whisking in one teaspoon of warm milk or cream vigorously to encourage the fat molecules to re-emulsify back into a stable mixture.
Easy Fudge Recipe
Ingredients:
Instructions:
Nutrition Facts:
| Calories | 138 kcal |
|---|---|
| Protein | 2.1 g |
| Fat | 7.1 g |
| Carbs | 16.4 g |
| Fiber | 1.2 g |
| Sugar | 14.2 g |
| Sodium | 32 mg |
