Homemade Chocolate Pie: Creamy and Rich
- Time: Active 15 minutes, Passive 10 minutes, Total 25 minutes (plus chilling)
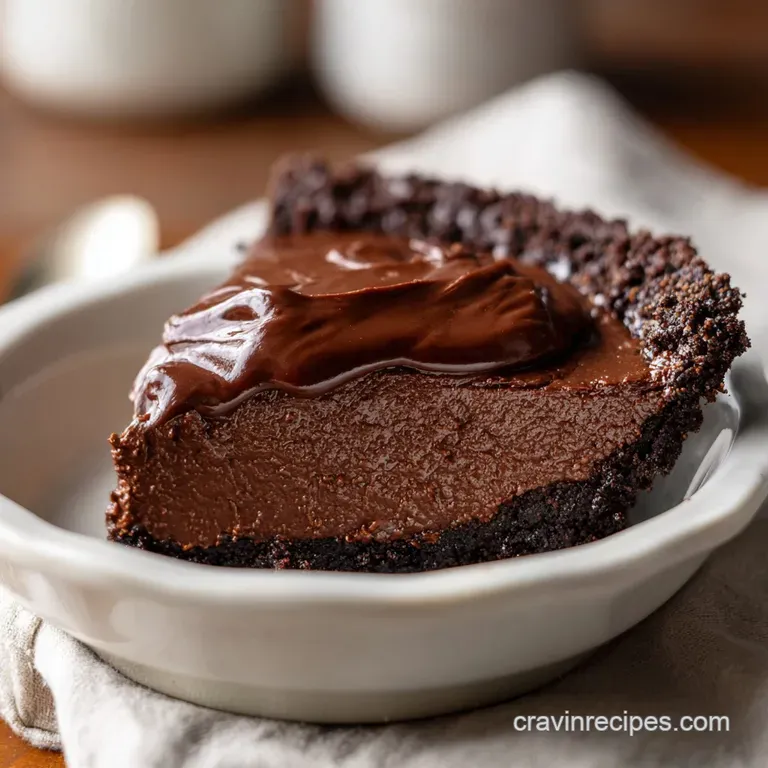
- Flavor/Texture Hook: Silky, deep chocolate custard with a buttery, shatter crisp crust
- Perfect for: Sunday family dinners, holiday dessert tables, or beginner bakers wanting a "wow" result
- Achieving the Perfect Set Without the Chocolate Soup Disaster
- The Secret to a Velvety Finish That Holds Its Shape
- Precision Metrics for This Foolproof Dessert
- A Deep Dive Into Our Chocolate Component Analysis
- Everything You Need for a Flawless Chocolate Filling
- The Arsenal of Tools for a Smooth Custard
- Step-by-Step Instructions for the Ultimate Chocolate Pie
- Solving Your Custard Challenges Like a Pro
- Adjusting the Volume for Any Occasion
- Debunking Traditional Custard Myths
- Preservation Secrets for the Best Leftovers
- Presentation Styles for a Visual Wow Factor
- Recipe FAQs
- 📝 Recipe Card
Achieving the Perfect Set Without the Chocolate Soup Disaster
We have all been there, standing in the kitchen with a plate of what was supposed to be a gorgeous dessert, only to watch it slump into a sad, brown puddle the moment the knife cuts through. The "chocolate soup" syndrome is the ultimate heartbreak for any home cook.
I remember one specific Thanksgiving where I rushed the cooling process on an old fashioned chocolate pie recipe, and by the time it hit the table, it looked more like a bowl of melted ice cream than a masterpiece.
It was a watery, weepy mess because the starch hadn't fully hydrated, and the eggs had curdled from the heat.
The struggle is real when you're trying to find a chocolate pie quick and easy enough for a weeknight but decadent enough for a party. Most people fail because they either undercook the cornstarch, leaving it with a chalky taste, or they overcook the eggs until they turn into sweet scrambled bits.
This recipe is the targeted fix for those exact frustrations. We are going to walk through the sensory cues the way the whisk feels heavier as the molecules bond and the specific aroma of the cocoa blooming to ensure you never serve a "soup pie" again.
Trust me, once you master the art of the 10 minute stovetop custard, you’ll realize that those boxed puddings never stood a chance. We are aiming for a texture that is dense yet light, like a chocolate cloud that actually holds its shape.
We’ll use a deep dish crust to maximize the filling to crunch ratio, ensuring every bite is a balanced symphony of sugar, butter, and dark, brooding cocoa. Let's get into why this method actually works while others fail.
The Secret to a Velvety Finish That Holds Its Shape
Science is our best friend in the kitchen, especially when we are dealing with custards. This chocolate pie quick and easy method relies on two specific mechanisms to give you that professional "stand up" slice.
- Starch Gelatinization: The cornstarch needs to hit a specific bubbling point to fully expand its molecules and trap the liquid. If you stop whisking the moment it gets thick, it will lose its structure as it cools; you must see those big, lazy bubbles to ensure a permanent set.
- Protein Denaturation: By tempering the egg yolks, we slowly introduce heat so the proteins uncoil and bond gently with the milk. This creates a matrix that supports the chocolate without turning rubbery or grainy.
- Fat Emulsification: Adding chilled butter and chopped chocolate at the very end, off the heat, allows the fats to stir in gently without breaking. This creates that glossy, "mirror" finish that looks so indulgent.
- Cocoa Hydration: Whisking the cocoa powder into the sugar while dry prevents those pesky little pockets of dry powder from forming later. The sugar crystals act like tiny scrubbers, breaking down the cocoa clumps before the milk even hits the pan.
Cook Method Comparison: Stovetop vs Oven Custard
| Method | Time | Texture | Best For |
|---|---|---|---|
| Stovetop Custard | 10 minutes | Silky, buttery, velvety | Quick weeknight cravings and silky mouthfeel |
| Oven Baked Pie | 45 minutes | Denser, slightly cake like | Traditionalists who want a "set" top skin |
| No Bake/Instant | 5 minutes | Airy, mousse like | Maximum speed but lacks depth and stability |
Choosing the stovetop method gives us total control over the heat, ensuring the eggs don't overcook while the starch gets exactly what it needs to stabilize.
Precision Metrics for This Foolproof Dessert
When we talk about an easy chocolate pie recipe, we need to be precise so there is no guesswork involved. I’ve made this in tiny apartments and professional kitchens, and these specs are the "golden rules" for success.
| Thickness | Internal Temp | Rest Time | Visual Cue |
|---|---|---|---|
| 1.5 inches | 175°F (Custard) | 4 hours (Minimum) | Thick "ribbons" trail from the whisk |
| 2 inches | 185°F (Custard) | 6 hours | Filling stays firm when the pan is tilted |
| 0.5 inches | 165°F (Custard) | 2 hours | Surface is glossy but slightly wobbly |
Getting the temperature right is the difference between a pie that cuts like butter and one that runs away from the crust. 175°F is that sweet spot where the cornstarch is active but the eggs are still creamy.
A Deep Dive Into Our Chocolate Component Analysis
Selecting the right ingredients is half the battle. You can’t just grab any cocoa powder and expect that deep, fudgy flavor we’re after.
| Component | Science Role | Pro Secret |
|---|---|---|
| Dutch process Cocoa | Neutralized acidity for a smoother, darker profile. | Sift it with the sugar to prevent "cocoa boulders" in the finished filling. |
| Cornstarch | The primary structural "skeleton" of the pie. | Never add it to hot liquid; it must start cold to hydrate properly. |
| Egg Yolks | Provide richness and a "short" texture that melts on the tongue. | Use large, room temperature yolks for the easiest tempering process. |
| Semi sweet Chocolate | Adds actual cocoa butter for a luxurious, firm set. | Finely chop the chocolate so it melts instantly from the residual heat. |
Most quick and easy chocolate cream pie recipes skip the actual chopped chocolate and rely solely on powder. That is a mistake. The cocoa butter in the solid chocolate is what provides that "snap" and richness that powder alone can't replicate.
Everything You Need for a Flawless Chocolate Filling
Before we start whisking, gather everything on your counter. This is a fast paced process once the heat is on, so having your "mise en place" ready is non negotiable.
- 1 (9 inch) pre baked deep dish pie crust: Why this? A deep dish provides the perfect volume for this rich, decadent custard amount.
- 3/4 cup (150g) granulated sugar: Why this? Provides sweetness and helps inhibit over coagulation of the egg proteins.
- 1/3 cup (30g) unsweetened Dutch process cocoa powder: Why this? Dutch process is less acidic and gives that iconic dark, "Oreo like" color.
- 1/4 cup (32g) cornstarch: Why this? This is our primary stabilizer; it ensures the pie is sliceable.
- 1/4 tsp (1.5g) fine sea salt: Why this? Salt cuts through the sugar and makes the chocolate flavor pop.
- 3 cups (710ml) whole milk: Why this? The fat in whole milk is essential for a creamy, indulgent mouthfeel.
- 4 large egg yolks, beaten: Why this? Yolks provide the emulsifiers needed for a stable, velvety custard matrix.
- 2 oz (56g) semi sweet chocolate, finely chopped: Why this? Adds depth of flavor and improves the "set" of the chilled pie.
- 2 tbsp (28g) unsalted butter, chilled and cubed: Why this? Swirled in at the end for a high gloss finish and extra richness.
- 1 tsp (5ml) pure vanilla extract: Why this? Enhances the floral notes of the cocoa beans.
- 1 cup (240ml) heavy whipping cream, cold: Why this? For the topping; it must be cold to whip into stiff peaks.
- 2 tbsp (15g) powdered sugar: Why this? Sweetens the cream while adding a touch of stability.
- 1/2 tsp (2.5ml) vanilla extract: Why this? For that classic whipped cream aroma we all love.
Ingredient Substitutions That Work
| Original Ingredient | Substitute | Why It Works |
|---|---|---|
| Whole Milk | Half and Half | Creates an even richer, almost fudge like texture. |
| Dutch process Cocoa | Natural Cocoa Powder | Note: Will be lighter in color and slightly more acidic/tangy. |
| Cornstarch | Arrowroot Powder | Use the same amount; results in a shinier, more translucent gel. |
| Pre baked Crust | Graham Cracker Crust | Adds a honeyed crunch that pairs beautifully with dark chocolate. |
If you are looking for more decadent ways to use these ingredients, you might enjoy trying my French Silk Brownies which use a similar fat to cocoa ratio for that signature fudgy bite.
The Arsenal of Tools for a Smooth Custard
You don't need a high tech kitchen to pull this off, but the right whisk and pan make a world of difference.
- Heavy Bottomed Saucepan: This is vital. Thin pans have "hot spots" that will scorch your milk before the cornstarch even thinks about thickening. A 3 quart stainless steel or enameled cast iron pot is perfect.
- Balloon Whisk: You want something with plenty of wires to break up those cocoa clumps. Avoid silicone whisks if possible; metal ones are better at scraping the "corners" of the pan where starch likes to hide.
- Fine Mesh Sieve: Even the best whisking can leave a tiny bit of cooked egg or a stubborn cocoa clump. Straining the custard into the pie shell is the "pro move" for a velvety result.
- Heat Proof Bowls: One for the egg yolks and a small one for the chopped chocolate.
- Plastic Wrap: This isn't just for storage; it’s a tool used to prevent that chewy "skin" from forming on top of your pudding.
Chef's Tip: Freeze your butter for 10 minutes before cubing it. When you drop those icy cold cubes into the hot custard at the very end, it creates a more stable emulsion, giving you a shine that looks like a professional glaze.
step-by-step Instructions for the Ultimate Chocolate Pie
Ready? Let’s get that stove on. Follow these steps closely, and pay attention to the smells they tell you exactly where the pie is in its journey.
- Whisk the dry base. In a cold heavy bottomed saucepan, whisk together the sugar, cocoa powder, cornstarch, and salt until all cocoa clumps are broken down. Note: Starting cold prevents the starch from clumping.
- Incorporate the milk. Gradually whisk in the whole milk over medium heat, stirring constantly to prevent scorching.
- Identify the "Bloom" aroma. Cook 5 minutes until the scent of toasted cocoa fills the room and the milk begins to steam.
- Temper the yolks. Gradually whisk a small amount (about half a cup) of the hot liquid into the beaten egg yolks in a separate bowl.
- Reintroduce the eggs. Slowly pour the warmed yolk mixture back into the saucepan while whisking vigorously.
- Activate the starch. Continue cooking and whisking 2 minutes until the mixture reaches a bubbling point and thickened ribbons trail from the whisk.
- Final enrichments. Remove from heat. Immediately stir in the chopped semi sweet chocolate, chilled butter cubes, and 1 tsp vanilla extract until the filling is glossy and smooth.
- The pour and seal. Pour the filling into the pre baked crust. Press plastic wrap directly onto the surface of the custard to prevent a skin from forming.
- The long chill. Refrigerate for at least 4 hours. The pie is ready when the center doesn't jiggle when the pan is nudged.
- The fluffy finish. Before serving, whisk the heavy cream, powdered sugar, and 1/2 tsp vanilla until stiff peaks form. Spread over the chilled pie.
Solving Your Custard Challenges Like a Pro
Even with a quick and easy chocolate pie recipe, things can go sideways. If your custard looks weird, don't panic. Most issues are fixable if you catch them early.
Why Your Filling Didn't Set
If your pie is still runny after 4 hours, it’s usually a heat issue. Cornstarch requires "Amylase" to be neutralized by boiling, or it will eventually break down and turn the pie back into liquid. If you didn't see those big bubbles, it won't stay firm.
Eliminating Lumps and Grittiness
Lumps happen when the starch or eggs cook too fast. If your custard looks "curdy," it means the eggs scrambled. This is why we temper! If it's already happened, a quick pass through a fine mesh sieve usually saves the day, though the texture might be slightly less rich.
Quick Troubleshooting Guide
| Problem | Root Cause | Solution |
|---|---|---|
| Grainy Texture | Cocoa wasn't sifted or sugar didn't dissolve. | Whisk dry ingredients longer next time; strain through a sieve now. |
| Thin Filling | Mixture didn't reach the boiling point. | Return to heat and whisk until one large bubble pops on the surface. |
| Weeping (Liquid at bottom) | Starch was overcooked or eggs were too hot. | Cool the pie completely before refrigerating; don't skip the tempering step. |
Common Mistakes Checklist
- ✓ Never stop whisking once the milk is hot; 10 seconds of neglect can lead to a scorched bottom.
- ✓ Do not use "natural" cocoa powder if you want that deep, dark chocolate appearance.
- ✓ Ensure your pie crust is completely cool before adding the hot filling to prevent a soggy bottom.
- ✓ Wait for "stiff peaks" in your cream; if it's too soft, it will slide right off the chocolate.
- ✓ Use a heavy bottomed pot; thin aluminum pots are the enemy of smooth custards.
Adjusting the Volume for Any Occasion
Scaling this recipe is straightforward, but remember that chocolate pie quick and easy batches behave differently when doubled.
Scaling Down (½ Batch for a mini 6 inch pie): Use a smaller saucepan to prevent the milk from evaporating too quickly. Reduce the cook time by about 3 minutes, but still look for those same thickening cues. For the egg yolks, use 2 large yolks.
Scaling Up (2x for two 9 inch pies): When doubling, do not double the salt or vanilla; use only 1.5x the amount (3/4 tsp salt and 1.5 tsp vanilla) to keep the flavors balanced.
You will need a much larger pot, and the thickening process will take about 5-8 minutes longer due to the increased volume of cold milk.
If you are baking for a larger crowd and want a different format, my Chocolate Swirl Loaf is another great way to use these pantry staples for 10+ servings.
Debunking Traditional Custard Myths
There are a lot of "old wives' tales" about chocolate pie with cocoa powder. Let's set the record straight so you can cook with confidence.
Myth: You must use a double boiler for custard. Truth: While a double boiler is safer for delicate sauces like Hollandaise, this starch thickened custard is robust enough for direct heat.
As long as you keep the whisk moving and use a heavy bottomed pan, direct medium heat is faster and more effective at activating the cornstarch.
Myth: Adding more eggs makes it firmer. Truth: Actually, too many eggs can make the pie rubbery or "eggy" in flavor. The firmness comes primarily from the cornstarch to milk ratio. The eggs are there for the velvety mouthfeel and rich color, not as the primary "glue."
Myth: You can't over whisk the filling. Truth: You actually can. If you whisk too violently once the starch has set, you can break the molecular bonds, leading to a "weepy" pie later. Whisk steadily but gently once it thickens.
Preservation Secrets for the Best Leftovers
Storage is where many people lose that beautiful texture. If you just throw a piece of foil over the pie, the humidity will turn the crust into a sponge.
- Storage (Fridge): This pie lasts up to 4 days in the refrigerator. Always keep it covered with plastic wrap pressed directly against the surface (if the whipped cream isn't on yet). If the cream is already on, use a pie dome or a large inverted bowl to cover it without touching the topping.
- Freezing: I do not recommend freezing this specific custard based chocolate pie. The cornstarch and egg structure will break upon thawing, resulting in a grainy, watery mess. If you must freeze, do so only with the crust, then fill it fresh.
- Zero Waste: If you have leftover filling that didn't fit in the crust, pour it into small ramekins for "bonus" chocolate puddings. Any leftover egg whites from the 4 yolks used in this recipe can be turned into a small batch of meringues or a healthy morning omelet.
Presentation Styles for a Visual Wow Factor
How you serve this chocolate pie quick and easy can change the entire vibe of the meal.
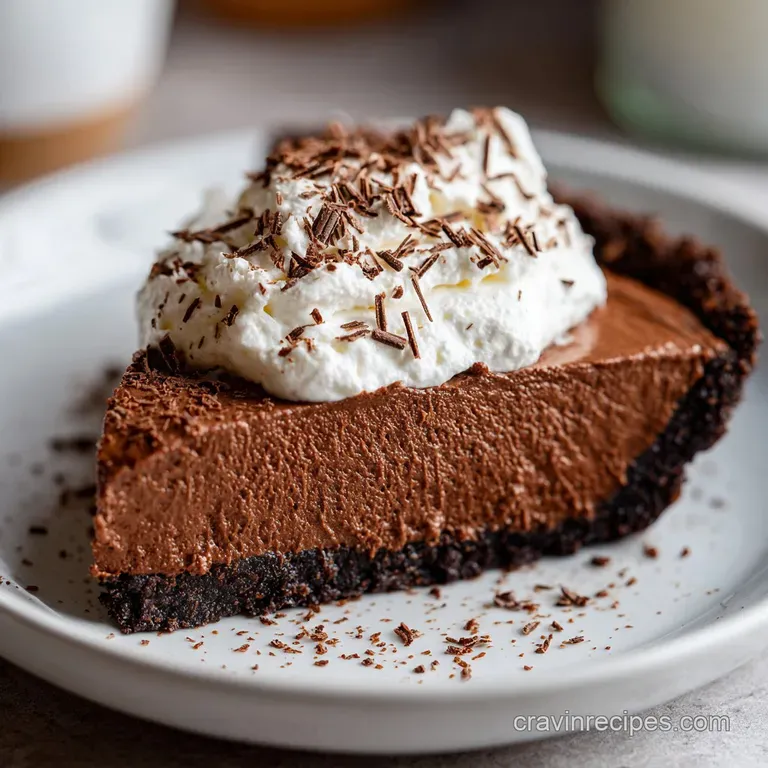
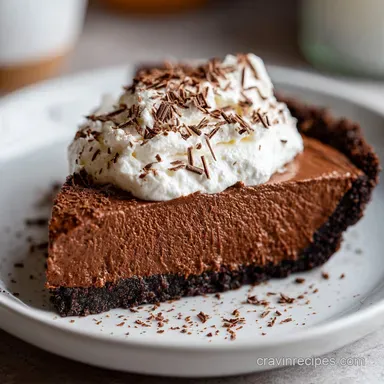
- The Classic Diner Look: Big, billowy clouds of whipped cream topped with a light dusting of cocoa powder. Use a warm knife (dipped in hot water and wiped dry) to get those sharp, clean restaurant style slices.
- The Gourmet Cafe Style: Skip the full cream covering and do individual dollops. Top each slice with a few curls of shaved dark chocolate or a single fresh raspberry. The acidity of the berry cuts through the richness of the 2 oz of semi sweet chocolate perfectly.
- The Decadent Sundae Style: Serve the slice with a drizzle of salted caramel sauce and a sprinkle of crushed toasted pecans. This adds a "turtle" element that is absolutely irresistible.
No matter how you dress it up, the core of this dish remains a 3 ingredient chocolate pie base (plus the aromatics) that delivers pure, unadulterated comfort. It's the kind of recipe that makes people ask for the secret, and you can honestly tell them it’s all in the bubbles!
Decision Shortcut: Tailoring Your Result
- If you want a darker, more intense flavor, use 70% dark chocolate instead of semi sweet.
- If you want a sturdier, transportable pie, increase the cornstarch to 1/3 cup.
- If you want a lighter, mousse like texture, fold half of the whipped cream into the cooled custard before filling the shell.

Recipe FAQs
How to prevent a skin from forming on the custard?
Press plastic wrap directly against the surface of the warm filling. This creates an airtight seal that stops the top layer from drying out and forming a rubbery film while the pie chills.
Is it possible to use natural cocoa powder instead of Dutch process?
No, this is a common misconception. Dutch process cocoa is essential here for the intended color and flavor depth; natural cocoa is more acidic and will not produce the same dark, rich result.
How to ensure the filling reaches the correct thickness?
Cook and whisk the mixture until it reaches a consistent bubbling point. This heat is required to fully activate the cornstarch thickening agents, which creates the structure needed for clean slices.
Why is my filling clumpy after adding the egg yolks?
Temper the yolks properly by slowly whisking in a small amount of hot liquid first. Adding the cold yolks directly to the hot saucepan too quickly will shock the proteins, causing them to scramble instead of smoothing into a custard.
How to tell when the whipped cream is ready?
Whisk the heavy cream until it holds stiff peaks that stand upright without drooping. If the cream is too soft, it will not support itself when spread over the pie; if you enjoyed mastering this aeration technique, see how we use the same principle in our Cake for 12 Servings recipe.
Is a pre-baked crust mandatory for this recipe?
Yes, the crust must be fully baked and cooled. Adding the hot custard to an unbaked crust will result in a soggy, undercooked dough that fails to hold its shape.
How long does the pie need to set in the refrigerator?
Refrigerate for at least 4 hours. This duration is non-negotiable to allow the custard proteins to firm up completely so you can slice the pie without it running.
Easy Homemade Chocolate Pie
Ingredients:
Instructions:
Nutrition Facts:
| Calories | 509 kcal |
|---|---|
| Protein | 8.1 g |
| Fat | 31.8 g |
| Carbs | 51.8 g |
| Fiber | 1.1 g |
| Sugar | 34.5 g |
| Sodium | 248 mg |
