Favorite Chicken Potpie with Puff Pastry
- Time: Active 20 minutes, Passive 30 minutes, Total 50 minutes
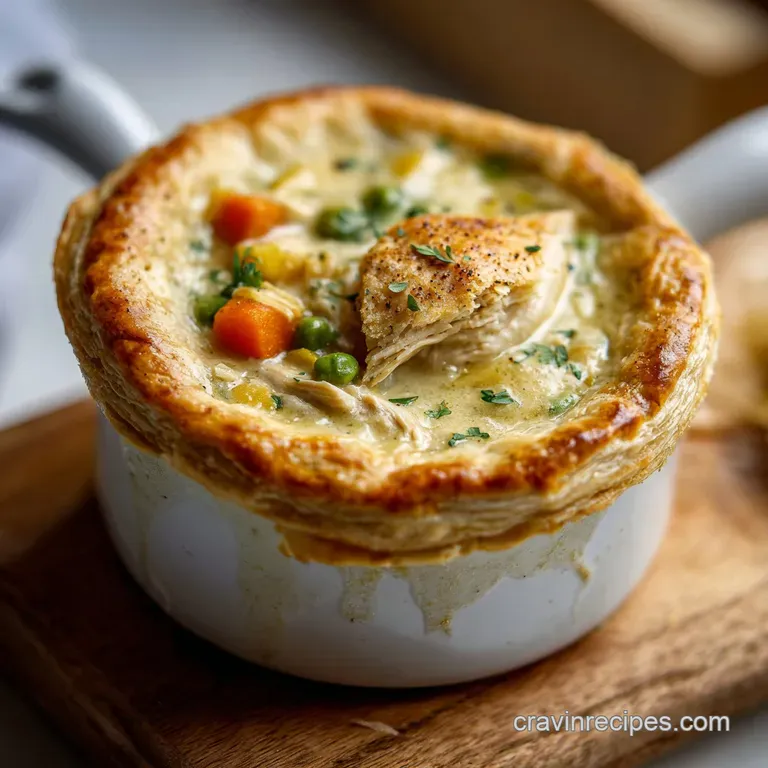
- Flavor/Texture Hook: Shattering, buttery puff pastry crust over a velvety, herb flecked chicken gravy.
- Perfect for: Busy weeknights, feeding a family of six, or a stress free Sunday lunch.
- Why This Easy Favorite Chicken Potpie Saves My Weeknights
- What Actually Makes This Crust Shatter And The Filling Velvety
- The Component Deep Dive For A Rich Savory Filling
- The Essential Ingredients For A Truly Hearty Chicken Filling
- Simple Tools Needed For A Fuss Free Casserole Experience
- From Sautéing To Shattering Crust In Fifty Minutes Total
- Fixing Runny Gravy And Other Common Potpie Pitfalls
- How To Scale This Recipe For A Hungry Crowd
- Swapping Pastry For Biscuits Or Trying The Viral Cobbler
- Debunking The Scratch Made Crust Myth
- Keeping Your Leftovers Fresh And Using Every Single Scrap
- The Best Hearty Sides To Serve With This Comfort Meal
- High in Sodium
- Recipe FAQs
- 📝 Recipe Card
Why This Easy Favorite Chicken Potpie Saves My Weeknights
Imagine walking through the front door after a long day, the air is chilly, and all you want is a hug in a bowl. That is exactly what this favorite chicken potpie feels like. I remember the first time I made this for my family; I was running behind schedule, the kids were hungry, and I almost reached for a frozen box.
Instead, I grabbed a leftover rotisserie chicken and a sheet of puff pastry I had tucked away in the freezer. The moment the butter hit the Dutch oven and that sizzle of onions and celery filled the kitchen, the whole mood in the house shifted.
We have all been there where we want a "from scratch" taste but simply do not have the hours to spare for a traditional pastry crust or poaching a whole bird. This recipe is the bridge between those worlds. It relies on smart shortcuts that do not sacrifice the soul of the dish.
The gold potatoes hold their shape beautifully, and the heavy cream adds just enough richness to make the broth feel like a proper gravy. It is no fuss cooking at its absolute finest, and honestly, I think it tastes better than the versions that take three times as long.
There is something so satisfying about the sound of a fork cracking through a mahogany colored puff pastry lid. It makes a distinct "shatter" sound that lets you know you are about to hit the jackpot of creamy, savory filling.
We are going to walk through the exact steps to get that filling perfectly thickened so it does not turn into a soup, and I will share why that tiny pinch of celery seed is actually the most important thing in your spice cabinet for this dish.
What Actually Makes This Crust Shatter And The Filling Velvety
Starch Gelatinization: The all purpose flour coats the butter slicked vegetables, and as the bone broth hits the pan, the starch molecules swell and burst, creating a thick, stable gravy that won't run thin in the oven.
Fat Layered Lamination: Using pre rolled puff pastry provides hundreds of thin layers of cold butter that steam rapidly at 400°F, forcing the dough to rise and create that iconic "shatter" texture.
Residual Heat Softening: The gold potatoes are diced small so they finish softening in the oven's ambient heat, ensuring they are tender but not mushy by the time the crust is golden.
Emulsion Stability: Whisking the heavy cream into the simmering bone broth at the end prevents the sauce from breaking or curdling during the over high heat bake.
| Filling Thickness | Internal Temp | Rest Time | Visual Cue |
|---|---|---|---|
| Thick & Gloopy | 165°F | 10 mins | Slow moving bubbles at the vents |
| Pourable Gravy | 160°F | 5 mins | Rapid, thin bubbling around edges |
| Set & Stable | 170°F | 15 mins | Filling holds its shape on the spoon |
When you are looking for that perfect consistency, the rest time is just as vital as the cook time. Allowing the potpie to sit for about ten minutes after it comes out of the oven lets the starches settle and firm up.
If you cut into it the second it leaves the heat, you might find the gravy a bit more fluid than you’d like. Trust me, the wait is worth it for that perfect, velvety bite.
The Component Deep Dive For A Rich Savory Filling
| Ingredient | Science Role | Pro Secret |
|---|---|---|
| Chicken Bone Broth | Provides the liquid base and natural gelatin for a thicker mouthfeel. | Use a version with high protein content; it naturally thickens the sauce as it reduces. |
| Gold Potatoes | Adds body and starch without falling apart like russets. | Leave the skins on if you’re in a rush; they are thin enough to disappear into the gravy. |
| Celery Seed | Infuses a concentrated, earthy "holiday" aroma throughout the sauce. | Don't skip this; it's what gives that classic, nostalgic "canned soup" flavor but better. |
| Heavy Cream | Acts as an emulsifier to create a silky, opaque finish. | Add it last so the high heat of the initial sauté doesn't scorch the dairy. |
Building a base with bone broth instead of a standard thin stock is a trick I learned when I wanted more body in my sauces without adding a pound of flour. The gelatin in bone broth gives the gravy a "lip smacking" quality that makes this favorite chicken potpie feel much more expensive than it actually is. If you're curious about building your own bases for future meals, you might find my Chicken and Broth base really helpful for meal prepping.
The Essential Ingredients For A Truly Hearty Chicken Filling
- 3 cups (450g) rotisserie chicken: Shredded or chopped. Why this? Using pre cooked chicken saves 40 minutes of prep and stays tender.
- Substitute: Leftover roasted turkey or even thick cut deli chicken breast.
- 1/3 cup (75g) unsalted butter: The fat base for our roux. Why this? Provides the richness needed for a traditional savory gravy.
- Substitute: Salted butter (just reduce the added sea salt by half).
- 1 large onion (150g): Finely diced. Why this? Provides the aromatic foundation for the entire flavor profile.
- Substitute: 1.5 cups of frozen diced onions if you are in a major rush.
- 2 medium carrots (120g): Sliced into half moons. Why this? Adds sweetness and a pop of color that survives the bake.
- Substitute: Frozen sliced carrots or parsnips for an earthier vibe.
- 2 ribs celery (80g): Diced small. Why this? Essential for the "mirepoix" flavor that screams comfort food.
- Substitute: A tablespoon of celery flakes if the crisper drawer is empty.
- 1 cup (150g) gold potatoes: Peeled and diced small. Why this? They hold their shape perfectly and add satisfying bulk.
- Substitute: Red potatoes (keep the skins on for extra color).
- 1/3 cup (45g) all purpose flour: Our thickening agent. Why this? It creates a stable sauce that won't separate under puff pastry.
- Substitute: 1:1 gluten-free flour blend if needed for dietary restrictions.
- 2 cups (480ml) chicken bone broth: The liquid gold. Why this? Richer flavor and better texture than standard chicken stock.
- Substitute: Regular chicken stock with a teaspoon of unflavored gelatin.
- 1/2 cup (120ml) heavy cream: For that velvety finish. Why this? It rounds out the salt and herbs with a mellow richness.
- Substitute: Full fat coconut milk (note: will add a very slight nutty flavor).
- 1 cup (150g) frozen peas: Added at the very end. Why this? They stay bright green and pop in your mouth.
- Substitute: Frozen corn or green beans chopped into small pieces.
- Fresh Herbs (1 tsp thyme, 1 tsp rosemary): Chopped fine. Why this? Fresh herbs provide a floral lift that dried spices can't match.
- Substitute: 1/2 tsp each of dried herbs if fresh isn't available.
- 1 sheet (250g) pre rolled puff pastry: The lid. Why this? Creates a light, flaky crust with zero dough rolling stress.
- Substitute: A pack of refrigerated biscuits or a standard pie crust.
- The Seasoning (1 tsp sea salt, 1/2 tsp black pepper, 1/2 tsp celery seed): Why this? Celery seed is the "hidden" ingredient that makes it taste authentic.
- Egg Wash (1 egg + 1 tbsp water): Why this? Gives the crust that professional, mahogany shine.
Simple Tools Needed For A Fuss Free Casserole Experience
To keep this a truly "no fuss" meal, I highly recommend using a Dutch oven (like a Lodge or Le Creuset) for the stovetop portion. The heavy bottom prevents the flour from burning when you are building the roux.
If you don't want to wash two pans, you can actually bake the whole thing right in a 10 inch oven safe cast iron skillet. It looks rustic and beautiful when you bring it to the table.
You will also need a good whisk. When you start adding that bone broth to the flour coated vegetables, a whisk is your best friend to ensure there are no lumps of raw flour hiding in the corners. A simple vegetable peeler and a sharp chef's knife are really all the tech you need here.
No fancy food processors or stand mixers required today!
From Sautéing To Shattering Crust In Fifty Minutes Total
1. Sautéing the Mirepoix
Melt the 1/3 cup of unsalted butter in your Dutch oven over medium heat. Once it is bubbling, toss in the diced onions, half moon carrots, celery, and diced gold potatoes. Sauté these for about 8–10 minutes.
You are looking for the onions to become translucent and the carrots to just begin to soften. Add your minced garlic, thyme, and rosemary during the very last minute so the garlic doesn't burn.
2. Building the Gravy
Sprinkle the 1/3 cup of all purpose flour directly over the butter soaked vegetables. Stir this constantly for 2 full minutes. Note: This "cooks out" the raw taste of the flour and ensures your gravy tastes like savory chicken, not a paste. Slowly whisk in the 2 cups of chicken bone broth and the 1/2 cup of heavy cream.
Keep stirring until the mixture begins to simmer and noticeably thickens.
3. Folding in the Goods
Turn the heat down to low. Fold in your 3 cups of shredded chicken and the cup of frozen peas. Stir in the sea salt, cracked black pepper, and that magical half teaspoon of celery seed. Once everything is combined and looking creamy, remove the pot from the heat.
4. Preparing the Vessel
Transfer your steaming chicken mixture into a 9 inch deep dish pie plate or a 10 inch oven safe skillet. Make sure the filling is leveled out so the pastry can sit flat on top.
5. Draping the Pastry
Unroll your puff pastry sheet and gently drape it over the top of your dish. If there is a lot of overhang, you can trim it with kitchen shears, leaving about half an inch to crimp against the side. Note: Trimming prevents the heavy edges from sliding off the dish as the butter melts in the oven.
6. The All Important Vents
Use a sharp knife to cut three or four small slits in the center of the pastry. Bake 20-25 mins until the crust is mahogany colored and shattering. These vents allow steam to escape so the bottom of the pastry doesn't get soggy.
7. The Golden Finish
Whisk together your egg and tablespoon of water in a small bowl. Brush this egg wash generously over every inch of the puff pastry. Don't be shy; this is what gives it that gorgeous color.
8. The over High heat Bake
Slide your dish into a preheated 400°F (200°C) oven. Bake for 20-25 minutes. You are waiting for the pastry to puff up significantly and turn a deep, golden mahogany.
9. The Visual Check
Keep an eye on the vents. You should see little bubbles of creamy gravy peeking through the slits. This tells you the inside is piping hot.
10. The Rest Phase
Remove the potpie from the oven and set it on a wire rack or a heat safe surface. Let it rest for at least 10 minutes before serving. This allows the sauce to thicken up into that perfect "casserole" consistency.
Fixing Runny Gravy And Other Common Potpie Pitfalls
Why Your Potpie Filling Is Too Thin
If you find your filling looks more like a soup than a gravy after the bake, it usually comes down to the roux or the potato starch. If you didn't cook the flour and butter long enough before adding liquid, it won't have the "muscle" to hold the broth together.
Another culprit is not dicing the potatoes small enough; they release starch as they cook, which helps thicken the sauce.
| Problem | Root Cause | Solution |
|---|---|---|
| Soggy Bottom Crust | Trapped steam under the pastry. | Cut larger vent slits and ensure the filling is hot before topping. |
| Burnt Pastry Edges | Oven "hot spots" or too much egg wash on the rim. | Cover the edges with foil halfway through if they darken too fast. |
| Bland Flavor | Not enough salt or missing the celery seed. | Taste the filling before you put the pastry on; adjust salt then. |
Why Your Pastry Didn't Puff
This is usually a temperature issue. Puff pastry relies on cold butter hitting a hot oven to create steam. If your kitchen was very warm or you let the pastry sit on the hot filling for too long before putting it in the oven, the butter might have melted prematurely.
Always keep your pastry in the fridge until the very second you are ready to drape and bake.
Common Mistakes Checklist
- ✓ Pat the chicken dry if you are using home roasted pieces (prevents extra water release).
- ✓ Never skip the 2 minute flour cook time (gets rid of the "pasty" flavor).
- ✓ Ensure your oven is fully preheated to 400°F before the pie goes in.
- ✓ Don't over fill the dish; leave about half an inch of space at the top so it doesn't boil over.
- ✓ Use gold potatoes, as russets will disintegrate and turn the gravy grainy.
How To Scale This Recipe For A Hungry Crowd
If you are hosting a larger family gathering, you can easily double this favorite chicken potpie. However, don't just double everything blindly. When doubling the liquids (broth and cream), I usually reduce the total liquid by about 10% because a larger volume of filling generates more internal steam and doesn't reduce as quickly in the oven.
For a double batch, use a 9x13 inch baking dish.
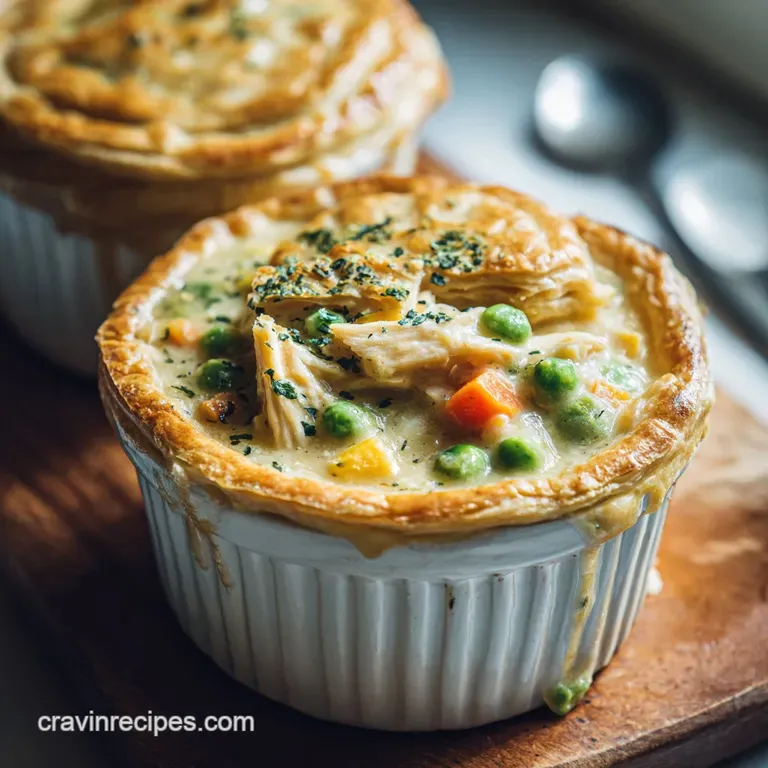
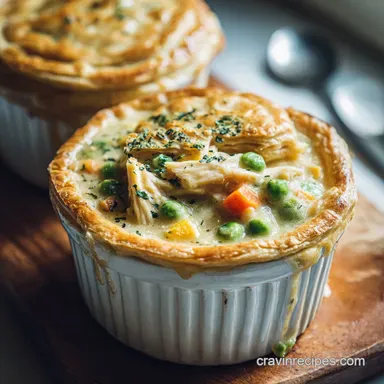
When scaling down for two people, you can use individual 10 ounce ramekins. Cut the puff pastry into circles slightly larger than the ramekins. Since smaller dishes cook faster, check them at the 15 minute mark.
You'll still want that 400°F heat, but the smaller thermal mass means the center will get hot much quicker than a deep dish pie.
Chef's Tip: If you're doubling the recipe, only increase the salt and black pepper by 1.5x initially. You can always add more after tasting the filling, but it's hard to come back from an over salted gravy.
Swapping Pastry For Biscuits Or Trying The Viral Cobbler
While the puff pastry is my personal favorite, there are some fun ways to change this up. One popular version is the chicken biscuit pot pie recipe. Instead of a sheet of pastry, you drop unbaked refrigerated biscuits (or homemade ones) on top of the hot filling. They soak up some of the gravy on the bottom while getting tall and fluffy on top. If you love a good biscuit topped dish, you really have to see how I do my Cheesy Chicken Casserole which uses a similar "top and bake" philosophy.
The viral chicken pot pie cobbler is another variation that has been all over social media. In that version, you usually melt butter in a dish, layer the chicken and veggies, and then pour a mixture of milk and biscuit mix (like Bisquick) over the top without stirring.
It creates a cake like topping that is much denser and more "bready" than the flaky puff pastry version we are making today. Both are delicious, but for that "shatter" factor, the puff pastry remains the king of the kitchen.
Debunking The Scratch Made Crust Myth
A big misconception in the cooking world is that you must make your own pie dough for it to be a "real" potpie. Honestly, I’ve done both, and for a savory dish like this, puff pastry is actually superior. Standard pie dough can often get soggy on the bottom when sitting on top of a wet filling.
Puff pastry, because of its lamination, stays crispier. Searing meat or poaching chicken from scratch is also not always necessary a high-quality rotisserie chicken is seasoned all the way to the bone, which actually adds a layer of flavor you might miss if you just boiled a plain chicken breast.
Another myth is that you need "cream of chicken" soup to get a thick filling. We are making our own "soup" with the butter, flour, and bone broth. It’s fresher, you can control the salt, and it doesn't have that metallic tin can aftertaste.
Plus, the heavy cream gives you that same "soupy" comfort with a much cleaner flavor profile.
Keeping Your Leftovers Fresh And Using Every Single Scrap
Storage Guidelines You can keep leftovers in the fridge for up to 3 days. The crust will lose its "shatter" in the fridge as it absorbs moisture from the gravy, but the flavor actually gets better as the herbs meld.
For the best reheating results, don't use the microwave unless you want a sad, soggy crust. Put a slice in a toaster oven or the big oven at 350°F for about 10 minutes. This helps the puff pastry regain some of its crunch.
Zero Waste Tips If you bought a whole rotisserie chicken for this, do not throw away the carcass! You can simmer those bones with some onion scraps and carrot ends to make your own bone broth for the next time you make this favorite chicken potpie.
Also, if you have leftover puff pastry scraps after trimming your pie, brush them with a little butter and cinnamon sugar, then bake them alongside the pie for a quick "cook's treat."
I've found that if I have leftover filling but no more pastry, I can serve it over a pile of Souper Rice with Chicken for a completely different meal the next day. It turns the potpie filling into a sort of "chicken a la king" that is absolutely hearty and filling.
The Best Hearty Sides To Serve With This Comfort Meal
Since this dish is already packed with protein, carbs, and veggies, you don't need much else. I usually serve it with a very simple, bright green salad dressed with a sharp lemon vinaigrette to cut through the richness of the heavy cream and butter.
A side of roasted broccoli or asparagus also works beautifully, as the charred flavor of the greens complements the earthy thyme and rosemary in the gravy.
If you really want to lean into the comfort factor, a small dish of cranberry sauce on the side provides a sweet tart contrast that reminds everyone of a mini Thanksgiving dinner. No matter how you serve it, this favorite chicken potpie is bound to become a staple in your rotation.
It's the recipe I turn to when I need a win, and I know it'll do the same for you. Happy cooking!

High in Sodium
845 mg 845 mg of sodium per serving (37% 37% of daily value)
The American Heart Association recommends limiting sodium intake to 2,300mg per day, with an ideal limit of 1,500mg per day for most adults.
Tips to Reduce Sodium
-
Choose Low-Sodium Broth-30%
Swap the regular chicken bone broth for a low-sodium or no-salt added chicken bone broth. This is the biggest contributor to sodium in the recipe.
-
Reduce Added Salt-25%
Reduce the added sea salt to 1/4 teaspoon. You can always add more salt at the table if needed.
-
Boost Flavor with Herbs and Spices
Increase the use of fresh thyme and rosemary, and consider adding other low-sodium aromatics like a bay leaf or a pinch of nutmeg to enhance flavor without salt.
-
Use Unseasoned Chicken-10%
If using rotisserie chicken, ensure it's unseasoned. If roasting your own chicken thighs, roast them without added salt or sodium containing marinades.
-
Opt for No-Salt Added Vegetables-5%
While not a major source here, if using any canned vegetables in other recipes, always choose no-salt added varieties.
Recipe FAQs
How to ensure the crust turns out perfectly golden and crisp?
Brush the top evenly with your egg wash before baking. This mixture of one egg and one tablespoon of water creates a deep mahogany color and a satisfying, shattering texture at 400°F.
Is it true that I should use a raw chicken breast for the filling?
No, this is a common misconception. Using shredded rotisserie or roasted chicken thighs is the intended method for this recipe, as the meat is already cooked and seasoned, saving you significant prep time.
How to achieve a thick, velvety gravy for the filling?
Whisk the flour into the sautéed vegetables and cook for two full minutes before adding liquids. This toast like step eliminates the raw flour taste and ensures the base thickens properly once you stir in the chicken bone broth and heavy cream. If you enjoyed this roux based thickening method, see how we use a similar principle in our Creamy Garlic Parmesan Chicken.
Can I prepare the filling ahead of time?
Yes, you can sauté the vegetable filling up to 24 hours in advance. Keep the mixture in the refrigerator, then transfer to your baking dish, top with the puff pastry, and bake at 400°F when you are ready to serve.
How to prevent the potatoes from becoming mushy during the bake?
Dice the gold potatoes into small, uniform pieces so they cook consistently during the 8 10 minute sauté. Because they are already softened before the pastry goes on, they will retain their shape and provide the perfect texture inside the gravy.
Should I vent the puff pastry before putting it in the oven?
Yes, cut small slits into the dough to allow steam to escape. This prevents the pastry from bubbling excessively and ensures it bakes into a shattering, buttery crust rather than becoming soggy.
How to know exactly when the potpie is finished baking?
Check that the crust is mahogany colored and looks visibly shattered. The total bake time is 20 25 minutes at 400°F, which is sufficient to heat the pre-cooked filling through and crisp the pastry.
Favorite Chicken Potpie
Ingredients:
Instructions:
Nutrition Facts:
| Calories | 635 kcal |
|---|---|
| Protein | 23.6 g |
| Fat | 39.2 g |
| Carbs | 36.4 g |
| Fiber | 3.8 g |
| Sugar | 4.2 g |
| Sodium | 845 mg |
