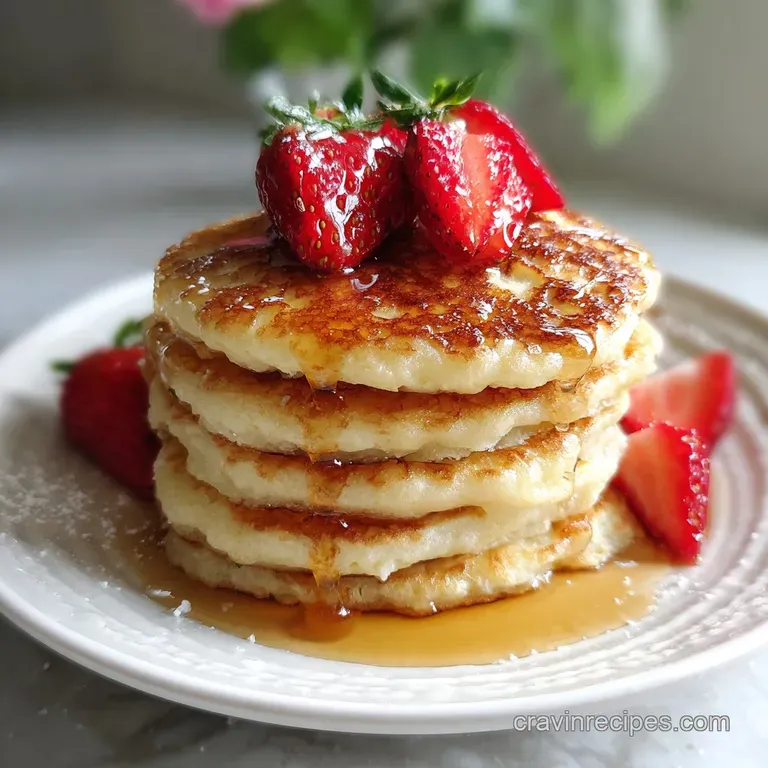
Easy Fluffy Pancakes from Scratch
- Time: Active 5 mins, Passive 10 mins, Total 15 mins
- Flavor/Texture Hook: Velvety crumb with a golden, buttery sizzle
- Perfect for: Lazy Sunday brunch or a quick, impressive weekday morning
- How to Make Easy Fluffy Pancakes From Scratch Every Time
- The Physics Behind a Perfect Cloud Like Rise
- Component Analysis of Your Breakfast Elements
- Selecting the Right Tools for Griddle Success
- Essential Ingredients for a Velvety Batter Mix
- The Step by Step Path to Golden Perfection
- Fixing Common Flaws for Better Morning Batches
- Scaling Your Breakfast for One or Twenty
- Preservation Techniques for Leftover Breakfast Batches
- Creative Ways to Plate and Enjoy Your Pancakes
- Dispelling Common Kitchen Tales
- Recipe FAQs
- 📝 Recipe Card
How to Make Easy Fluffy Pancakes From Scratch Every Time
The sun is barely peaking through the blinds, the kitchen is quiet, and then you hear it: that first cold pat of butter hitting the preheated cast iron. It doesn't just melt, it dances, releasing a nutty aroma that signals the start of a proper morning.
I used to think that thick, restaurant style stacks were some kind of culinary sorcery involving specialized equipment or secret ingredients. I spent years scraping rubbery, flat discs into the bin, wondering why my "scratch" attempts felt like eating cardboard.
The secret isn't a gadget; it's the rhythm. It's that moment you see the first bubble surface and pop, leaving a tiny crater that stays open, telling you the structural integrity is ready for the flip.
When I finally cracked this method, the result was a stack so light it practically defied gravity, with edges that shatter slightly before giving way to a soft, pillowy center.
We're going to walk through this together so you never have to settle for a sad breakfast again. We'll talk about why we leave the lumps alone and how to manage the heat so you get that uniform, deep bronze finish without a raw, gooey middle.
Trust me, once you see these puff up on your own stove, you'll never look at a pre made mix the same way.
The Physics Behind a Perfect Cloud Like Rise
Chemical Leavening: The baking powder reacts twice, first when hitting the liquid and again when hitting the heat, creating tiny CO2 pockets. These pockets are trapped by the flour's gluten network, causing the batter to expand vertically rather than spreading thin.
The Steam Effect: As the moisture in the milk and egg heats up, it turns into steam, which pushes against the internal structure of the pancake. This internal pressure is what creates that signature "shatter" on the outer crust while keeping the inside moist and airy.
| Method | Time | Texture | Best For |
|---|---|---|---|
| Cast Iron Skillet | 3-4 mins per batch | Extra crispy, buttery edges | Deep flavor and traditional finish |
| Electric Griddle | 2-3 mins per batch | Uniform golden color, very soft | Feeding a crowd quickly |
| Non Stick Pan | 4 mins per batch | Smooth, matte finish | Beginners or low-fat cooking |
Choosing your heat source is the first step in determining the final personality of your stack. While a griddle offers more space, a heavy bottomed skillet provides a better sear and that irresistible buttery crunch around the perimeter.
Component Analysis of Your Breakfast Elements
| Ingredient | Science Role | Pro Secret |
|---|---|---|
| All Purpose Flour | Provides structure via gluten | Weigh it (250g) to avoid a heavy, dense crumb |
| Baking Powder | Primary leavening agent | Ensure it's fresh by testing a pinch in hot water |
| Whole Milk | Hydration and fat for tenderness | Room temp milk integrates faster without clumping butter |
| Unsalted Butter | Fat for flavor and "shortening" | Melted butter creates a silky, velvety mouthfeel |
Selecting the Right Tools for Griddle Success
You don't need a professional kitchen, but a few specific items make the process much smoother. A large, flat bottomed skillet is non negotiable for even heat distribution. I prefer cast iron because it holds heat like a champion, but a heavy stainless steel or a reliable non stick pan works too.
You'll also want a wide, thin spatula. If your spatula is too thick, you'll end up squishing the air out of the pancakes when you try to get underneath them. A flexible silicone or thin metal turner is your best friend here.
Finally,, a wire whisk is essential for aerating the dry ingredients, but put it away once the liquids are added we switch to a silicone spatula for the "gentle fold" stage to keep things light.
Essential Ingredients for a Velvety Batter Mix
- 2 cups all purpose flour (250g): Why this? Provides the essential protein structure for the pancake to hold its shape.
- Substitute: 1:1 gluten-free flour blend. Result: slightly grittier texture but still delicious.
- 2 tbsp granulated sugar (25g): Why this? Aids in browning via the Maillard reaction and balances the salt.
- Substitute: Honey or maple syrup. Result: Adds moisture; reduce milk by 1 tablespoon.
- 2 tsp baking powder: Why this? The "engine" of the rise. Do not swap for baking soda.
- Substitute: 1/2 tsp baking soda + 1/2 cup Greek yogurt (replacing 1/2 cup milk).
- 1/2 tsp salt: Why this? Sharpens all other flavors and controls the gluten development.
- Substitute: Sea salt. Use a fine grain to ensure it dissolves evenly.
- 1 1/2 cups whole milk (350ml): Why this? Fat content provides a richer, more tender crumb than skim milk.
- Substitute: Oat milk. Result: Nuttier flavor and slightly faster browning.
- 1 large egg: Why this? Acts as a binder and adds richness to the interior.
- Substitute: 1/4 cup unsweetened applesauce. Result: Denser but very moist.
- 3 tbsp unsalted butter, melted (42g): Why this? Essential for that buttery aroma and preventing a rubbery texture.
- Substitute: Neutral oil (like avocado). Result: Less flavor but stays soft longer.
- 1 tsp vanilla extract: Why this? Provides a nostalgic, floral aroma that complements the maple syrup.
- Substitute: Almond extract. Use only 1/4 tsp as it is very strong.
If you enjoy the process of mixing batters, you might find the technique for my Moist Banana Bread recipe quite similar, as both rely on not overworking the gluten to maintain a soft bite.
The step-by-step Path to Golden Perfection
- Whisk dry ingredients. Combine the 2 cups all purpose flour, 2 tbsp sugar, 2 tsp baking powder, and 1/2 tsp salt in a large bowl. Note: This aerates the flour, preventing clumps later.
- Prepare the liquids. In a separate jug, whisk the 1 1/2 cups milk, 1 egg, and 1 tsp vanilla until the egg is fully incorporated.
- Melt the butter. Melt your 3 tbsp unsalted butter and let it cool slightly for 2 minutes before slowly whisking it into the milk mixture. Note: Adding hot butter to cold milk can cause the butter to solidify into tiny pebbles.
- Merge the mixtures. Pour the wet ingredients into the dry bowl.
- Fold gently. Using a spatula, stir until just combined. Stop when you see small lumps; do not seek a smooth batter.
- Preheat the pan. Heat your skillet over medium low heat for 3-5 minutes. Test the heat by dropping a bead of water on the surface it should sizzle and dance.
- Lube the surface. Lightly coat the pan with a small pat of butter or a wipe of oil.
- Pour the batter. Use a 1/4 cup measure to pour batter into the pan, leaving space between each cake.
- Wait for bubbles. Cook for about 2-3 minutes until bubbles form on the surface and the edges look set.
- The Golden Flip. Slip the spatula underneath and flip in one swift motion. Cook the second side for 1-2 minutes until golden brown and springy to the touch.
For those who love a sweet finish to their morning, these techniques are almost identical to how we handle the base in our Soft and Chewy recipe, where temperature control is everything.
Fixing Common Flaws for Better Morning Batches
Why Your Pancakes Are Flat and Dense
If your stack looks more like a crepe than a cloud, the culprit is almost always overmixing. When you stir the batter until it's perfectly smooth, you develop the gluten far too much. This creates a tough, elastic web that traps the air bubbles so tightly they can't expand.
Plus,, if your baking powder is older than six months, it may have lost its chemical "zip."
To Fix a Burnt Exterior with a Raw Center
This is a classic heat management issue. If the pan is too hot, the outside of the pancake sears and burns before the heat has a chance to travel to the center to cook the egg and flour. The solution is patience. Medium low heat is the sweet spot.
If the butter in your pan starts smoking, it's too hot remove the pan from the heat for 60 seconds and turn the dial down.
| Problem | Root Cause | Solution |
|---|---|---|
| Gummy Center | Heat too high or flipped too early | Lower heat; wait for bubbles to pop and stay open |
| Rubbery Texture | Overmixing the batter | Mix until just combined; lumps are your friend |
| No Browning | Pan not preheated or no fat used | Preheat for 5 mins; use a thin layer of butter/oil |
Common Mistakes Checklist
- ✓ Stop mixing the moment the last streak of flour disappears.
- ✓ Let the batter rest for 5 minutes before cooking (relaxes gluten).
- ✓ Never press down on the pancake with your spatula after flipping.
- ✓ Use a fresh stick of butter for the pan every 2-3 batches to avoid burnt bits.
- ✓ Ensure your baking powder hasn't expired (test it in hot water).
Scaling Your Breakfast for One or Twenty
Scaling Down (½ Batch): This is perfect for a solo breakfast. Use 1 cup of flour and half of all other ingredients. For the egg, whisk it in a small bowl and use approximately 2 tablespoons. Cook time remains the same, but you’ll likely only need one small skillet.
Scaling Up (2x or 4x): When doubling, be careful with the leavening. Use 1.5x the salt and spices rather than a full double to keep the flavor balanced. If you're making a massive batch, keep the finished pancakes on a wire rack inside a 200°F oven to keep them crispy.
Never stack them while waiting to serve, as the steam will turn them soggy.
If you find yourself with leftover cocoa powder while scaling up for a party, you could pivot some of that energy into a Fudgy Brownies recipe for a decadent brunch dessert later.
Preservation Techniques for Leftover Breakfast Batches
Storage: These keep surprisingly well in the fridge for up to 3 days. Place them in an airtight container with a piece of parchment paper between each pancake to prevent sticking.
Freezing: Pancakes are a meal prepper’s dream. Flash freeze them on a baking sheet for 1 hour until hard, then transfer to a heavy duty freezer bag. They’ll stay fresh for up to 2 months.
Reheating: Skip the microwave if you can; it makes them chewy. Instead, pop them in a toaster on a medium setting. It revives the "shatter" of the outer crust while warming the middle perfectly. Alternatively, heat them in a dry skillet over low heat for 1 minute per side.
Zero Waste Tip: If you have leftover batter that you can't cook right away, don't throw it out! You can store raw batter in the fridge for up to 24 hours.
The baking powder will lose some of its "lift," so just whisk in an extra 1/4 teaspoon of baking powder right before you hit the pan the next morning to bring back the fluff.
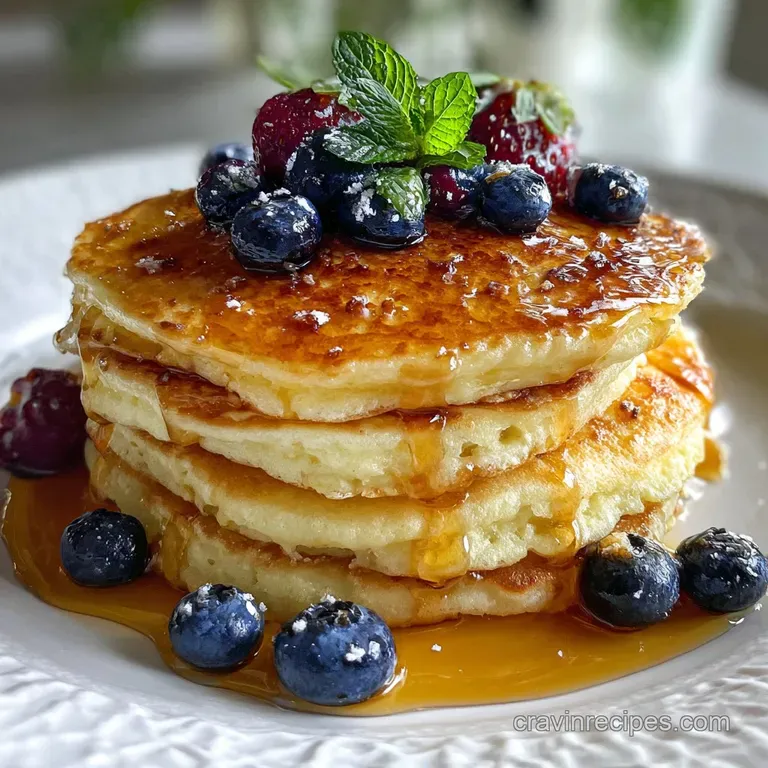
Creative Ways to Plate and Enjoy Your Pancakes
The Classic Diner Experience
To get that authentic diner feel, serve the stack with a massive knob of salted butter right on top while they are piping hot. Use real maple syrup the Grade A Dark color provides a robust, caramel like flavor that cheap corn syrup mimics can't touch.
A side of crispy, salty bacon provides the perfect contrast to the sweet, velvety cakes.
For a High End Restaurant Finish
Transform these into a gourmet meal by topping them with a quick berry compote. Simmer a handful of frozen blueberries with a splash of lemon juice and a teaspoon of sugar until it thickens. Finish with a dollop of crème fraîche or thick Greek yogurt and a sprinkle of lemon zest.
The brightness of the fruit cuts through the richness of the butter beautifully.
For an Extra Crispy Edge
If you love those lacy, crispy edges, use slightly more butter in the pan than you think you need. Instead of a thin wipe, leave a shallow pool of shimmering butter. The batter will essentially "fry" at the perimeter, creating a golden halo that provides a satisfying crunch against the soft interior.
Dispelling Common Kitchen Tales
Myth: You must have buttermilk for fluffy pancakes. Truth: While buttermilk adds a nice tang and helps with rise, it's the ratio of baking powder to flour that does the heavy lifting. You can achieve incredible heights with whole milk as long as you don't overmix.
The acidity of buttermilk can be mimicked by adding a teaspoon of lemon juice to your milk if you really want that flavor profile.
Myth: The first pancake is always a "throwaway." Truth: The "sacrificial pancake" only happens because the pan wasn't preheated properly. If you give your skillet a full 5 minutes to reach temperature and ensure the fat is shimmering but not smoking, your very first pancake will be just as golden and perfect as the last one.
Myth: Sifting flour is a waste of time. Truth: While you don't have to sift, whisking your dry ingredients thoroughly is vital. Flour settles in the bag, and if you don't break up those clumps, you'll end up with pockets of dry flour in your finished pancake because you're (correctly) trying not to overmix the batter.
A quick 30 second whisking of the flour, sugar, and baking powder ensures a much more consistent crumb.

Recipe FAQs
How to make simple fluffy pancakes?
Whisk the dry ingredients first, then gently fold the wet into the dry. Stop mixing the moment you see the last streak of flour disappear, leaving small lumps visible. Let the batter rest for five minutes before cooking on medium low heat.
How to make 3 ingredient fluffy pancakes?
No, it is not possible to achieve true fluffiness with only three standard ingredients. Fluffiness requires a chemical leavener like baking powder reacting with heat and liquid, which necessitates at least four core components: flour, liquid, binder (like egg), and leavener.
What's the secret to super fluffy pancakes?
Do not overmix the batter, and ensure your baking powder is fresh. Overmixing develops gluten, leading to a tough, flat texture, while fresh leavening creates the necessary carbon dioxide pockets to achieve maximum vertical rise.
What is the secret ingredient to make fluffy pancakes?
The secret is the leavener: baking powder, used generously and recently purchased. It generates the gas that traps steam inside the batter, pushing the pancake upwards before the exterior sets.
How to avoid flat pancakes when cooking?
Cook on medium low heat and never press down after flipping. Too high heat burns the outside before the inside can rise, and pressing the pancake releases all the trapped air you worked so hard to create.
Should I let the pancake batter rest before cooking?
Yes, allow the batter to rest for five minutes. This brief rest allows the flour to fully hydrate and relaxes the gluten strands slightly, resulting in a more tender crumb without sacrificing the lift from the baking powder.
Is it true that the first pancake is always a waste?
No, this is a common misconception based on improper heat management. The first pancake is usually a test; if your pan is fully preheated for five minutes before the first pour, that initial cake will cook perfectly.
Fluffy Pancakes From Scratch

Ingredients:
Instructions:
Nutrition Facts:
| Calories | 405 kcal |
|---|---|
| Protein | 11.1 g |
| Fat | 13.3 g |
| Carbs | 59.3 g |
| Fiber | 1.7 g |
| Sugar | 10.8 g |
| Sodium | 580 mg |
