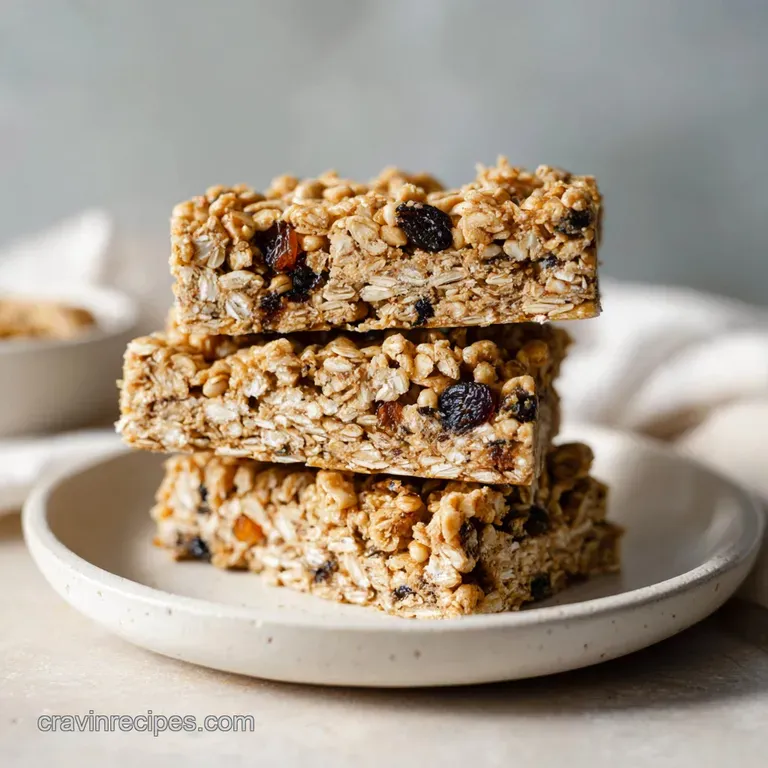
Homemade Granola Bars for Kids
- Time: Active 15 minutes, Passive 5 minutes, Total 20 minutes
- Flavor/Texture Hook: Chewy toasted oats with a velvety peanut butter finish
- Perfect for: School lunchboxes and busy weekday meal prep
- Mastering the Best Homemade Granola Bars for Kids
- Planning Your Recipe Success
- Product Component Analysis
- Essential Pantry Staples and Substitutes
- Necessary Tools for Easy Prep
- Step-By-Step Mixing and Pressing Instructions
- Solving Common Texture Problems
- Flavor Variations and Creative Swaps
- Scaling and Batch Cooking
- Debunking Texture and Ingredient Myths
- Storage and Freezing Guidelines
- Suggested Pairings and Serving Ideas
- Recipe FAQs
- 📝 Recipe Card
Mastering the Best Homemade Granola Bars for Kids
The first time I tried making these, my kitchen looked like a honey coated disaster zone. I had oats stuck to my elbows, the bars crumbled into a pile of expensive birdseed the moment I touched them, and my toddler just stared at the mess with genuine confusion.
It was a classic "Pinterest fail" that left me scrubbing the countertop for twenty minutes while the kids asked for crackers instead.
But I was determined to stop buying those cardboard tasting boxed versions filled with ingredients I couldn't pronounce. I spent the next three weekends tweaking the ratio of liquid to dry ingredients until I finally heard that satisfying "thwack" of a solid bar hitting the cutting board.
When my eldest finally took a bite and didn't leave a trail of crumbs across the living room rug, I knew I’d hit gold.
This recipe is the result of those sticky afternoons. It’s a hearty, no fuss approach that actually stands up to the rigors of a backpack. We aren't looking for gourmet complexity here; we want a reliable, comforting snack that tastes like home and keeps the "hangry" meltdowns at bay.
Trust me, once you nail the press down technique, you’ll never go back to the store-bought aisle.
Planning Your Recipe Success
Thermal Binding: Boiling the honey and butter for exactly sixty seconds creates a specific sugar concentration that acts as a structural glue once cooled. This prevents the "crumble effect" often found in no bake recipes.
Starch Hybridization: Combining old-fashioned rolled oats with quick oats creates a multi layered matrix where the small flakes fill the gaps between the larger ones. This increased surface area contact points strengthen the bar’s internal integrity.
Protein Stabilization: The natural fats in creamy peanut butter emulsify with the honey, creating a flexible fat in-sugar suspension. This allows the bar to remain chewy rather than becoming brittle and shattering when bitten.
| Method | Time | Texture | Best For |
|---|---|---|---|
| No Bake (This Recipe) | 20 minutes | Chewy and soft | Quick meal prep and soft bite preference |
| Toasted Oat Method | 35 minutes | Nutty and firm | Maximum flavor depth and older kids |
| Baked Version | 45 minutes | Crunchy and dry | long term shelf stability without fridge |
Right then, before we get our hands sticky, let's talk about why we use specific ingredients. If your kids love these, they'll also go crazy for my No Bake Peanut recipe which uses a very similar flavor profile but in a bite sized format.
Product Component Analysis
| Ingredient | Science Role | Pro Secret |
|---|---|---|
| old-fashioned Oats | Structural Base | Toast them in a dry pan for 3 minutes for a deeper aroma. |
| Honey | Primary Adhesive | Use a darker honey for a more intense, floral sweetness. |
| Ground Flaxseed | Moisture Binder | It absorbs excess oils, keeping the bars from feeling greasy. |
| Unsalted Butter | Softening Agent | It prevents the honey from turning into hard candy. |
Essential Pantry Staples and Substitutes
To get these homemade granola bars for kids just right, you'll need a mix of hearty grains and sticky binders. For busy mornings, I often prep these alongside a Freezer Friendly Breakfast recipe so the whole week is sorted.
- 2.5 cups (225g) old-fashioned rolled oats: The backbone of the bar. (Substitute: Barley flakes for a grainier bite). Why this? Provides the essential chewy texture and fiber base.
- 0.5 cup (45g) Quick cooking oats: The "filler" that holds it all together. (Substitute: Extra old-fashioned oats pulsed twice in a blender).
- 0.25 cup (30g) Ground flaxseed: Adds healthy fats and binding power. (Substitute: Chia seeds for more crunch). Why this? Acts as a nutritional boost that helps stabilize the syrup.
- 0.5 cup (170g) Honey: The glue. (Substitute: Brown rice syrup for a vegan option).
- 0.5 cup (125g) Creamy peanut butter: Adds protein and creaminess. (Substitute: Sunflower seed butter for a nut free version).
- 0.25 cup (30g) Shelled hemp hearts: For a subtle nutty flavor. (Substitute: Finely chopped pumpkin seeds).
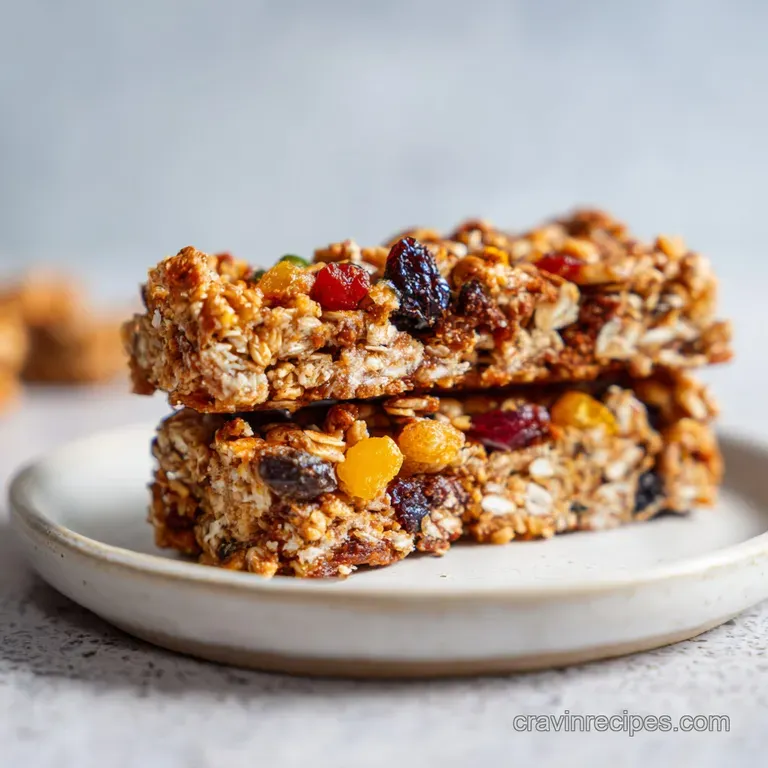
- 0.5 cup (85g) Mini dark chocolate chips: Because we all need a little treat. (Substitute: Dried cranberries or raisins).
- 2 tbsp (28g) Unsalted butter: Keeps the bars biteable. (Substitute: Coconut oil for a dairy-free swap).
- 0.5 tsp Fine sea salt: Balances the sugar.
- 1 tsp Pure vanilla extract: Rounds out the flavors.
Necessary Tools for Easy Prep
You don't need a high tech kitchen for this, but a few specific items make the process much smoother. I highly recommend a 20cm square baking pan for the perfect thickness. If you use a larger pan, the bars will be too thin and prone to snapping.
A sturdy silicone spatula is your best friend here. The mixture is incredibly thick and sticky, and a regular wooden spoon might actually snap if you aren't careful. Also, grab some parchment paper. Don't even try to make these without lining the pan first; otherwise, you'll be chipping granola off the metal for hours.
step-by-step Mixing and Pressing Instructions
- Line the pan. Place a long strip of parchment paper in your 20cm pan, leaving an overhang on two sides to act as handles.
- Combine dry ingredients. In a large mixing bowl, toss the 225g old-fashioned oats, 45g quick oats, 30g flaxseed, 30g hemp hearts, and sea salt until evenly distributed.
- Simmer the binder. Place the 170g honey, 125g peanut butter, and 28g butter in a small saucepan over medium heat.
- Activate the glue. Bring the mixture to a gentle boil, until the surface is covered in small, bubbling amber craters. Note: This usually takes about 3-5 minutes of heating.
- Time the boil. Let it bubble for exactly 60 seconds, then remove from heat immediately.
- Flavor infusion. Stir in the 1 tsp vanilla extract. Note: Adding it at the end prevents the flavor from evaporating.
- Merge the components. Pour the hot liquid over the dry oat mixture and stir vigorously until every oat is coated and glistening.
- Cool slightly. Let the mixture sit for 2-3 minutes before adding the 85g chocolate chips. Note: This prevents them from melting completely into a brown smudge.
- The big press. Transfer to the pan and use a second piece of parchment to press down with your full body weight until the surface is flat and matte.
- Set the structure. Refrigerate for at least 2 hours before lifting out by the parchment handles and slicing into 14 bars.
Solving Common Texture Problems
Why Your Bars Are Too Sticky to Touch
If the bars feel tacky even after chilling, the honey mixture likely didn't reach a high enough temperature. The sugars need to concentrate slightly to move from a liquid state to a semi solid state. If you pull it off the heat as soon as it gets warm, it stays a syrup.
Why Your Bars Are Crumbly and Won't Hold Shape
This usually happens because of "weak pressing." You really have to put some muscle into it. If there are air pockets between the oats, the "glue" can't do its job. It could also be that you added too many extra mix ins like nuts or seeds without increasing the honey.
| Problem | Root Cause | Solution |
|---|---|---|
| Falling apart | Inadequate compression | Use the bottom of a heavy pot to press the mixture into the pan. |
| Too hard to bite | Boiled honey too long | Limit the hard boil to exactly 60 seconds to avoid "candy" stage. |
| Soggy texture | Too much liquid/butter | Measure the honey by weight (170g) rather than volume for precision. |
Common Mistakes Checklist
- ✓ Using only old-fashioned oats (leads to a loose, crumbly bar).
- ✓ Skipping the parchment paper (results in a permanent bond with the pan).
- ✓ Adding chocolate chips while the mixture is boiling hot (they will melt and disappear).
- ✓ Cutting the bars while they are still warm (they need to set to develop structural integrity).
- ✓ Forgetting the salt (the bars will taste flat and overly sweet).
Flavor Variations and Creative Swaps
The Nut Free School Safety Bar
To make these homemade granola bars for kids nut free, simply swap the peanut butter for an equal amount of sunflower seed butter (like SunButter). The texture remains nearly identical, though the color may have a slight greenish tint due to a natural reaction with the baking soda (if you were baking them, but here it's just flavor!).
Homemade Breakfast Bars for Kids
For a morning version, I like to swap half the chocolate chips for dried blueberries or chopped dried apricots. It feels a bit more "breakfast appropriate" and provides a nice chew that pairs perfectly with a glass of milk.
The "Cereal Bar" Texture Swap
If your kids prefer a lighter, airier bar, you can replace 1 cup of the old-fashioned oats with puffed rice cereal. This creates a "crunch and chew" hybrid that mimics popular commercial cereal bars but with much better ingredients.
- For a salty sweet kick: Add 2 tablespoons of crushed pretzels to the mix.
- For a tropical vibe: Swap hemp hearts for unsweetened shredded coconut.
- For more protein: Stir in a tablespoon of collagen peptides into the hot honey mixture.
Scaling and Batch Cooking
If you want to make a massive batch for a soccer team or a party, doubling the recipe works well. Just use a 23x33cm (9x13 inch) pan instead of the 20cm square.
When scaling up, be careful with the boiling honey. A larger volume of syrup takes longer to reach the boiling point, but the "60 second rule" still applies once it starts bubbling vigorously. If you scale down to a half batch, use a loaf pan to maintain the thickness of the bars.
Reducing the size in a large pan will result in thin, brittle "granola bark" rather than bars.
| Servings | Oat Adjustment | Pan Size | Setting Time |
|---|---|---|---|
| 7 Bars | 1.25 cups rolled / 0.25 cup quick | 22x12cm Loaf Pan | 90 minutes |
| 14 Bars | 2.5 cups rolled / 0.5 cup quick | 20x20cm Square | 120 minutes |
| 28 Bars | 5 cups rolled / 1 cup quick | 23x33cm Rectangular | 180 minutes |
Debunking Texture and Ingredient Myths
One common myth is that you must bake granola bars for them to be "shelf stable." In reality, the high sugar content in honey and the low moisture in oats make these perfectly safe at room temperature for several days.
The heat from boiling the honey also helps "cook" the oats just enough to make them digestible and flavorful without the oven.
Another misconception is that you can't use "natural" peanut butter (the kind you have to stir). While processed creamy peanut butter provides a more consistent emulsion, you can absolutely use the natural stuff. Just make sure it is very well stirred so the oil doesn't separate and make the bars greasy.
Storage and Freezing Guidelines
These bars stay remarkably fresh for up to one week when stored in an airtight container in the refrigerator. I actually prefer them cold, as the honey binder is firmest right out of the fridge. If you're packing them for lunch, they will soften slightly at room temperature but should still hold their shape until noon.
For long term storage, these are fantastic freezer candidates. Wrap each bar individually in parchment paper or plastic wrap and place them in a freezer bag. They will keep for up to three months.
You don't even need to "reheat" them; just pop one in a lunchbox in the morning, and it will be perfectly thawed and chewy by lunchtime.
Zero Waste Tip: Don't throw away the "dust" and crumbs left at the bottom of the pan after slicing. Save those golden nuggets and use them as a topping for yogurt or oatmeal. It’s basically premium, artisanal granola that would cost ten dollars a bag at a fancy grocery store!
Suggested Pairings and Serving Ideas
These bars are quite hearty on their own, but they play well with others. If you're serving them as a snack at home, a side of apple slices or a few sticks of string cheese creates a balanced "plate" that covers all the nutritional bases.
For a more substantial "deconstructed breakfast," crumble a bar over a bowl of Greek yogurt and add a drizzle of extra honey. The contrast between the cold, tangy yogurt and the chewy, sweet bar is a total winner. If you're looking for another easy to grab snack, my Air Fryer Mozzarella recipe is a great savory counterpart to these sweet bars for an after school snack spread.
Right then, you're ready to tackle the "granola bar challenge." Just remember: boil for a minute, press like you mean it, and let them chill. You’ve got this!

Recipe FAQs
Are homemade granola bars good for kids?
Yes, when made with whole ingredients. Homemade versions allow you to control sugar content and avoid artificial additives found in many store-bought bars.
How to make your own granola for kids?
Combine dry oats and mix in a hot, boiled binder of honey, butter, and peanut butter. Stir thoroughly until all oats are coated, press firmly into a lined pan, and chill until solid.
What holds granola bars together?
A boiled syrup of honey and butter acts as the primary structural adhesive. Boiling the binder for exactly 60 seconds concentrates the sugars, creating a hard setting glue when cooled.
Are homemade granola bars actually healthy?
Generally yes, as they are high in fiber and complex carbohydrates. Their healthiness depends on minimizing refined sugars and using nutrient dense additions like flaxseed and nuts.
Why do my homemade bars crumble instead of holding a shape?
You likely didn't press the mixture firmly enough into the pan. Insufficient compression leaves air gaps, preventing the cooled binder from fully locking the oats together.
Can I make these bars nut-free for school?
Yes, substitute the peanut butter with an equal amount of sunflower seed butter. This swap maintains the necessary fat content and binding structure for chewy bars.
Do I need to bake these granola bars?
No, baking is not required for this recipe's structure. The mixture relies on chilling after the hot syrup is added to set, making them a faster, no-bake option.
Homemade Granola Bars For Kids

Ingredients:
Instructions:
Nutrition Facts:
| Calories | 231 kcal |
|---|---|
| Protein | 6.1 g |
| Fat | 11.1 g |
| Carbs | 29.4 g |
| Fiber | 2.7 g |
| Sugar | 13.9 g |
| Sodium | 82 mg |
