Incredibly Moist Pumpkin Bread Recipe
- Time: Active 10 minutes, Passive 1 hour, Total 1 hour 10 mins
- Flavor/Texture Hook: Deeply spiced, velvety, and fudge like interior
- Perfect for: Indulgent weekend brunches or cozy holiday gifting
- Mastering the Ultimate Incredibly Moist Pumpkin Bread
- The Physics Behind the Velvety Pumpkin Crumb
- The Chemistry of Your Chosen Ingredients
- Selecting the Best Elements for Success
- Essential Tools for a Foolproof Bake
- A Step-by-Step Guide to the Best Loaf
- Solving Your Most Common Baking Hurdles
- Adjusting the Recipe for Any Crowd
- Debunking Common Pumpkin Bread Tales
- Storage Guidelines and Zero Waste
- Creative Ways to Serve and Enjoy
- Recipe FAQs
- 📝 Recipe Card
Mastering the Ultimate Incredibly Moist Pumpkin Bread
I’ll never forget the first time I tried to make a loaf of pumpkin bread for a neighborhood potluck. I followed a vintage recipe that promised "world famous" results, but what came out of the oven was a dry, crumbly mess that tasted more like cardboard than autumn.
I was so embarrassed I almost hid it under a kitchen towel, but instead, I spent the next three months obsessed with fixing it. I experimented with butter versus oil, added an extra egg here, and tweaked the spice levels there until I finally heard that specific sizzle of the batter hitting the hot edges of the pan and smelled that intoxicating aroma of toasted nutmeg.
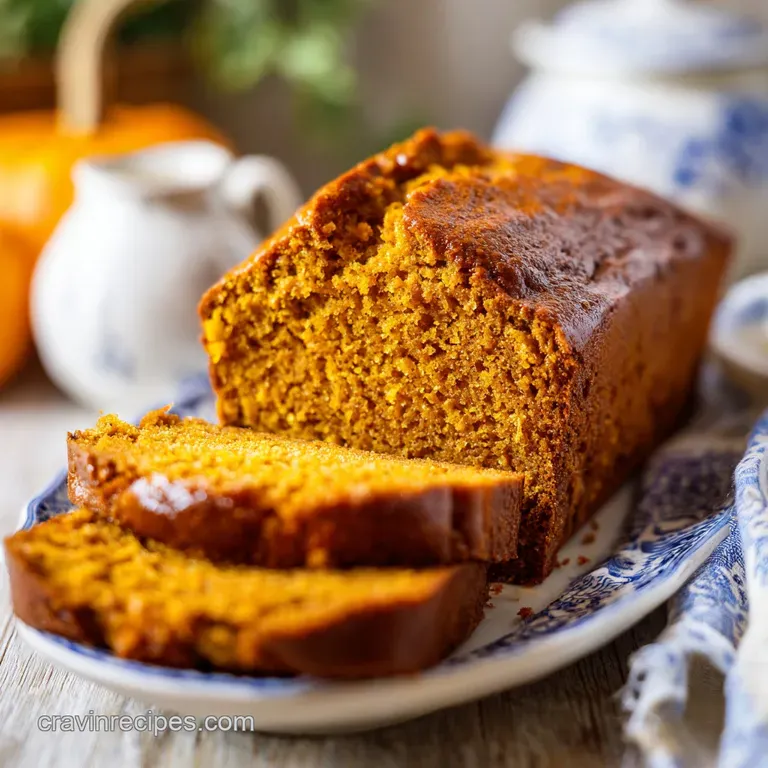
The secret I discovered isn't just about the pumpkin; it's about how you treat the moisture. This incredibly moist pumpkin bread relies on a high ratio of pumpkin puree and oil to create a texture that is almost pudding like in the center while maintaining a sturdy, golden crust.
It’s the kind of bread that makes your kitchen smell like a boutique candle and makes your friends beg for the recipe before they’ve even finished their first slice. We aren't making a light and airy sponge here; we are making something rich, heavy, and deeply indulgent.
Trust me, once you see how that dark brown sugar dissolves into the pumpkin and oil to create a glossy, mahogany batter, you’ll know you’re on the right track. We’re going for a crumb that is so damp it almost sticks to the knife, yet holds its shape perfectly when you cut a thick, generous slab.
If you've ever felt personally slighted by a dry quick bread, this is your redemption. Let's get into the mechanics of why this specific formula works so well.
The Physics Behind the Velvety Pumpkin Crumb
Hygroscopic Action: Brown sugar contains molasses, which actively pulls moisture from the air and traps it within the bread's structure during and after baking.
Fat Suspension: Using neutral oil instead of butter ensures the fat remains liquid at room temperature, providing a silky mouthfeel that doesn't turn "waxy" when the bread cools.
Fiber Reinforcement: The high volume of pumpkin puree provides a dense network of plant fibers that support the rise without needing excessive gluten development.
Emulsification Stability: Three large eggs provide enough lecithin to bind the heavy pumpkin moisture and oil into a unified, smooth crumb that won't separate or feel greasy.
| Ingredient Source | Prep Time | Flavor Impact | Best For |
|---|---|---|---|
| Fresh Sugar Pumpkin | 1 hours 15 mins | Earthy, less sweet | Enthusiasts with extra time |
| Organic Canned Puree | 0 minutes | Rich, consistent, velvety | The gold standard for this loaf |
| Pumpkin Pie Filling | 0 minutes | Cloyingly sweet, pre spiced | Avoid - ruins the spice balance |
When I first started baking, I used to think fresh pumpkin was always the way to go, but I learned the hard way that the water content in fresh pumpkins varies wildly. Canned puree is actually more concentrated, which is why it helps achieve that incredibly moist pumpkin bread texture we’re after.
It's one of those rare cases where the "shortcut" is actually the superior choice for a predictable, gooey result.
The Chemistry of Your Chosen Ingredients
| Ingredient | Science Role | Pro Secret |
|---|---|---|
| Canned Pumpkin | Primary Hydrator | Note: Always use 100% puree, not pie filling, to control the sugar and spice levels. |
| Light Brown Sugar | Moisture Retainer | Note: Pack it tightly to ensure you get the full molasses content for a damp crumb. |
| Neutral Oil | Crumb Softener | Note: Avocado or grapeseed oil provides fat without masking the delicate pumpkin flavor. |
| Baking Soda | Leavening Agent | Note: Reacts with the acidity in the pumpkin to create a fine, uniform rise. |
Choosing your ingredients carefully is the difference between a "good" loaf and a "where has this been all my life" loaf. I always reach for a high-quality vanilla and fresh spices. If your cinnamon has been sitting in the back of the pantry since the last presidential election, it's time to toss it.
The spices are the soul of this recipe, and they need to be vibrant enough to punch through the heavy moisture of the pumpkin.
Selecting the Best Elements for Success
For this recipe, we are using specific quantities to ensure the balance of flavors is exactly right. Don't be tempted to swap the oil for butter unless you want a much drier result. Similarly, the egg count is non negotiable for the structure.
- 15 oz canned pumpkin puree: Why this? Provides the foundational moisture and the iconic vibrant orange color. (Substitute: Roasted, strained butternut squash puree)
- 0.5 cup neutral oil: Why this? Keeps the bread incredibly moist even after three days on the counter. (Substitute: Melted coconut oil)
- 3 large eggs: Why this? Acts as the "glue" that keeps this heavy, damp loaf from falling apart. (Substitute: 0.75 cup unsweetened applesauce, though it will be denser)
- 1 cup light brown sugar, packed: Why this? The molasses content adds a caramel like depth and helps retain hydration. (Substitute: Dark brown sugar for a more intense flavor)
- 0.5 cup granulated sugar: Why this? Helps create those slightly crisp, crackled edges on the top of the loaf. (Substitute: Coconut sugar)
- 1 tsp pure vanilla extract: Why this? Rounds out the sharp spices and bridges the pumpkin and sugar flavors. (Substitute: Vanilla bean paste)
- 1.75 cups all purpose flour: Why this? Provides enough protein for structure without making the bread tough. (Substitute: 1:1 gluten-free flour blend)
- 1 tsp baking soda: Why this? Essential for browning and lift in this acidic batter. (Substitute: 3 tsp baking powder, but color will be lighter)
- 0.5 tsp baking powder: Why this? Provides a secondary lift to ensure the loaf isn't too heavy. (Substitute: Omit if necessary, but loaf will be flatter)
- 1 tsp fine sea salt: Why this? Sharpens all the sweet and spiced notes so they don't taste flat. (Substitute: Kosher salt, use 1.5 tsp)
- 2 tsp ground cinnamon: Why this? The primary aromatic that defines the "fall" flavor profile. (Substitute: Pumpkin pie spice blend)
- 1 tsp ground ginger: Why this? Adds a subtle heat that cuts through the richness of the oil. (Substitute: 0.5 tsp freshly grated ginger)
- 0.5 tsp ground nutmeg: Why this? Adds a woody, nutty complexity that compliments the pumpkin. (Substitute: Ground mace)
- 0.25 tsp ground cloves: Why this? A little goes a long way to provide that nostalgic "baked goods" aroma. (Substitute: Ground allspice)
Essential Tools for a Foolproof Bake
You don't need a fancy stand mixer for this; in fact, I prefer doing it by hand to avoid overworking the flour. Over mixing is the enemy of a tender crumb! I once used a high speed mixer and ended up with a loaf so tough we could have used it as a doorstop. Now, I stick to a sturdy whisk and a silicone spatula.
You'll need a standard 9x5 inch loaf pan. If you use a smaller pan, the batter might overflow and create a smoky mess in your oven. I also highly recommend using parchment paper. Not only does it make cleanup a breeze, but it allows you to lift the entire loaf out of the pan once it has cooled slightly, preventing the bottom from getting soggy.
A cooling rack is also vital. If you leave the bread in the pan for too long, the steam will collect at the bottom and ruin that velvety texture we worked so hard to achieve.
Finally, an oven thermometer is a small investment that pays huge dividends. Most home ovens are off by 10 or 20 degrees, which can be the difference between a raw center and a perfectly baked loaf. Since this is an incredibly moist pumpkin bread, the bake time is longer than most cakes, and precision is key.
A step-by-step Guide to the Best Loaf
- Heat the oven. Set your oven to 350°F (180°C) and grease a 9x5 inch loaf pan. Note: Greasing and then lining with parchment ensures a "shatter proof" release every time.
- Whisk the dry aromatics. In a medium bowl, combine the flour, baking soda, baking powder, salt, cinnamon, ginger, nutmeg, and cloves. Note: Whisking thoroughly prevents "spice clumps" in your finished bread.
- Combine the wet base. In a separate large bowl, whisk together the pumpkin puree, neutral oil, and vanilla extract until the mixture looks glossy and smooth.
- Emulsify the sugars. Add both the brown and granulated sugars to the pumpkin mixture and whisk vigorously. Note: You want the sugars to partially dissolve into the pumpkin moisture.
- Incorporate the eggs. Add the 3 eggs one at a time, whisking well after each addition until the batter is lightened and velvety.
- Merge the mixtures. Gently fold the dry ingredients into the wet batter using a spatula. Stop mixing the moment the last white streak of flour disappears.
- Fill the pan. Pour the batter into your prepared loaf pan and smooth the top with your spatula. Note: Tap the pan on the counter once to release large air bubbles.
- The low and slow bake. Place the pan in the center of the oven and bake for 1 hour. Note: Start checking at 55 minutes, as oven speeds vary.
- The doneness check. Insert a wooden skewer into the deepest part of the loaf; it should come out clean or with just a few moist crumbs until the top is dark golden and slightly crackled.
- The patient cool. Let the bread sit in the pan for 10 minutes, then lift it out using the parchment "slings" to a wire rack to cool completely.
Solving Your Most Common Baking Hurdles
One of the most frustrating things that can happen is taking your loaf out, letting it cool, and finding a raw, gummy center. It’s a common issue with high moisture bakes. Usually, this happens because the outside looked "done" while the interior was still struggling to set. This is a very similar technique to what I talk about in my Moist Banana Bread recipe, where the weight of the fruit (or pumpkin) requires a longer, more stable heat.
Why the Bread Sunken in the Middle
This usually happens if you open the oven door too early in the baking process. The rush of cool air collapses the delicate structure before the eggs have a chance to set. Another culprit is using expired baking soda; if the gas bubbles don't have enough strength to hold up the heavy pumpkin, the center will inevitably dip.
Make sure your leaveners are fresh and keep that door closed for at least the first 45 minutes.
Why the Top Cracked Early
A big crack across the top is actually a hallmark of a great quick bread! It happens because the outside sets while the inside is still rising and expanding. However, if the crack looks "exploded," your oven might be too hot. This forces the bread to rise too fast.
If your oven runs hot, try lowering the temp to 325°F (160°C) and extending the time by 10-15 minutes.
Troubleshooting Texture and Rise Issues
| Problem | Root Cause | Solution |
|---|---|---|
| Gummy/Dense Crumb | Over mixing the flour | Fold by hand only until the flour is just incorporated. |
| Burned Top / Raw Middle | Oven temp too high | Tent the loaf with foil after 40 mins and lower the temp. |
| Dry and Crumbly | Too much flour | Spoon and level your flour; don't scoop directly from the bag. |
Common Mistakes Checklist
- ✓ Using "Pumpkin Pie Filling" instead of 100% Puree (this ruins the spice/sugar balance)
- ✓ Scooping the flour with the measuring cup (this packs it down, adding too much flour)
- ✓ Forgetting to check the expiration date on your baking soda
- ✓ Slicing the bread while it's still piping hot (this causes the steam to escape too fast, drying it out)
- ✓ Over whisking once the flour is added (this develops gluten, making it tough)
Adjusting the Recipe for Any Crowd
Scaling a quick bread can be a bit tricky because of the pan sizes. If you want to double this recipe to make two loaves, simply double all ingredients. However, be careful with the spices I usually suggest only increasing the salt and spices by 1.5x to start, as they can become overwhelming when doubled.
When baking two loaves at once, ensure there is at least two inches of space between the pans to allow the air to circulate, or the sides won't brown properly.
To make mini loaves, reduce the baking time to about 30 to 35 minutes. These are perfect for holiday gifting! If you want to scale down to a single small loaf (half recipe), you’ll need to beat one egg and use half of it. It’s a bit of a pain, but it ensures the structure remains intact. For more sweet brunch ideas that scale well for groups, you might enjoy my Cinnamon Roll Monkey recipe.
| Desired Change | Adjustment Strategy | Pan Size Change |
|---|---|---|
| Double Loaf | 2x Ingredients (1.5x spices) | Two 9x5 pans |
| Mini Loaves | Same batter | 3-4 small tins |
| Muffins | Same batter | 12 count muffin tin |
Debunking Common Pumpkin Bread Tales
Many people believe that the more you whisk the batter, the airier it will be. This is a total myth for quick breads. Because we are using oil and heavy pumpkin, we aren't trying to incorporate air like a sponge cake. In fact, the more you whisk after adding the flour, the more gluten you develop.
This leads to a rubbery texture rather than the velvety, incredibly moist pumpkin bread we are aiming for.
Another myth is that pumpkin bread needs to be refrigerated immediately. Because of the high sugar and spice content, it’s actually quite shelf stable. Storing it in the fridge can actually dry out the crumb faster.
Keep it on the counter for the first 2 or 3 days; the flavor actually gets better as the spices "bloom" into the moist crumb over time.
Storage Guidelines and Zero Waste
To keep your bread in peak condition, wrap it tightly in plastic wrap or store it in an airtight container at room temperature. It will stay incredibly moist for up to 4 days. If you still have leftovers after that, move it to the fridge for another 3 days. For long term storage, this bread freezes beautifully.
I like to slice it first, then wrap each slice individually in foil and place them all in a freezer bag. You can pull out a single slice and pop it in the toaster for a quick, "shatter crisp" edge.
Don't let any pumpkin go to waste! If you have a few tablespoons left in the bottom of the can, stir it into your morning oatmeal or whisk it into a vinaigrette with some maple syrup and apple cider vinegar. You can even freeze leftover puree in ice cube trays to drop into smoothies later.
As for the loaf itself, if it finally starts to go stale after a week, it makes the most indulgent French toast you’ve ever had.
Creative Ways to Serve and Enjoy
While a plain slice is a thing of beauty, you can really lean into the indulgence by adding a "schmear" of salted maple butter. Just whip together softened butter, a splash of maple syrup, and a pinch of flaky sea salt.
The salt cuts through the sweetness of the incredibly moist pumpkin bread in a way that is absolutely addictive.
For a more "dessert" feel, try warming a slice in a skillet with a little bit of butter until the edges get a slight sizzle and become crispy. Top it with a dollop of cold whipped cream or even a scoop of vanilla bean ice cream.
The contrast between the hot, spiced bread and the melting cream is a sensory experience you won't soon forget. It’s the ultimate way to celebrate the season, whether you’re sharing it with friends or keeping the whole loaf for yourself I certainly won’t judge!

Recipe FAQs
What is the single most important factor for an incredibly moist pumpkin bread?
Using neutral oil instead of butter. Oil stays liquid at room temperature, ensuring the crumb feels velvety and moist long after baking, whereas butter solidifies and creates a slightly firmer texture.
Should I substitute canned pumpkin puree with fresh pumpkin puree?
No, stick with canned puree. Canned puree has a more consistent, lower water content, which is crucial for achieving the specific dense and moist texture promised by this recipe.
How to prevent the center of this loaf from sinking after baking?
Do not open the oven door during the first 45 minutes of baking. The rapid temperature drop causes the structure, which is heavily weighed down by moisture, to collapse before the eggs fully set.
Is it true that chilling the batter overnight makes the pumpkin bread more flavorful?
Yes, letting the batter rest overnight is beneficial. The flour fully hydrates and the spices fully bloom, resulting in a deeper flavor, similar to how the flavors deepen in a Moist Carrot Cake recipe.
How to ensure the bread does not stick to the loaf pan?
Line the entire pan with parchment paper, leaving an overhang. Grease the pan first, then lay the paper so you can lift the entire loaf out intact once it has cooled slightly, which prevents steaming the bottom.
What can I use instead of brown sugar to retain moisture?
Use golden syrup or maple syrup, but reduce the liquid elsewhere. Brown sugar works because its molasses is hygroscopic, so if you substitute, you must reduce other added liquids slightly to maintain the right consistency.
How can I achieve the crisp top texture without drying out the interior?
Sprinkle granulated sugar heavily over the batter right before baking. The granular sugar melts and then caramelizes quickly, creating a protective, crackled crust while the interior remains under wraps.
Moist Pumpkin Bread Recipe

Ingredients:
Instructions:
Nutrition Facts:
| Calories | 273 kcal |
|---|---|
| Protein | 3.7 g |
| Fat | 10.5 g |
| Carbs | 41.6 g |
| Fiber | 1.7 g |
| Sugar | 24.6 g |
| Sodium | 308 mg |
