No-Churn Birthday Cake Ice Cream
- Time: Active 15 minutes, Passive 6 hours, Total 6 hours 15 minutes
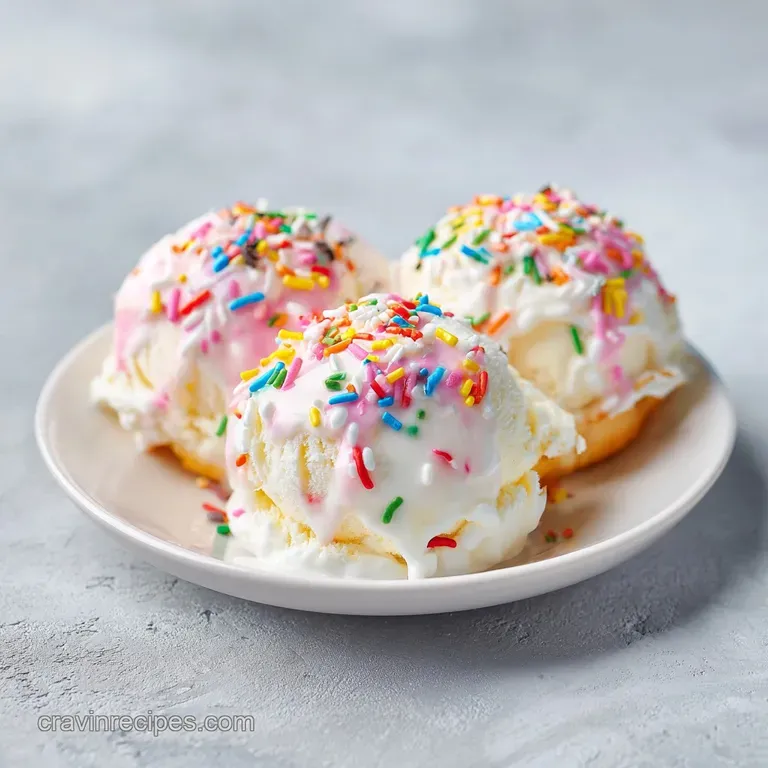
- Flavor/Texture Hook: Silky vanilla base with a buttery cake batter finish and a satisfying rainbow sprinkle crunch.
- Perfect for: Last minute birthday celebrations, summer sleepovers, or when you need a serious dose of sugar fueled nostalgia.
- The Ultimate Birthday Cake Ice Cream
- The Physics of the Freeze
- Fast Method Versus Classic Churn
- Analyzing the Sweet Components
- Essential Elements and Swaps
- Essential Tools for Success
- Step-by-Step Churning Success
- Fixing Common Frozen Fails
- Adjusting for Any Crowd
- Debunking Frozen Treat Fables
- Storing and Repurposing Scraps
- Pairing the Perfect Scoop
- Birthday Cake Ice Cream FAQs
- 📝 Recipe Card
The Ultimate Birthday Cake Ice Cream
There is a very specific aroma that hits you the second you peel back the plastic on a box of yellow cake mix. It is sweet, slightly floral, and smells like childhood happiness. I remember trying to recreate this flavor years ago by just tossing dry mix into plain vanilla store-bought tubs. It was...
well, it was a gritty disaster. I learned the hard way that you can't just dump flour based mixes into cold cream and expect magic.
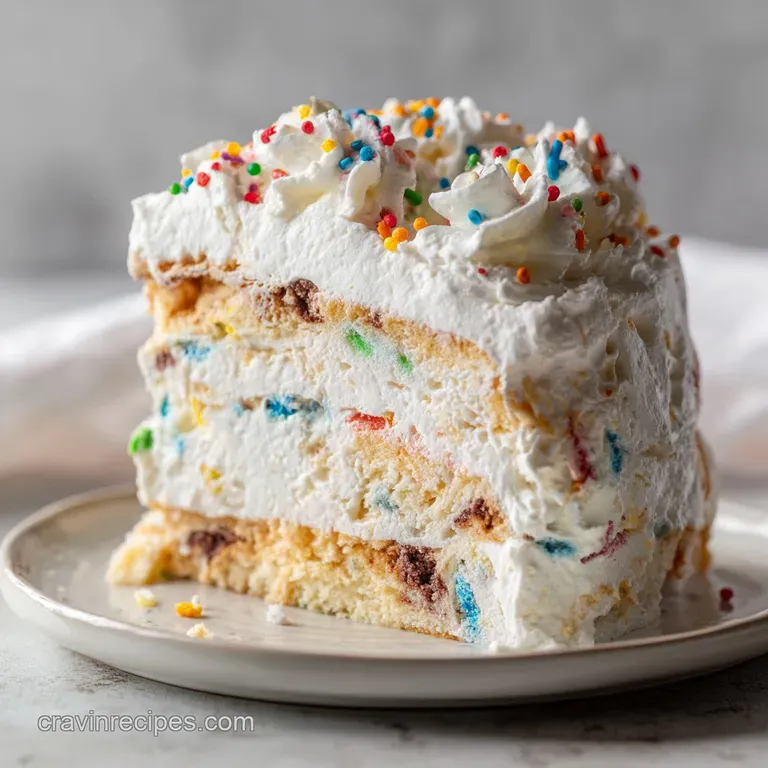
This version is the result of those failed experiments. We’re talking about a base that is so thick and indulgent it feels like eating frozen silk. When you fold in those pre baked cake bits and the rainbow jimmies, it creates this beautiful contrast of soft cream and dense, chewy cake.
It’s the kind of dessert that makes you want to skip the actual cake entirely and just eat the ice cream with a massive serving spoon.
The Physics of the Freeze
Fat Stabilization: High fat heavy cream creates a structural foam that traps air, providing a velvety mouthfeel without the need for constant churning. Sugar Depression: The high sugar content in sweetened condensed milk lowers the freezing point, ensuring the scoop stays soft rather than turning into a solid block of ice.
Fast Method Versus Classic Churn
| Method | Time | Texture | Best For |
|---|---|---|---|
| No Churn (This Recipe) | 20 minutes prep | Dense, fudgy, and silky | Busy weeknights and beginners |
| Traditional Churn | 45 minutes + chilling | Light, airy, and melting | Purists with an ice cream maker |
| Ice Cream Cake | 30 minutes prep | Layered and structural | Large parties and celebrations |
Right then, let's talk about why this specific method wins every single time. Most people think you need a fancy machine taking up counter space to get professional results. But honestly, for a flavor as rich as this, the no churn method actually works better.
It mimics the density of premium "super premium" brands you'd find in a high end scoop shop.
Analyzing the Sweet Components
| Ingredient | Science Role | Pro Secret |
|---|---|---|
| Heavy Whipping Cream | Provides the fat structure for aeration | Use cream with at least 36% fat for the sturdiest peaks |
| Sweetened Condensed Milk | Acts as the sweetener and prevents large ice crystals | Keep it at room temperature to fold in easily |
| Yellow Cake Mix | Delivers the iconic "cake batter" flavor profile | Always heat treat to eliminate bacteria before mixing |
| Almond Extract | Mimics the "bakery" scent found in professional cakes | A little goes a long way; don't over measure |
The magic really happens when that almond extract hits the vanilla. It’s a trick I learned from an old school baker. Vanilla on its own is great, but that tiny hit of almond is what gives it that "boxed cake" nostalgia we all secretly love. If you’re looking for more party ready treats, you might also love my Mini Cheesecake Recipe which uses a similar high fat base for maximum creaminess.
Essential Elements and Swaps
To get that perfect shatter of sprinkles and the velvety base, you need the right lineup. Here is exactly what I use in my kitchen.
- 2 cups heavy whipping cream (36% fat or higher), chilled: Why this? The high fat content is non negotiable for the structure.
- 14 oz sweetened condensed milk (1 can): Why this? It provides sweetness and the perfect gooey texture.
- 0.5 cup yellow cake mix, heat treated: Why this? This is the soul of the flavor profile.
- 1 tablespoon pure vanilla extract: Why this? Rounds out the sweetness with depth.
- 0.25 teaspoon almond extract: Why this? The secret ingredient for that authentic bakery taste.
- 1 pinch fine sea salt: Why this? Balances the sugar so it isn't cloying.
- 0.5 cup rainbow sprinkles (jimmies): Why this? Jimmies hold their color better than nonpareils.
- 1 cup pre baked vanilla cake bits, cubed: Why this? Adds essential texture and "chew" to every scoop.
| Original Ingredient | Substitute | Why It Works |
|---|---|---|
| Yellow Cake Mix | Chocolate Cake Mix | Switches the profile to a "death by chocolate" version |
| Rainbow Jimmies | Chocolate Sprinkles | Offers a more muted, sophisticated look and cocoa flavor |
| Vanilla Cake Bits | Crushed Sandwich Cookies | Adds a crunchy, creamy texture similar to cookies and cream |
Chef's Tip: Freeze your mixing bowl and whisk attachment for 15 minutes before starting. A cold bowl helps the cream reach stiff peaks much faster and prevents the fat from melting during the process.
Essential Tools for Success
You don't need a lot of gear for this, but the quality of your tools matters. A stand mixer is your best friend here because whipping cream by hand is a workout nobody wants. If you don't have one, a sturdy hand mixer works just fine.
You'll also need a 9x5 inch loaf pan, preferably metal, as it conducts the cold much faster than glass or ceramic.
I also recommend a silicone spatula. Since we are folding in heavy ingredients like cake bits and condensed milk, you need something flexible that won't deflate all that lovely air you just whipped into the cream.
Finally, a piece of parchment paper or plastic wrap to press directly onto the surface of the ice cream will prevent those pesky ice crystals from forming on top while it sets in the freezer.
step-by-step Churning Success
1. Heat Treating the Cake Mix
Spread the 0.5 cup yellow cake mix on a baking sheet and bake at 180°C (350°F) for 5 minutes. Note: This kills any lingering bacteria in the raw flour, making it safe to eat cold.
2. Preparing the Flavor Base
Whisk the 14 oz sweetened condensed milk, heat treated cake mix, 1 tablespoon vanilla, 0.25 teaspoon almond extract, and a pinch of salt in a large bowl until completely smooth and lump free.
3. Whipping the Aerated Base
Pour the 2 cups chilled heavy cream into your cold mixing bowl and whip on medium high until stiff, billowy peaks form. Note: If it looks like thick shaving cream, you are there.
4. Lightening the Mixture
Add two large spoonfuls of the whipped cream into the condensed milk mixture and stir gently. Note: This "sacrificial" cream lightens the heavy milk so the rest of the cream doesn't deflate.
5. Incorporating the Cream
Fold the remaining whipped cream into the base using a slow figure eight motion until no white streaks remain.
6. Adding the Texture
Gently toss in the 0.5 cup rainbow sprinkles and 1 cup pre baked cake bits. Note: Stop mixing the moment they are distributed to avoid bleeding the sprinkle colors.
7. Transferring to the Pan
Pour the mixture into a 9x5 inch loaf pan and smooth the top with your spatula until the surface is level.
8. Achieving the Final Freeze
Press a piece of plastic wrap directly onto the surface and freeze for at least 6 hours until the center is firm to the touch.
Fixing Common Frozen Fails
Why Your Ice Cream Is Gritty
If you notice a sand like texture, it's usually because the cake mix wasn't fully incorporated into the condensed milk or the mixture wasn't heat treated properly. Raw flour can feel grainy on the tongue. To fix this, always sift your cake mix before stirring it into the liquid base.
The Problem of Color Bleeding
Nothing ruins the look of this dish faster than rainbow sprinkles turning the whole base a muddy grey. This happens if the cream is too warm or if you over mix after adding the sprinkles. The moisture in the cream dissolves the sugar coating on the jimmies.
| Problem | Root Cause | Solution |
|---|---|---|
| Liquid Base | Cream wasn't whipped to stiff peaks | Whip until the peaks stand straight up when the whisk is lifted |
| Icy Texture | Too much air or improper sealing | Press plastic wrap directly onto the surface before freezing |
| Hard to Scoop | Freezer temperature is too low | Let the container sit on the counter for 5 minutes before serving |
Common Mistakes Checklist
- ✓ Ensure the heavy cream is ice cold straight from the fridge (warm cream won't hold air).
- ✓ Don't skip the almond extract; it provides the "birthday" flavor profile.
- ✓ Use "jimmies" (the long ones) rather than "nonpareils" (the tiny balls) to prevent color bleeding.
- ✓ Sift the cake mix to ensure the base is velvety and not lumpy.
- ✓ Use a metal pan for faster freezing and better texture.
Adjusting for Any Crowd
If you are hosting a large party, you can easily double this recipe. Just be aware that you'll need to work in batches when whipping the cream unless you have a very large stand mixer bowl. When doubling, I suggest using 1.5 times the salt and extracts rather than a full 2x to keep the flavors balanced.
For a smaller "treat for two," you can halve everything and use a small glass storage container instead of a loaf pan.
Scaling up for an ice cream cake is also brilliant. You can use this exact mixture as a middle layer between two sheets of cake. If you're looking for a base cake, my Chocolate Cupcakes with Chocolate recipe can be adapted into a flat sheet pan cake that pairs beautifully with this vanilla heavy ice cream.
Debunking Frozen Treat Fables
One major myth is that no churn ice cream is "lesser" than churned. In reality, the lack of added air (overrun) makes it denser and richer, which many people actually prefer for cake batter flavors. Another misconception is that you can use low-fat milk.
Trust me on this: do not attempt this with half and half or whole milk. Without the high fat content of heavy whipping cream, the water in the milk will freeze into hard, crunchy shards of ice, ruining that velvety experience.
Storing and Repurposing Scraps
This ice cream will stay fresh and delicious for up to 2 weeks in the freezer. Beyond that, it might start to pick up "freezer smells" or develop ice crystals. Always keep it in the back of the freezer, which is the coldest part, rather than in the door where the temperature fluctuates every time you open it.
If you have leftovers that are getting a bit too firm, don't throw them out! You can blend the remaining ice cream with a splash of milk to make the world's best cake batter milkshake. You can also sandwich a scoop between two sugar cookies for an instant ice cream sandwich.
If you have extra cake bits or sprinkles, store them in a sealed container at room temperature for your next batch or use them to top off a bowl of morning yogurt for a "birthday" breakfast surprise.
Pairing the Perfect Scoop
While this ice cream is a star on its own, it plays very well with others. I love serving a scoop of this alongside a warm, fudgy brownie. The contrast of the freezing, velvety cream against a warm, gooey chocolate base is incredible.
You could even go full "party mode" and serve it with a drizzle of white chocolate ganache and extra sprinkles on top.
If you're feeling adventurous, try serving it with a side of tart raspberry sauce. The acidity of the berries cuts through the intense sweetness of the cake mix base perfectly. It’s a sophisticated twist on a childhood classic that will have your friends asking for the recipe before they've even finished their first bowl.
Trust me, once you make this, the store-bought tubs will never taste the same again. Let's crack on and get those whisks moving!

Birthday Cake Ice Cream FAQs
Do they still sell birthday cake ice cream?
Yes, virtually every major brand carries some version. While availability shifts seasonally, the flavor profile is extremely popular and generally remains a standard offering in the freezer aisle.
Is birthday cake ice cream just vanilla with sprinkles?
No, it is typically more complex than simple vanilla and sprinkles. True birthday cake ice cream incorporates artificial or natural yellow cake batter flavoring, often using butter flavor or almond extract to mimic the distinct baked taste.
Did Blue Bunny discontinue birthday cake ice cream?
Blue Bunny sometimes rotates its flavors, but a dedicated "Birthday Cake" offering is usually available. Check local retailers, as product lines frequently shift based on regional demand and seasonal releases.
What does birthday cake ice cream have in it?
The core components are usually a vanilla or cake flavored base, sweetened condensed milk, rainbow sprinkles, and small pieces of baked cake or frosting swirl. Achieving the right texture often requires a high fat content, similar to our no-churn base technique.
How can I ensure my homemade birthday cake ice cream is velvety, not icy?
Ensure your mixture has a high sugar and fat ratio to depress the freezing point. The key is preventing large water crystals from forming, which is why sweetened condensed milk is critical in no-churn recipes; mastering this stability is similar to controlling texture when making a Turtle Cheesecake recipe.
How do I heat treat raw cake mix safely for use in ice cream?
Spread the dry cake mix on a baking sheet and bake at 350°F (175°C) for exactly 5 minutes. This brief application of heat kills bacteria like E. coli, making the raw flour component safe to consume in a frozen dessert.
What is the best way to prevent sprinkles from bleeding their color into the base?
Fold the sprinkles in during the final step and mix as minimally as possible. You should stop mixing the moment the colors are evenly distributed; overmixing agitates the colors in the liquid base, leading to an unwanted grey hue.
No Churn Birthday Cake Ice Cream

Ingredients:
Instructions:
Nutrition Facts:
| Calories | 382 calories |
|---|---|
| Protein | 4.2 g |
| Fat | 23.4 g |
| Carbs | 40.1 g |
| Fiber | 0.4 g |
| Sugar | 31.5 g |
| Sodium | 178 mg |
