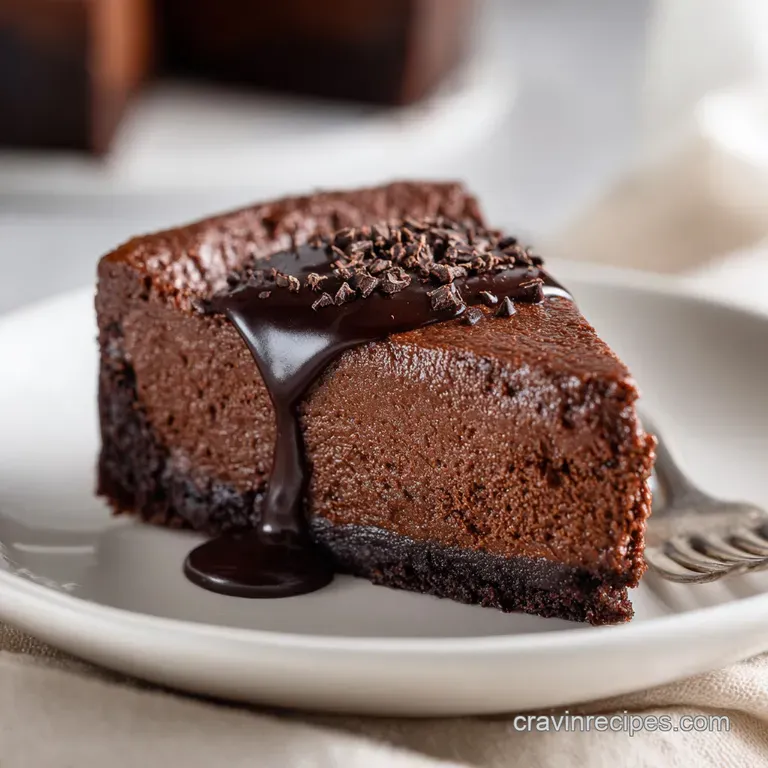
Chocolate Cake: Silky Mousse & Fudgy Crumb
- Time: Active 30 mins, Passive 35 mins, Total 1 hours 5 mins
- Flavor/Texture Hook: Silky mousse over a moist, fudgy crumb
- Perfect for: Milestone birthdays, dinner parties, or serious sugar cravings
- The Ultimate Indulgent Chocolate Recipe
- Why This Works
- Component Analysis Deep Dive
- Choosing Your Essential Elements
- Creating The Velvet Layers
- Fixing Common Cocoa Baking Hurdles
- Scaling The Success
- Chocolate Preparation Myths
- Preserving That Fresh Fudgy Texture
- Finishing Touches For Gorgeous Serving
- Recipe FAQs
- 📝 Recipe Card
The Ultimate Indulgent Chocolate Recipe
You know that specific, earthy scent when boiling water hits dark cocoa powder? It’s not just a smell; it’s an atmosphere. The first time I tried this specific method, I was convinced I’d ruined it. The batter looked like thin chocolate soup, splashing against the sides of the bowl.
I almost threw it out to start over, but I’m so glad I didn't. That watery batter is exactly what creates the most melt in-your mouth crumb you’ve ever experienced.
We are moving past those dry, crumbly boxed mixes. This is about building layers of richness, starting with a base that stays moist for days and finishing with a mousse that feels like a velvet cloud.
Trust me, once you see how the boiling water "blooms" the cocoa, you’ll never go back to the old way of just whisking dry ingredients together.
The real magic happens when the dark chocolate ganache meets the whipped cream. It transforms from a heavy, dense liquid into a light, airy mousse that holds its shape. It’s indulgent without being cloying, and honestly, you might find yourself eating the mousse straight from the bowl with a spoon.
I won't judge; I've done it more times than I can count.
Why This Works
- Cocoa Blooming: Boiling water dissolves the cocoa solids, releasing trapped flavor molecules for a deeper, more intense chocolate profile.
- Oil vs Butter: Using 3/4 cup neutral oil ensures the cake remains soft even when cold, as oil stays liquid at lower temperatures while butter solidifies.
- Two Stage Aeration: Folding whipped heavy cream into a cooled chocolate ganache creates a stable, bubbly structure that doesn't collapse.
- Maillard Enhancement: The 1 3/4 cups granulated white sugar reacts with the proteins in the eggs during baking to create a slightly crisp, caramelized exterior.
| Thickness | Internal Temp | Rest Time | Visual Cue |
|---|---|---|---|
| 1 inch (layer) | 200°F (93°C) | 10 mins | Edges pull away slightly |
| 2 inch (loaf) | 205°F (96°C) | 20 mins | Toothpick comes out clean |
| Cupcake | 195°F (90°C) | 5 mins | Springs back when touched |
It is crucial to let the cake rest in the pan for those first 10 minutes. If you try to flip it while it's piping hot, the delicate structure we built with the boiling water will likely shatter.
Patience is the hardest ingredient to find in a kitchen, but it's the one that ensures your layers stay beautiful.
Component Analysis Deep Dive
| Ingredient | Science Role | Pro Secret |
|---|---|---|
| Dutch processed cocoa | Neutralized acidity | Sift it to avoid stubborn lumps |
| Boiling water | Solvent and hydrator | Must be rolling boil, not warm |
| Baking soda | Leavening agent | Reacts with heat to create lift |
| Dark chocolate | Fat and structure | Use 60% cacao for balanced bitterness |
Choosing Your Essential Elements
- 3/4 cup Dutch processed cocoa powder, sifted: Why this? It has a smoother, darker flavor than natural cocoa.
- 1 cup boiling water: Why this? Essential for blooming the cocoa powder.
- 1 1/2 cups all purpose flour: Why this? Provides enough protein for structure without being tough.
- 1 3/4 cups granulated white sugar: Why this? Adds sweetness and moisture through hygroscopy.
- 3/4 cup neutral oil: Why this? Guarantees a moist crumb that lasts for days.
- 2 large eggs: Why this? Binds the fats and liquids into a stable emulsion.
- 1 1/2 tsp baking soda: Why this? Creates the necessary bubbles for a light texture.
- 1/2 tsp salt: Why this? Sharpens the chocolate flavor and balances sugar.
- 8 oz dark chocolate (60% cacao or higher): Why this? High fat content makes the mousse velvety.
- 2 cups heavy cream, divided: Why this? Creates the base and the air for mousse.
- 2 tbsp powdered sugar: Why this? Stabilizes the whipped cream portion.
- 1 tsp pure vanilla extract: Why this? Rounds out the floral notes of the cacao.
| Original Ingredient | Substitute | Why It Works |
|---|---|---|
| Neutral Oil | Melted Coconut Oil | Similar fat profile. Note: Adds a slight tropical scent. |
| Dutch Cocoa | Natural Cocoa | More acidic. Note: You must add 1/4 tsp baking powder. |
| Heavy Cream | Full fat Coconut Milk | High fat content. Note: Mousse will be softer and nuttier. |
If you're looking for something quicker during the week, my Soft and Chewy recipe hits the spot without the wait. However, for a true centerpiece, sticking to these specific cake ingredients is your best bet for that bakery quality finish.
Creating The Velvet Layers

- Sift the cocoa. Place 3/4 cup Dutch processed cocoa in a large bowl and whisk in 1 cup boiling water until smooth and glossy. Note: This prevents dry clumps in your final batter.
- Mix the liquids. Whisk in 3/4 cup neutral oil, 2 large eggs, and 1 tsp vanilla extract until fully incorporated and shimmering.
- Combine dry ingredients. In a separate bowl, whisk 1 1/2 cups flour, 1 3/4 cups sugar, 1 1/2 tsp baking soda, and 1/2 tsp salt until no streaks remain.
- Fold the batter. Gradually add the dry mixture to the wet cocoa base until the batter is thin and dark. Note: Don't overmix; stop once the flour disappears.
- Bake the base. Pour into a greased 9 inch pan and bake at 180°C for 35 minutes until a tester comes out clean.
- Melt the ganache. Place 8 oz chopped dark chocolate in a bowl. Heat 1 cup heavy cream until simmering and pour over chocolate until it melts into a silky liquid.
- Chill the base. Allow the ganache to cool completely to room temperature until it thickens to a pudding like state.
- Whip the cream. In a cold bowl, whip the remaining 1 cup heavy cream with 2 tbsp powdered sugar until stiff peaks form.
- Fold the mousse. Gently fold the whipped cream into the cooled ganache until a light, airy mousse forms. Note: Use a spatula to keep the air bubbles intact.
- Assemble and set. Spread the mousse over the cooled cake until the top is wavy and thick. Chill for 30 minutes before slicing.
Fixing Common Cocoa Baking Hurdles
Why Your Cake Sunk
If your cake looks like a crater in the middle, it’s usually a temperature or leavening issue. Opening the oven door too early causes a sudden drop in temperature, which can collapse the fragile air bubbles before the flour has set.
Alternatively, if your baking soda is old, it won't produce enough gas to hold the weight of the heavy cocoa batter.
Seized Chocolate In Mousse
When chocolate turns into a grainy, hard lump, it has "seized." This happens if a tiny drop of water gets into the chocolate while it's melting, or if the cream was too cold when added to the chocolate. The fats and solids separate, destroying that velvety texture we need for the top layer.
| Problem | Root Cause | Solution |
|---|---|---|
| Grainy Mousse | Over whipped cream | Fold in a splash of liquid cream to soften. |
| Dry Cake Crumb | Over baking | Check 5 mins early; look for slight edge pulling. |
| Mousse is Runny | Ganache was too warm | Chill the ganache cream mix for 20 mins before whipping. |
- ✓ Preheat your oven for at least 20 minutes to ensure a steady temperature.
- ✓ Use a kitchen scale for the flour to avoid "packing" the cup too tightly.
- ✓ Ensure your eggs are at room temperature so they emulsify properly with the oil.
- ✓ Wipe your mixing bowl with lemon juice before whipping cream to remove any fat residue.
- ✓ Never use a whisk for the final mousse fold; use a silicone spatula instead.
Scaling The Success
When you need to feed a crowd, doubling this recipe is relatively straightforward. For a 2x batch, use two 9 inch pans rather than one giant pan to ensure the center cooks through before the edges burn.
You’ll want to keep the spices and leavening agents at about 1.5x the original amount to avoid a soapy aftertaste from the baking soda.
If you’re scaling down for a "date night" version, you can halve everything and use a 6 inch round pan. For the eggs, beat one egg in a small cup and use half by weight. Reduce the baking time by about 8 minutes, but start checking with a toothpick at the 25 minute mark just to be safe.
This cake is basically the sophisticated older sister to my Chocolate Cupcakes with Chocolate recipe. While the cupcakes are great for a quick fix, the full cake allows for that thick, luscious mousse layer that really makes this a standout dessert.
| Serving Size | Pan Size | Cook Time | Yield |
|---|---|---|---|
| Single (12) | 9" Round | 35 mins | 1 Cake |
| Small (6) | 6" Round | 27 mins | 1 Mini Cake |
| Crowd (24) | 9x13 Sheet | 42 mins | 24 Squares |
Chocolate Preparation Myths
A common misconception is that you must use expensive "baking chocolate" bars for the mousse. While high-quality chocolate is better, you can absolutely use high end chocolate chips.
Just be aware that chips contain stabilizers that make them melt a bit thicker, so you might need an extra tablespoon of heavy cream to get that perfect "velvety" finish.
Another myth is that you shouldn't use oil in a premium cake because it's "cheaper" than butter. In reality, oil provides a superior texture for chocolate cakes because it doesn't mask the cocoa flavor with dairy fats.
It also keeps the cake moist for much longer, which is why professional bakeries often prefer oil based sponges.
Preserving That Fresh Fudgy Texture
Because of the fresh heavy cream in the mousse, this cake needs to live in the fridge. Place it in an airtight container or cover it tightly with plastic wrap to prevent it from absorbing any "fridge smells" like onions or leftovers. It will stay fresh and fudgy for up to 4 days.
If you find the mousse has firmed up too much, let your slice sit on the counter for 10 minutes before eating.
You can freeze the cake base (without the mousse) for up to 3 months. Wrap it in a double layer of plastic wrap and then a layer of foil. When you're ready to serve, thaw it at room temperature and then whip up a fresh batch of mousse. For zero waste, take any cake scraps or crumbs from leveling the top and toss them with a bit of leftover ganache to make "cake truffles." Dip those in melted chocolate maybe even try my Chocolate Covered Pretzels recipe technique for a secondary treat.
Finishing Touches For Gorgeous Serving
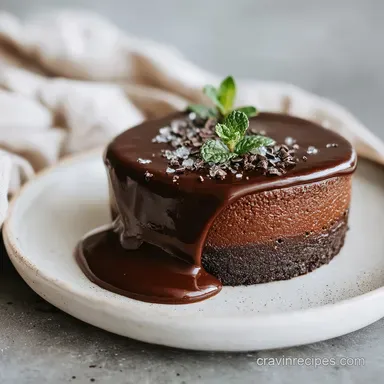
To get those clean, restaurant style slices, run a long knife under hot water and wipe it dry between every single cut. This prevents the mousse from dragging down into the dark cake layer. For a bit of contrast, I love topping this with a few flakes of sea salt or some fresh raspberries.
The acidity of the berries cuts through the richness of the 8 oz dark chocolate beautifully.
If you really want to go over the top, serve each slice with a small dollop of lightly sweetened crème fraîche. The slight tang acts as a perfect foil to the deep, sugary notes of the sponge.
No matter how you serve it, remember that this is a "flavor layers" experience you want to get a bit of the airy mousse and the dense cake in every single bite. Enjoy the sugar rush!

Recipe FAQs
What kind of chocolate should I use for the cake base?
Use Dutch processed cocoa powder. This recipe relies on blooming the cocoa with boiling water to achieve maximum flavor saturation for the fudgy crumb.
What kind of chocolate to use for chocolate molds?
Use high-quality couverture or tempering chocolate bars (60% cacao or higher). For molds, you need high fat content that can set firm without blooming.
What chocolate should I use for the whipped ganache mousse?
Use 60% cacao or higher dark chocolate for the ganache base. The higher cacao content ensures the resulting mousse is rich and dense enough to hold its structure when folded with cream.
Is it true you must use a double boiler to melt the chocolate for the ganache?
No, this is a common misconception. Heating the heavy cream until it simmers and pouring it over the chopped chocolate works perfectly, ensuring even melting with no risk of scorching.
How to achieve the airiest mousse layer possible?
Fold the whipped cream into the cooled ganache gently using a spatula. Do not whisk the mixtures together once the air is incorporated; this preserves the necessary structure you built when whipping the cream.
How to fix it if my cake batter looks too thin?
Do not add more flour; trust the recipe's liquid ratio. This thin batter is necessary for the oil-based crumb to stay moist, similar to the high hydration principles used in our Whole Grain Bread recipe.
What is the slang term for chocolate?
Choc. This is an informal abbreviation used frequently in casual conversation or quick recipe notes, though it rarely appears in formal baking literature.
Velvety Chocolate Mousse Cake
Ingredients:
Instructions:
Nutrition Facts:
| Calories | 559 kcal |
|---|---|
| Protein | 5.2 g |
| Fat | 37.4 g |
| Carbs | 54.8 g |
| Fiber | 4.2 g |
| Sugar | 37.9 g |
| Sodium | 245 mg |
