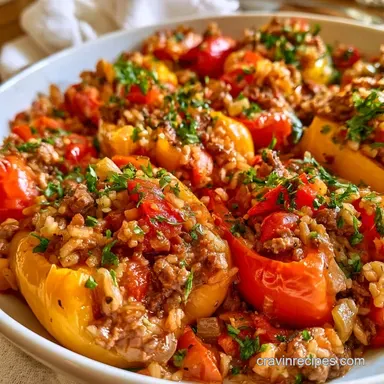
Hearty Crockpot Stuffed Peppers
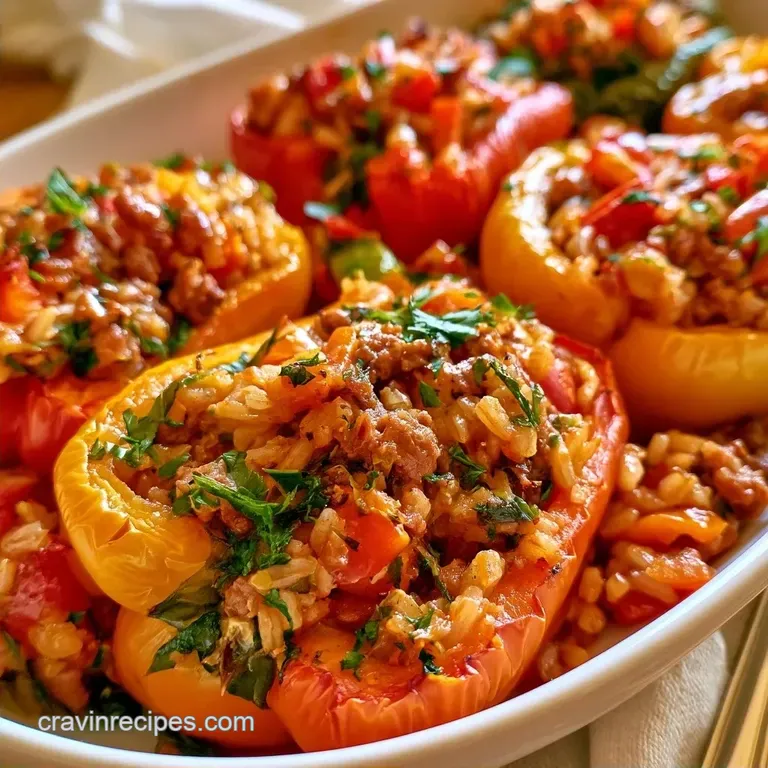
- Time: 30 min active + 6 hours cooking
- Flavor/Texture Hook: Hearty beef with tender, slow cooked pepper shells
- Perfect for: Budget-friendly family dinners and meal prep
The smell of simmering garlic and smoked paprika hitting the air is usually when I know dinner is actually going to happen. I remember my first attempt at this dish, and it was a disaster.
I just threw everything in the pot and hoped for the best, but I ended up with a soggy, beefy soup where the peppers had completely collapsed into the sauce. It was edible, but it wasn't a meal you could actually serve on a plate.
I spent a few weekends messing around with the liquid levels and how tightly I packed the filling. I realized that the difference between a mushy mess and a hearty meal comes down to how you prep the vessel and how much broth you actually need.
Now, I just stick to the method that keeps the peppers upright and the filling firm.
You can expect a meal that feels like a warm hug on a Tuesday night. These Stuffed Peppers are heavy on the protein and a bit lighter on the fuss, making them a great choice for anyone who hates spending three hours standing over a stove.
Easy Crockpot Stuffed Peppers for Dinner
Right then, let's look at the logistics. This is a budget smart meal because it uses simple staples like brown rice and ground beef, but it feels a lot more expensive than it actually is. If you're feeding a crowd, these are easy to scale, and they don't require any fancy equipment other than a standard slow cooker.
Since we're using a slow cooker, the timing is flexible. Whether you're leaving these to simmer while you're at work or doing a shorter High setting on a Saturday, the result is a consistent, comforting dish. The brown rice is a key choice here because it holds its structure better than white rice during a long simmer.
| Method | Time | Texture | Best For |
|---|---|---|---|
| Slow Cooker | 6 hours | Tender & Juicy | Set and forget meals |
| Oven Baked | 1 hour | Slightly Charred | Faster turnaround |
| Steam/Pot | 45 mins | Very Soft | Quick weeknight fix |
The Main Building Blocks
I've found that using lean ground beef is a smart move here. Since the peppers sit in the liquid for hours, too much fat can pool at the bottom and make the sauce feel greasy. I usually go for 90% lean to keep it clean but still flavorful.
For the rice, uncooked brown rice is the way to go. If you use pre cooked rice, it often turns into mush by the time the peppers are tender. The raw grains soak up the beef broth and tomato juices, which means all that flavor goes directly into the filling instead of just staying in the pot.
What Each Ingredient Does
| Ingredient | Role | If You Don't Have It |
|---|---|---|
| Bell Peppers | The vessel for the filling | Zucchini or Poblano peppers |
| Brown Rice | Absorbs liquid and adds bulk | Quinoa or cauliflower rice |
| Lean Ground Beef | Main protein and savory base | Ground turkey or lentils |
| Beef Broth | Creates the braising steam | Vegetable broth or water |
Ingredients & Substitutes
- 6 large bell peppers, tops removed and seeded Why this? Large peppers hold more filling and stay upright.
- 1 tsp olive oil (Substitute: Avocado oil)
- 1 lb lean ground beef (Substitute: Ground turkey) Why this? Lean meat prevents a greasy sauce.
- 1 cup uncooked brown rice (Substitute: Quinoa)
- 1 medium yellow onion, finely diced (Substitute: White onion)
- 3 cloves garlic, minced (Substitute: 1 tsp garlic powder)
- 1 tsp dried oregano (Substitute: Italian seasoning)
- 1 tsp smoked paprika (Substitute: Regular paprika + pinch of cumin)
- ½ tsp salt
- ½ tsp black pepper
- 1 can (14.5 oz) fire roasted diced tomatoes (Substitute: Regular diced tomatoes)
- 1 cup low sodium beef broth (Substitute: Beef stock)
- 2 tbsp tomato paste (Substitute: Extra diced tomatoes)
- 1 tbsp Worcestershire sauce (Substitute: Soy sauce)
- 1 cup part skim mozzarella cheese, shredded (Substitute: Monterey Jack)
- Fresh parsley, chopped for garnish
Essential Tools for the Job
You only need a few basic pieces of equipment for this recipe. A large skillet is essential for browning the beef, as searing the meat directly in the slow cooker often results in a grey, boiled appearance and a lack of depth.
A slow cooker with at least a 6-quart capacity (such as a Hamilton Beach or Crock Pot) is ideal. This provides enough space for the peppers to stand upright without being crushed against the walls, which ensures they cook evenly.
Chef's Note: If your slow cooker features a searing function, you can brown the beef directly in the pot. This eliminates the need for a skillet and saves you from washing an extra dish.
Step-by-step Instructions
- Cook the lean ground beef over medium high heat in a pan until it's no longer pink. Toss in the diced onion and garlic, sautéing for 4–5 minutes until the onion turns translucent and the garlic becomes fragrant. Pour off any extra fat.
- In a large bowl, stir together the cooked beef, uncooked brown rice, oregano, smoked paprika, salt, and pepper. Mix well to ensure the seasonings are spread evenly. Note: Combining the rice with the beef fat promotes more uniform cooking.
- Coat the interior of the bell peppers with olive oil. Firmly stuff each pepper with the beef and rice blend, using a spoon to press it down and remove any air gaps.
- In a small bowl, whisk the diced tomatoes, beef broth, tomato paste, and Worcestershire sauce. Pour this liquid base into the bottom of your slow cooker.
- Arrange the Stuffed Peppers upright inside the slow cooker. Cover and set to Low for 6 hours (or High for 3–4 hours) until the peppers soften and slump slightly.
- Top each pepper with an even layer of part skim mozzarella. Put the lid back on for 10–15 minutes until the cheese has bubbled and melted completely.
- Just before serving, garnish with fresh chopped parsley.
- Allow the Stuffed Peppers to sit for 5 minutes before removing them from the pot to ensure the filling stays put.
The Trick Behind the Texture
The reason these Stuffed Peppers don't turn into a pile of mush is all about the hydration. Unlike oven roasting where the dry heat can shrivel the pepper, the slow cooker uses a gentle steam lock. This breaks down the tough fibers of the bell pepper slowly, giving it a velvety feel while the inside stays hearty.
Rice Absorption: The brown rice acts like a sponge. Because it's uncooked, it pulls moisture from the surrounding beef broth and tomato sauce, preventing the filling from becoming watery.
Internal Structure: Packing the filling tightly is a non negotiable step. When you leave air pockets, the pepper walls collapse inward as they soften, which ruins the presentation and the bite. If you like a different vessel, you can check out my beef stuffed zucchini boats for a similar vibe.
What Can Go Wrong
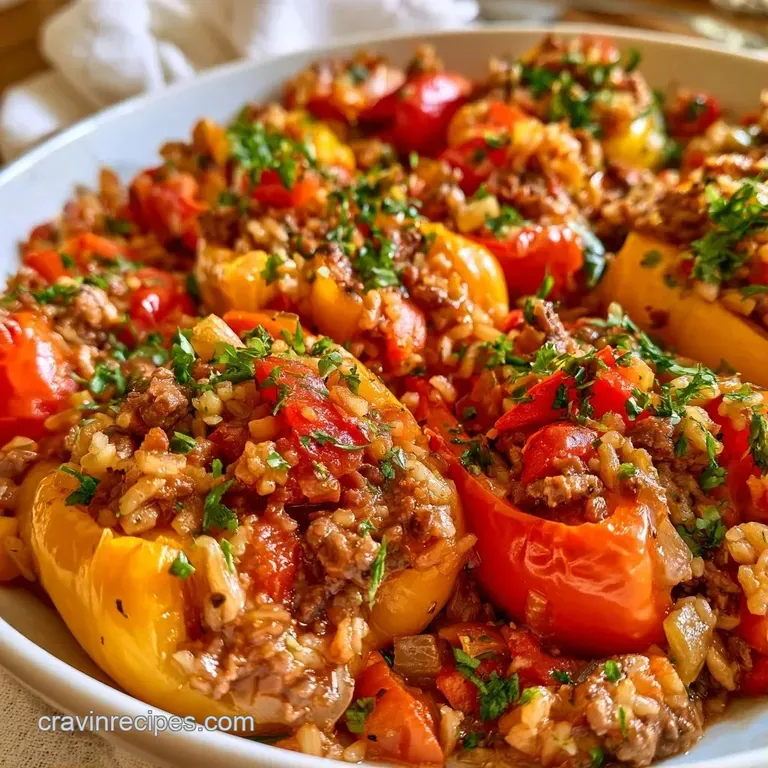
If your peppers come out too soft, you've likely added too much liquid. The broth should only come up about an inch or two on the side of the peppers. If it's deeper, you're essentially boiling them, which leads to a collapse.
Another common issue is the rice. If the rice is still a bit crunchy after 6 hours, it usually means the peppers were packed too tightly or the liquid didn't permeate the filling. A little more broth in the bottom of the pot usually fixes this for the next batch.
Fixing Common Issues
| Problem | Root Cause | Solution |
|---|---|---|
| Mushy Peppers | Too much braising liquid | Reduce broth to 1 cup max |
| Crunchy Rice | Not enough moisture/too tight | Pack filling slightly looser |
| Bland Flavor | Under seasoned meat | Add extra smoked paprika or salt |
| Collapsed Walls | Air pockets in filling | Press beef and rice down firmly |
Keeping It Fresh
Store these peppers in a tight glass container in the fridge for a maximum of 4 days. I find they actually taste even better the next day, as the smoked paprika and Worcestershire sauce have more time to meld together.
For long term storage, you can keep the cooked peppers in the freezer for about 2 months. Just ensure they are fully cooled before placing them in a freezer bag. When you're ready to serve, thaw them in the fridge overnight.
Avoid the microwave when reheating, as it can make the peppers rubbery. Instead, heat them in a 350°F (180°C) oven for 15 minutes, adding a splash of beef broth to the pan. This preserves the moisture and prevents the cheese from getting oily.
Flavor Variations to Try
You can easily customize the flavor of these Stuffed Peppers by swapping out the spices. For a Mexican inspired version, substitute the oregano with cumin and use pepper jack cheese instead of mozzarella. Stirring some black beans into the beef makes the filling even heartier.
For a Mediterranean flair, use ground lamb rather than beef and mix crumbled feta and chopped spinach into the rice. If you want a different pepper, try roasting poblano peppers first to give the meal a smoky heat.
Quick Adjustment Guide: Brighten the flavor? → stir 1 tsp lemon zest into the beef Boost the heat? → add 1 finely diced jalapeño to the onion sauté Reduce the carbs? → replace brown rice with riced cauliflower
These Stuffed Peppers can also be made vegetarian by replacing the beef with a blend of mushrooms and cooked lentils. Just remember to use vegetable broth at the bottom of the pot to keep the flavor deep and savory.
Presentation Tips
To remove the Stuffed Peppers from the slow cooker, use tongs or a wide spatula. Since they become quite tender, they may split if you lift them from the top. Instead, gently slide your tool under the base and lift straight up.
For a nutritious accompaniment, serve these with lightly steamed green beans or a fresh garden salad. The acidity of a vinaigrette helps cut through the rich, cheesy beef filling, balancing the flavors on the plate.
To add a refreshing contrast, I suggest topping each pepper with a dollop of Greek yogurt or sour cream. The cool creaminess complements the warm, smoked paprika notes of the Stuffed Peppers beautifully.
Finish with a sprinkle of fresh parsley to add a burst of color that makes the presentation look elegant and polished.
Kitchen Myths
Some people think you have to parboil the rice before adding it to Stuffed Peppers. This is a mistake. Parboiled rice often ends up mushy in the slow cooker. Raw brown rice is the right choice because it cooks at the same rate as the peppers.
Another myth is that you need to sear the peppers themselves to lock in flavor. Searing the peppers doesn't actually change the final taste much in a slow cooker. The real flavor comes from browning the meat and using a high-quality braising liquid.
Scaling the Batch
If you're making a smaller batch, say 3 peppers, use a smaller slow cooker or a toaster oven if you're switching methods. Reduce the cooking time by about 20% if you're using a very small pot, as the heat concentrates faster.
For a huge family gathering, you can double the recipe to 12 peppers. However, don't double the salt and spices to 2x. I usually go for 1.5x the spices when doubling a slow cooker recipe, as the flavors concentrate more intensely during the long simmer.
If you're using a massive pot, make sure the peppers are still standing upright and not stacked on top of each other, or the bottom layer will turn into a mash.
High in Sodium
820 mg 820 mg of sodium per serving (36% 36% of daily value)
The American Heart Association recommends a daily sodium limit of no more than 2,300 mg for most adults to maintain heart health.
Tips to Reduce Sodium
-
Swap the Broth-30%
Replace the low-sodium beef broth with water or homemade unsalted beef stock to eliminate significant processed salt.
-
Omit Added Salt-25%
Remove the ½ tsp of salt from the recipe; the other ingredients provide enough savory flavor.
-
Choose No-Salt Added Tomatoes-20%
Use no-salt added fire roasted diced tomatoes instead of the standard canned version.
-
Modify the Sauce-20%
Use a low-sodium Worcestershire sauce or substitute it with a splash of balsamic vinegar for a similar tang.
-
Limit the Cheese-15%
Reduce the mozzarella cheese by half or use a fresh, lower sodium variety.
-
Boost the Aromatics
Increase the dried oregano and smoked paprika to enhance the depth of flavor without adding any sodium.
Recipe FAQs
How long do you cook stuffed peppers in a slow cooker?
Set your slow cooker to Low for 6 hours or High for 3 4 hours. The peppers are ready once the walls feel tender when pierced.
Is it true that bell peppers turn to mush in a slow cooker?
Actually, no. Bell peppers hold their structure well when cooked slowly on the Low setting.
What is a good filling for stuffed peppers?
Mix lean ground beef with uncooked brown rice and smoked paprika for a savory, hearty base. You can use a similar filling approach for stuffed poblanos.
Why did my stuffing leave gaps in the pepper?
Press the filling down firmly with a spoon to eliminate air pockets. This prevents the stuffing from shrinking and keeps the pepper upright.
How to prep the peppers for stuffing?
Brush the interior of the seeded peppers with olive oil. This adds a layer of flavor and helps the filling release easily.
Crockpot Stuffed Peppers