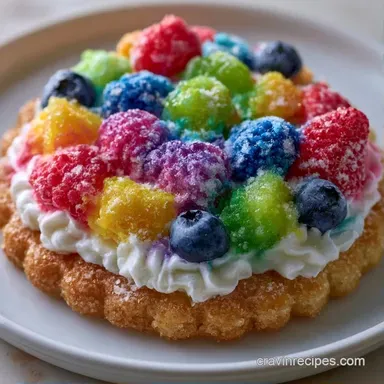
Fruit Pizza Recipe with Glaze: Baked
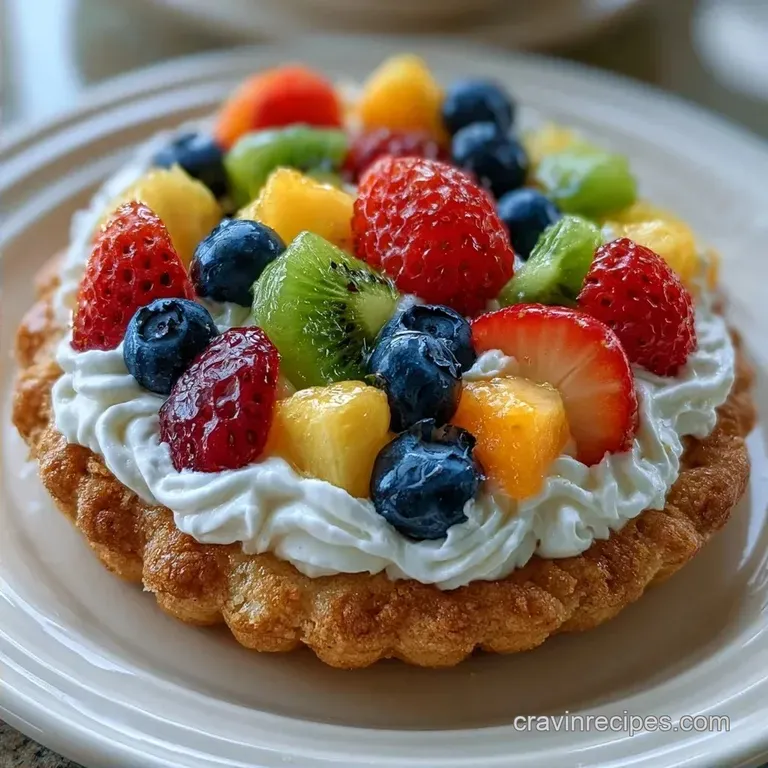
- Time: 30 minutes of prep and 20 minutes in the oven
- Key Highlights: Rich, velvety, and high-gloss
- Ideal for: Baby showers or summer brunches
- Making the Best Fruit Pizza recipe with glaze
- Recipe Specs
- Why Most Recipes Fail
- Ingredient Deep Dive
- Equipment Needed
- Ingredients & Substitutes
- The Cooking Process
- Avoiding Kitchen Disasters
- Make It Your Own
- Preservation Secrets
- What to Serve This With
- Why the Glaze Actually Works
- Recipe FAQs
- 📝 Recipe Card
Making the Best Fruit Pizza recipe with glaze
Nothing beats the aroma of buttery sugar cookies wafting through the house, drawing everyone into the kitchen. In my early attempts, I rushed the process by topping the crust while it was still hot. The cream cheese dissolved instantly, turning the dessert into a soggy disappointment.
That failure showed me exactly how to handle this recipe correctly.
The goal is a perfect balance: a crisp bite from the cookie, a fluffy cream layer, and a glossy finish on the fruit. These elements combine beautifully. The sugar in the crust complements the tanginess of the cheese, while the glaze ensures the fruit looks vibrant on the plate.
This Fruit Pizza recipe with glaze doesn't require advanced baking skills. Instead, it relies on precision with timing and temperature. By mastering the cooling period and the folding technique, you can create a professional bakery-quality treat with less than an hour of active preparation.
Recipe Specs
Right then, let's look at the numbers. This recipe uses an 11 inch tart pan to get those clean edges, but you can easily swap that for a round baking sheet if you're feeling casual.
| Goal | Adjustment | Result |
|---|---|---|
| For a firmer set | Chill crust 1 hour | Cleaner slices |
| For tangier cream | Add 1 tbsp lemon juice | Cuts through sugar |
| For deeper crust | Bake for 17 minutes | Nuttier flavor |
For the base, I'm sticking with a traditional oven bake. While some people try to do a stovetop version in a skillet, the oven provides a more consistent brown across the whole surface. A stovetop method often leaves the center undercooked while the edges burn, which ruins the structural integrity of your slices.
Why Most Recipes Fail
Most people treat the cream cheese layer like a frosting, but it's actually more like a stabilized mousse. If you don't handle the aeration correctly, you end up with a dense slab of cheese rather than a light topping.
The Temperature Trap: Placing cream on a warm crust melts the fats instantly. This creates a liquid layer that seeps into the cookie, turning your base into mush.
The Glaze Viscosity: Using cold preserves leads to clumps and "tearing" the fruit as you brush it. Warming the jam makes it pourable, ensuring a thin, even coat that doesn't weigh down the berries.
The Aeration Gap: Beating the cream cheese and whipped cream together too aggressively knocks out the air. Folding them gently keeps the filling light and fluffy.
Ingredient Deep Dive
The cookie dough is the anchor. I usually go with a standard sugar cookie dough because it has the right amount of fat to stay crisp. If you're interested in other dough styles, you might like my Homemade Pizza Dough Recipe, though that's obviously for the savory side of things.
The cream cheese provides the necessary tang to stop the dessert from being cloyingly sweet. By folding in whipped heavy cream, we transform it from a heavy spread into something a bit more ethereal.
The apricot preserves act as the glue and the gloss. They provide a mild, honey like sweetness that doesn't overpower the kiwi or strawberries. The touch of lemon juice in the glaze is what gives it that professional, bright finish.
Equipment Needed
You can get by with basic gear, but these tools will make the process much smoother.
- 11 inch tart pan (ideally with a removable bottom)
- Electric hand mixer or stand mixer
- Two mixing bowls (one should be chilled for the cream)
- Rubber spatula for folding
- Small microwave-safe bowl
- Pastry brush for the glaze
- Wire cooling rack
Ingredients & Substitutes
Here is exactly what you'll need. Trust me on the chilled bowl for the cream, it makes a huge difference.
- 1 lb sugar cookie dough Why this? Provides a sweet, sturdy base
- Substitute: Shortbread dough (more buttery, less sweet)
- 1 tsp melted butter Why this? Prevents sticking to the pan
- Substitute: Cooking spray (less flavor)
- 8 oz cream cheese, softened Why this? Adds richness and tang
- Substitute: Mascarpone (richer, milder taste)
- 1/4 cup granulated sugar Why this? Sweetens the cheese layer
- Substitute: Honey (denser, floral notes)
- 1 tsp pure vanilla extract Why this? Classic aromatic warmth
- Substitute: Almond extract (more nutty)
- 1 cup heavy whipping cream, chilled Why this? Creates the light texture
- Substitute: Coconut cream (dairy-free, tropical)
- 2 tbsp powdered sugar Why this? Stabilizes the whipped cream
- Substitute: Extra granulated sugar (less stable)
- 1 cup fresh strawberries, sliced Why this? Bright, classic sweetness
- Substitute: Raspberries (tart, softer)
- 1 kiwi, peeled and sliced Why this? Adds a pop of green
- Substitute: Green grapes (crunchier, milder)
- 1/2 cup fresh blueberries Why this? Deep color and burst of flavor
- Substitute: Blackberries (larger, seedier)
- 1/2 cup mandarin orange segments Why this? Citrus brightness
- Substitute: Canned peaches (softer, sweeter)
- 1/2 cup apricot preserves Why this? Creates a neutral, glossy sheen
- Substitute: Peach jam (similar effect)
- 1 tbsp lemon juice Why this? Cuts the sugar in the glaze
- Substitute: Lime juice (zestier)
The Cooking Process
Now we move on to putting it all together. Spend a few moments on the fruit layout to ensure the tart looks stunning.
Phase 1: Baking the Golden Base
- Heat your oven to 350°F (175°C) and coat an 11 inch tart pan with melted butter.
- Firmly press the sugar cookie dough across the base, bringing it slightly up the sides for a small border.
- Bake for 12–15 minutes until the edges turn a light mahogany brown.
- Place the crust on a wire rack to cool fully. Note: This ensures the cream doesn't melt.
Phase 2: Whipping the Velvety Cream
- Mix the softened cream cheese, granulated sugar, and vanilla extract until the texture is smooth and airy.
- Using a chilled bowl, whip the heavy cream and powdered sugar until stiff peaks form.
- Carefully fold the whipped cream into the cream cheese blend with a spatula. Note: Avoid over-mixing to keep the volume.
- Smooth the filling evenly across the cooled base.
Phase 3: Artful Fruit Arrangement
- Place the fruit in concentric rings. Begin with the kiwi around the perimeter, followed by strawberries, mandarin oranges, and finally blueberries in the middle.
Phase 4: Applying the Mirror Glaze
- Warm the apricot preserves and lemon juice in the microwave for 20–30 seconds until the mixture is runny.
- Stir well and use a pastry brush to lightly coat the fruit with the warm glaze.
Avoiding Kitchen Disasters
When making a Fruit Pizza recipe with glaze, the biggest risks are moisture and stability. If you see something looking off, here is how to handle it.
Preventing a Soggy Crust
The number one culprit is residual heat. Even if the crust feels "mostly" cool, the center can still be warm enough to liquefy the cream cheese. If you're really worried, you can brush a thin layer of melted white chocolate on the cooled crust first. This acts as a moisture barrier, keeping the cookie crisp for longer.
Fixing Runny Filling
If your cream mixture looks more like a sauce than a cloud, you likely over beat the heavy cream or your cream cheese was too warm. To fix this, chill the mixture in the fridge for 30 minutes, then gently fold in another tablespoon of powdered sugar. This helps stabilize the structure.
Stopping Fruit Bleeding
Some berries, especially cheap strawberries, can bleed juice into the white cream. The fix is in the glaze. By applying the warm apricot glaze immediately after arranging the fruit, you effectively "seal" the berries in place. This keeps the colors vibrant and the cream clean.
Make It Your Own
This glazed fruit pizza is highly customizable. Here are a few ways to switch up the flavors.
For a tropical twist, replace the strawberries with mango slices and the blueberries with pineapple chunks. I suggest using a coconut-infused sugar cookie dough for the base to enhance that island feel.
To make a berry-forward version, use a combination of raspberries, blackberries, and blueberries. Instead of apricot preserves, use a seedless raspberry jam for the glaze to give the dessert a rich, ruby red shine.
If you enjoy fruit-centric desserts, you might also like my Classic Apple Pie Recipe, which similarly balances a crisp crust with bright fruit. For a dairy-free alternative, substitute the filling with cashew-based cream cheese and full-fat coconut cream. Just remember to chill the coconut cream overnight so you can scoop out the thick portion.
Preservation Secrets
For the best results, enjoy this glazed Fruit Pizza the day it is prepared, although it will stay good for a short while.
Refrigerate the pizza in a shallow container or keep it in the tart pan wrapped tightly with plastic wrap. It stays fresh for about 2 days. After that, the fruit may release moisture, which will make the crust soggy.
I suggest avoiding the freezer for this dessert. Once frozen and thawed, the cream cheese filling often becomes grainy, and the fruit loses its firmness and turns mushy.
To prevent waste, blend any leftover fruit into a morning smoothie or toss it into a fresh fruit salad. Extra glaze is also a fantastic topping for overnight oats or plain Greek yogurt.
What to Serve This With
Because the Fruit Pizza recipe with glaze is so rich and sweet, you want sides that cleanse the palate.
A chilled glass of Prosecco or a light Moscato pairs beautifully with the berries and cream. If you're serving this at a brunch, a pot of strong, unsweetened black coffee or an Earl Grey tea provides a bitter contrast that cuts through the sugar.
For a full dessert spread, serve it alongside some salty Marcona almonds or a bowl of fresh mint leaves. The salt and mint help reset your taste buds between bites, making each slice feel as fresh as the first.
Why the Glaze Actually Works
You may wonder why the apricot preserves are necessary. It’s more than just a visual touch.
The jam's sugar creates a sheer, protective coating on the fruit. This prevents air from oxidizing the strawberries and kiwi, ensuring they stay fresh-looking for several hours. It also provides a light, glossy sheen that makes the colors vibrant.
Without it, the fruit tends to appear matte and dry after only an hour in the fridge.
Recipe FAQs
What are some good fruits to use on a fruit pizza?
Strawberries, kiwi, blueberries, and mandarin oranges. These provide a balance of sweetness and tartness while looking vibrant on the cream cheese layer.
Do strawberries taste good on pizza?
Yes, they are a classic choice. The sweetness of the berry pairs perfectly with the tang of the cream cheese frosting.
Is it true that ice cream works as a fruit pizza topping?
No, this is a common misconception. Ice cream melts too quickly and would turn the sugar cookie crust soggy instantly.
How to use surplus lemons in baking?
Incorporate fresh lemon juice into glazes or batters. Adding acidity helps balance sugar and brightens the overall flavor profile.
Which toppings work best for lemon pie?
Fresh berries or a dollop of whipped cream. These add a light, airy contrast to the dense, tart filling of the pie.
Can lemon juice be added to vanilla frosting?
Yes, it adds a bright citrus note. The acidity cuts through the richness of the sugar and cream.
Does heating lemon juice on a flame improve the taste?
False. High heat can make lemon juice taste bitter, so it is better to stir it in at the end of the process.
When should you remove the crust from the oven?
Pull it after 12-15 minutes when edges are light mahogany brown. If you enjoyed mastering the soft-yet-firm texture of this sugar cookie base, the same baking principles apply to our banana pudding cookies.
Fruit Pizza Recipe With Glaze: Baked