Low-Sugar Peach Pie with Frozen Peaches

- Time: 20 min active + 2 hours resting
- Flavor/Texture Hook: A rich, golden-brown buttery crust paired with a spiced, jammy interior
- Perfect for: Weekly family gatherings or sudden sweet tooth cravings
The aroma of melted butter and cinnamon wafts out as soon as the oven opens. I first baked this for a gloomy October potluck; despite the lack of fresh fruit, everyone craved a warm treat. It provides the kind of cozy nostalgia that truly warms a space.
You don't need an orchard in your backyard to enjoy this. Frozen peaches actually provide more uniform slices, preventing the common issue where some pieces disintegrate while others remain tough.
This Peach Pie with Frozen Peaches offers a wonderful balance between a salty, flaky crust and a vibrant, sweet center. It's an indulgent, decadent dessert that is surprisingly simpler to prepare than a tray of cookies.
Why This Filling Actually Sets
- Cornstarch Power: It creates a clear, stable gel that holds the peaches together without making the filling look cloudy.
- The Drain Step: Frozen fruit releases a ton of water when thawing. Removing that liquid ensures the crust stays crisp.
The balance here comes from the lemon juice cutting through the heavy sugar and butter. If you've enjoyed my Classic Apple Pie recipe, you'll notice the same focus on a sturdy crust.
| Method | Time | Texture | Best For |
|---|---|---|---|
| Oven Bake | 50 mins | Flaky & Crisp | Traditional family slices |
| Stovetop Prep | 15 mins | Jammy & Soft | Quick crumbles or bowls |
Recipe Specs
Here are the essential details. This pie yields 12 servings, though you'll likely crave a second piece if you're anything like me.
- Prep time:20 minutes
- Cook time:50 minutes
- Total time:3 hours 40 mins (includes resting)
- Oven Temp: 400°F (200°C) initial, 375°F (190°C) finish
The Essential Ingredient List
I prefer using premade crusts for this one because it keeps the process stress free. Trust me, the result is still incredibly buttery.
| Ingredient | What It Does | Best Swap |
|---|---|---|
| Frozen Peaches | Provides the bulk and flavor | Nectarines (fresh or frozen) |
| Cornstarch | Thickens the juices | Flour (use 2x amount) |
| Granulated Sugar | Sweetens and balances tartness | Brown sugar for a caramel note |
| Premade Crust | Holds everything together | Homemade butter crust |
For the Filling
- 24 oz (680g) frozen peach slices, thawed and drained Why this? Consistent size and flavor year round
- 1/2 cup (100g) granulated sugar
- 3 tbsp (25g) cornstarch
- 1 tbsp (15ml) fresh lemon juice
- 1/2 tsp (2g) ground cinnamon
- 1/4 tsp (1.5g) salt
- 1 tsp (5ml) vanilla extract
For the Crust
- 1 package (400g) refrigerated premade pie crusts
- 1 egg (50g)
- 1 tbsp (15ml) water
- 1 tbsp (8g) coarse sugar
Basic Tools You'll Need
No professional equipment is required. The only essential item is a standard 9 inch pie pan. I suggest a silicone spatula for folding the fruit to keep the slices from bruising. A colander is essential for draining, or you'll end up with peach soup.
Chef Note: Use a pastry brush for the egg wash if you have one. If not, simply dabbing the crust with a clean paper towel works perfectly.
Step by step Baking Guide
Let's crack on. The most important part is the patience during the cooling phase.
- Place frozen peaches in a colander over a bowl for 30 minutes. Gently press the fruit to remove excess liquid. Note: This prevents a soggy bottom
- In a large bowl, whisk together the sugar, cornstarch, cinnamon, and salt.
- Fold in the drained peaches, lemon juice, and vanilla extract. Stir until the fruit is evenly coated in the starch mixture.
- Fit the first crust into a 9 inch pie pan, pressing it gently against the edges.
- Pour the peach mixture into the crust, smoothing the top with a spatula.
- Roll out the second crust and place it over the filling. Cut 3-4 steam slits in the center or weave a lattice.
- Pinch the top and bottom crusts together to create a tight seal.
- Beat the egg with 1 tbsp water and brush the egg wash over the top crust; sprinkle with coarse sugar.
- Bake in a preheated oven at 400°F (200°C) for 20 minutes until the edges begin to brown.
- Reduce heat to 375°F (190°C) and bake for another 30 minutes until the crust is mahogany colored and filling is bubbling.
- Allow the pie to rest for at least 2 hours before slicing to ensure the filling sets.
Fixing Common Baking Issues
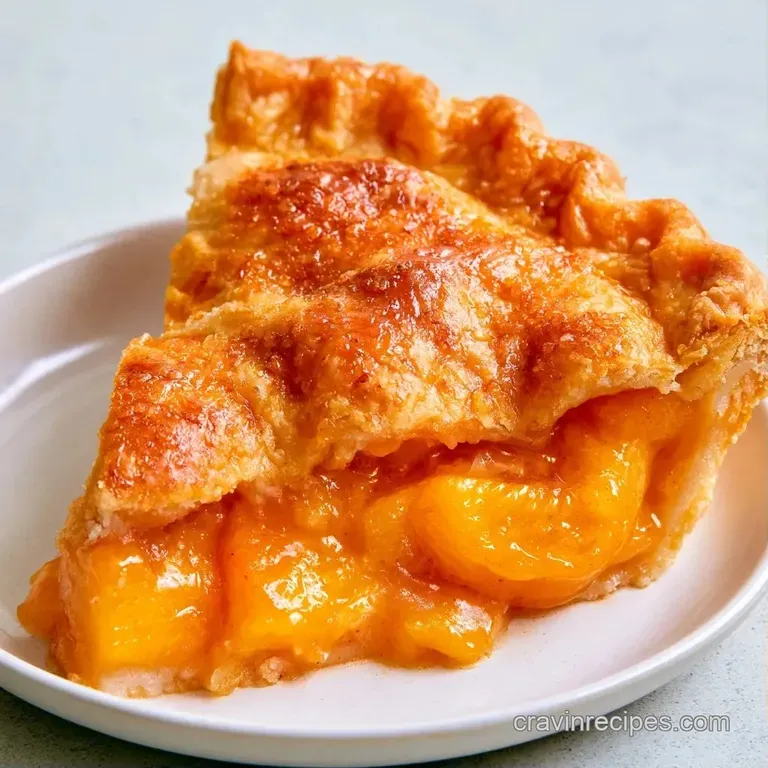
One mistake I once made was slicing into the pie while it was still steaming. The filling just ran everywhere. You have to wait. The cornstarch needs time to cool and lock everything in place.
When the Bottom is Soggy
This usually happens if the peaches weren't drained enough. The excess water pools at the bottom and steams the crust instead of baking it.
When the Edges Burn
The edges of the crust often brown faster than the center. If you see them getting too dark at the 20 minute mark, just wrap a strip of foil around the rim.
When Filling Stays Runny
This is almost always a resting issue. If you cut it too early, it will look like soup. If it's still runny after 3 hours, you might have missed some cornstarch.
| Problem | Root Cause | Solution |
|---|---|---|
| Soggy Bottom | Too much fruit juice | Drain peaches for 30 mins |
| Burnt Edges | High heat on thin crust | Use a foil shield |
| Runny Center | Sliced too early | Rest for 2 full hours |
Make It Your Own
This recipe is quite adaptable if you're looking for variety. I enjoy mixing a pinch of nutmeg with the cinnamon to create a warmer profile. If you prefer a crunchier texture, replace the top crust with an oat and brown sugar crumble.
- For a brighter taste? → stir in 1 tsp lemon zest
- For more depth? → add 1/4 tsp ground ginger
- For added decadence? → coat the bottom crust in melted butter
For a smaller treat, check out these Italian Peachy Cookies to get those same peach notes in a bite sized snack.
Adjusting Your Batch Size
Adjusting pie proportions can be challenging due to pan dimensions. For a half batch, use a 6 inch pan and decrease the baking time by roughly 20%.
If you double the recipe, avoid using a single dish to ensure the center cooks through; instead, use two 9 inch pans. When doubling, only multiply the cinnamon and salt by 1.5x so they don't overwhelm the fruit.
To bake two pies simultaneously, drop the oven temperature by 25°F and add 5-10 minutes to the clock to compensate for the extra moisture.
Busting Common Pie Myths
Some people think you can't use frozen fruit for a "real" pie. That's not true. Frozen peaches are often picked at peak ripeness and flash frozen, meaning they can actually taste better than "fresh" store-bought peaches in winter.
Another myth is that you need to pre cook the filling on the stove. While that works, it often overcooks the fruit. Baking the raw filling allows the peaches to soften slowly, keeping them chunky and lush.
Keeping Leftovers Fresh
Keep remaining slices in an airtight tub in the refrigerator for as long as 4 days. The crust may lose a bit of its crispness, but it will still taste wonderful.
To reheat, steer clear of the microwave to avoid a chewy crust. Instead, warm a slice in the oven at 350°F for 10 minutes. If you prefer to freeze the pie, do so before baking. Wrap the raw pie tightly with plastic wrap and foil for up to 3 months.
Simply add 10 minutes to the baking time when cooking from frozen.
To avoid waste, mix any leftover peach juice from the colander into a smoothie or your morning yogurt.
What to Serve Alongside
The richness of the buttery crust needs something to balance it. A scoop of cold vanilla bean ice cream is the standard for a reason. The cold cream melting into the warm, cinnamon spiced peaches is just pure bliss.
If you want something lighter, a dollop of unsweetened whipped cream with a hint of lemon zest works wonders. For a bit of a twist, serve it with a side of fresh raspberries to add a tart, bright pop of color and flavor.
Recipe FAQs
Can I use frozen peaches instead of fresh?
Yes, they are a great alternative. Because they are picked at peak ripeness, they provide a consistent flavor. If you enjoy working with frozen fruit for dessert, see how similar fruit prep works in our fruit pizza.
Should frozen peaches be thawed before baking?
Yes, thaw and drain them first. Place the slices in a colander for 30 minutes and press gently to remove excess liquid so the filling does not become runny.
How to prevent a soggy bottom crust?
Drain the fruit thoroughly in a colander for 30 minutes before mixing. This removes the excess moisture that would otherwise soak into the bottom pastry.
Is it true that peach cobbler is just another name for peach pie?
No, this is a common misconception. Pie uses a distinct pastry crust on the bottom and top, while cobbler features a biscuit or cake like topping.
What is the best way to seal the crust edges?
Pinch the top and bottom crusts together firmly to create a tight seal. This keeps the filling from leaking out during the baking process.
Why must the pie rest for two hours?
To allow the filling to set. Cutting into the pie too early causes the cornstarch thickened juices to run, making the slices collapse.
How do I get a golden mahogany crust?
Brush an egg wash of egg and water over the top crust. Bake at 400°F for 20 minutes, then reduce to 375°F for 30 minutes.
Peach Pie With Frozen Peaches